Inland RPI TFT 3.5" LCD Touchscreen Shield

Introduction
It is the cutest, little display for the Raspberry Pi. It features a 3.5" display with 480x320 16-bit color pixels and a resistive touch overlay. It supports any revision of Raspberry Pi (directly-pluggable).
Description

Connection Diagram
This will have to be the easiest step, since you just need to take the LCD module and plug it on to your raspberry pi GPIO pins as shown in the below picture.

Program Writing
1. Writing an image to the SD card
In our supporting files, you will find the image file “2016-05-27-raspbian-jessie” which is an operation system come with a Desktop Environment. You need to use an image writing tool like Win32DiskImager to install it on your SD card. Then write the image into your SD card.
2. Log in the Pi
Insert the SD Card and finally attach the power supply. The Raspberry Pi will boot immediately. This will take a little bit more than a minute. Once the Pi is booted it will ask you for the username and the password.
By default the following log-in credentials can be used:
- Username: pi
- Password: raspberry
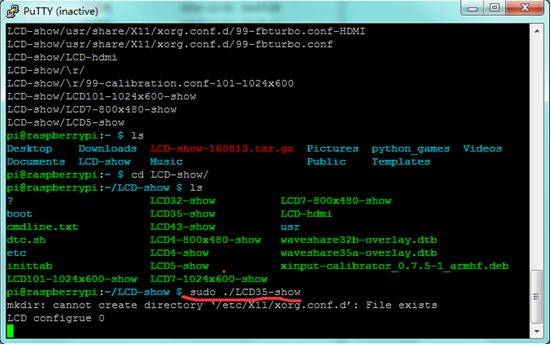
3. Programming
Copy the LCD-show-160813.tar file and put it into the raspberry pi file through WinSCP.
Type in this command to unzip the source code:
tar xfz LCD-show-160813.tar.gz
cd LCD-show-160813
Finally type this to launch the program:
sudo ./LCD-show-160813
Once this is done, restart your Raspberry Pi:
sudo reboot


Test Result
Touch the touchscreen to look at the information on your Pi as shown in below figure.
