An article on how to use the Display Calibration on the Mac OS. This article includes both Normal and Expert calibration steps.
1) Open the Apple menu and select System Preferences.

2) In System Preferences, open Display.
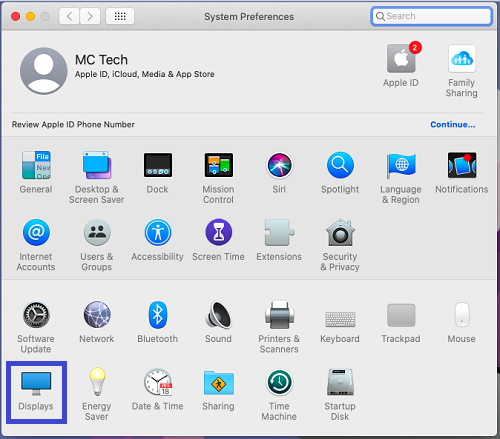
3) In Display, click on the Color tab.

Normal Display Calibration
1) Click on the Calibrate button.

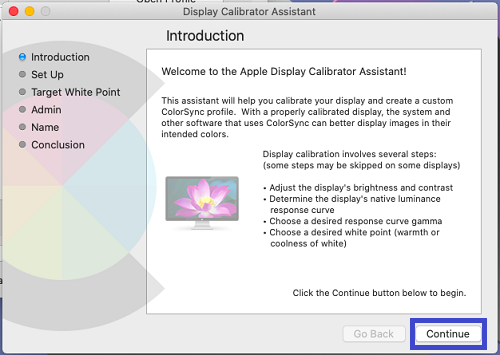
2) On the Introduction page for the Display Calibrator Assistant, click Continue.
3) The first setting you will see is Select a target white point, which controls the overall tint of the screen. To manually adjust the slider, uncheck Use native white point.
Going lower will make the tint more yellow while going higher will make the tint more blue. Once you have chosen your white point, click on Continue.

4) Next, you will see the Administration options. This will give you to choose if you want to allow any other user to use the calibration you make. If you want to, click on the box to check it. Otherwise, proceed with Continue.

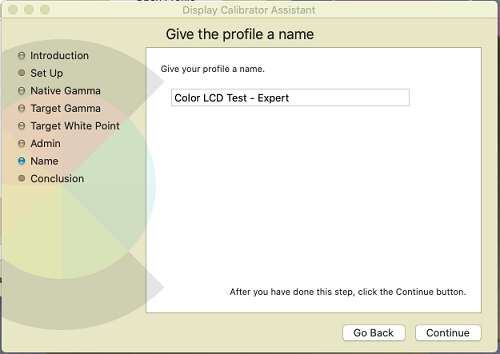
5) You will have the option go Give the profile a name from here, give it any name you want and Continue.

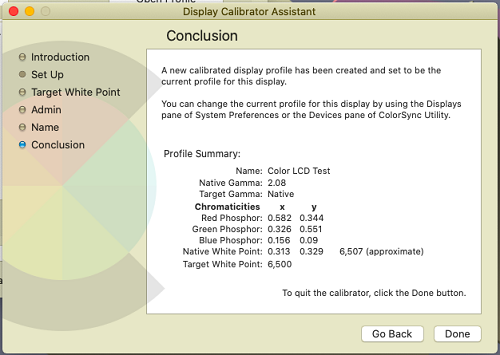
6) You will now see the Conclusion which gives you the profile summary information about the calibration you have put together. When finished, click on Done.
7) You will return to the previous Display window, the profile you created will now display in the list.

Expert Mode Display Calibration
1) On the Color tab, hold down the Option key and then click on Calibrate to enter the display calibration in Expert Mode.
2) On the Introduction page, you will see a box for Expert mode. Ensure the box is checked and click Continue.

3) The first setting you can adjust is the Native gamma for the native luminance response curve. Follow the instructions on the page and adjust both the vertical bar on the left and the crossbar on the right to adjust the settings.
This will have to be repeated for five different forms of Native gamma.

4) Next is the Target gamma, which controls the overall contrast on the screen. You can see a box for Use native gamma on this display already checked. If you wish to change this, uncheck the box and move the slider.
If you slide it lower, the contrast will be brighter, while sliding it higher will darken the contrast.

5) You will then Select a target white point, where you can change the overall color tint of the screen.

6) You will next see the Administrator options, allowing to choose if other users on the computer can see this calibration and use it.

7) Next you will be able to Give the profile a name.
8) Now you will see the Conclusion of the calibration with the information shown. Once you are done click on Done.

9) You will be at the Color tab of the Display settings where you will see the new calibration listed under Display profile. You can select this calibration as needed.
