Computers
Computer Parts
Custom PC Builder
DIY/ Maker
{$smarty.capture.menu}
Activity
Categories
Discussions
Computers
Computer Parts
Custom PC Builder
DIY/ Maker
How to install a Hard Drive into the PowerSpec NUC1 - Micro Center
<main> <article class="userContent"> <p>The PowerSpec NUC1 is able to support one internal standard 2.5 inch SATA notebook hard drive or solid state drive. This article will show the process of installing a hard drive into the PowerSpec NUC1.</p><p>NOTE: While this model is no longer sold by Micro Center or the manufacturer, this information may still be useful to those using this model of computer.</p><p><br></p><p>
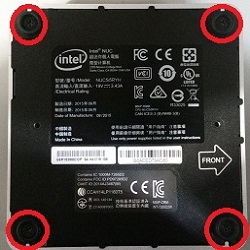
1. Turn the NUC1 upside down so that the four screws are facing upwards.</p><div class="embedExternal embedImage display-large float-none"> <div class="embedExternal-content"> <a class="embedImage-link" href="https://60a99bedadae98078522-a9b6cded92292ef3bace063619038eb1.ssl.cf2.rackcdn.com/images_TechSupportArticlePix_8948Image1.jpg" rel="nofollow noreferrer noopener ugc" target="_blank"> <img class="embedImage-img" src="https://60a99bedadae98078522-a9b6cded92292ef3bace063619038eb1.ssl.cf2.rackcdn.com/images_TechSupportArticlePix_8948Image1.jpg" alt="PowerSpec NUC1 Bottom View" height="180" width="320" loading="lazy"></img></a> </div> </div> <p></p><p><br></p><p>
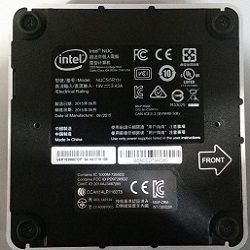
2. Begin loosening each screw using a Philips screw driver.</p><div class="embedExternal embedImage display-large float-none"> <div class="embedExternal-content"> <a class="embedImage-link" href="https://60a99bedadae98078522-a9b6cded92292ef3bace063619038eb1.ssl.cf2.rackcdn.com/images_TechSupportArticlePix_8948Image2.jpg" rel="nofollow noreferrer noopener ugc" target="_blank"> <img class="embedImage-img" src="https://60a99bedadae98078522-a9b6cded92292ef3bace063619038eb1.ssl.cf2.rackcdn.com/images_TechSupportArticlePix_8948Image2.jpg" alt="PowerSpec NUC1 Bottom View Case Screws" height="180" width="320" loading="lazy"></img></a> </div> </div> <p></p><p><br></p><p>
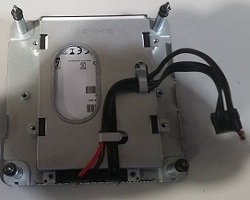
3. Once the screws are all loose, they will not come out due to being held in place with retainers. Carefully remove the bottom of the NUC1 and locate the hard drive mounting bracket.</p><div class="embedExternal embedImage display-large float-none"> <div class="embedExternal-content"> <a class="embedImage-link" href="https://60a99bedadae98078522-a9b6cded92292ef3bace063619038eb1.ssl.cf2.rackcdn.com/images_TechSupportArticlePix_8948Image3.jpg" rel="nofollow noreferrer noopener ugc" target="_blank"> <img class="embedImage-img" src="https://60a99bedadae98078522-a9b6cded92292ef3bace063619038eb1.ssl.cf2.rackcdn.com/images_TechSupportArticlePix_8948Image3.jpg" alt="NUC1 Hard Drive Mounting Bracket" height="180" width="320" loading="lazy"></img></a> </div> </div> <p></p><p><br></p><p>
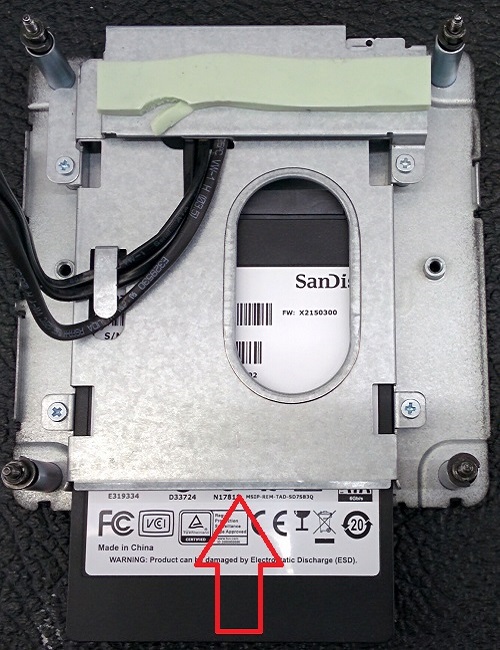
4. Align the hard drive to the bracket with the gold contacts facing down and then slide the hard drive toward the SATA connector, pushing gently until the drive is fully connected.</p><div class="embedExternal embedImage display-large float-none"> <div class="embedExternal-content"> <a class="embedImage-link" href="https://60a99bedadae98078522-a9b6cded92292ef3bace063619038eb1.ssl.cf2.rackcdn.com/images_TechSupportArticlePix_8948Image4.jpg" rel="nofollow noreferrer noopener ugc" target="_blank"> <img class="embedImage-img" src="https://60a99bedadae98078522-a9b6cded92292ef3bace063619038eb1.ssl.cf2.rackcdn.com/images_TechSupportArticlePix_8948Image4.jpg" alt="Hard drive connected in drive bay" height="180" width="320" loading="lazy"></img></a> </div> </div> <p></p><p><br></p><p>
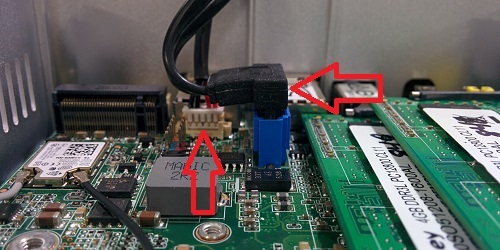
5. Ensure the SATA power and data cables are connected into the motherboard.</p><div class="embedExternal embedImage display-large float-none"> <div class="embedExternal-content"> <a class="embedImage-link" href="https://60a99bedadae98078522-a9b6cded92292ef3bace063619038eb1.ssl.cf2.rackcdn.com/images_TechSupportArticlePix_8948Image5.jpg" rel="nofollow noreferrer noopener ugc" target="_blank"> <img class="embedImage-img" src="https://60a99bedadae98078522-a9b6cded92292ef3bace063619038eb1.ssl.cf2.rackcdn.com/images_TechSupportArticlePix_8948Image5.jpg" alt="SATA power and data cables connected" height="180" width="320" loading="lazy"></img></a> </div> </div> <p></p><p><br></p><p>6. Place the bottom of the NUC1 on top of the case, and then tighten the four screws on the bottom of the case. The drive installation has now been completed.</p><div class="embedExternal embedImage display-large float-none"> <div class="embedExternal-content"> <a class="embedImage-link" href="https://60a99bedadae98078522-a9b6cded92292ef3bace063619038eb1.ssl.cf2.rackcdn.com/images_TechSupportArticlePix_8948Image6.jpg" rel="nofollow noreferrer noopener ugc" target="_blank"> <img class="embedImage-img" src="https://60a99bedadae98078522-a9b6cded92292ef3bace063619038eb1.ssl.cf2.rackcdn.com/images_TechSupportArticlePix_8948Image6.jpg" alt="Bottom casing installed with four corner screws" height="180" width="320" loading="lazy"></img></a> </div> </div> <p><br></p> </article> </main>