Use File History to back up to an external drive or network location.
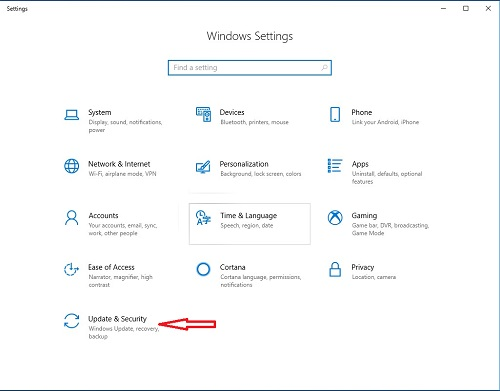
- Click on Windows icon in the low left corner of desktop. Click on Gear icon.
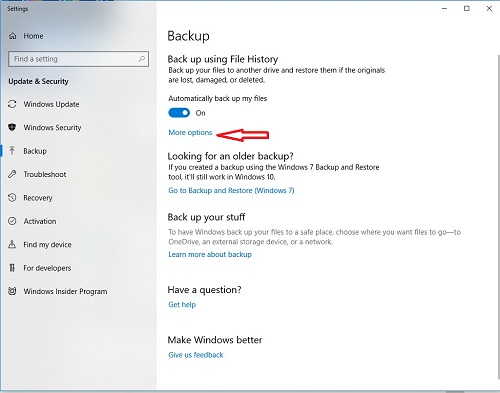
2. Click Update and security
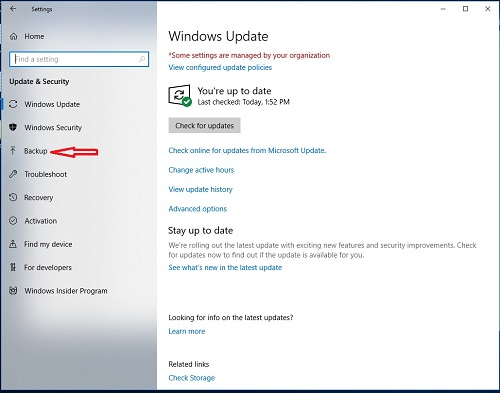
3. Click Backup
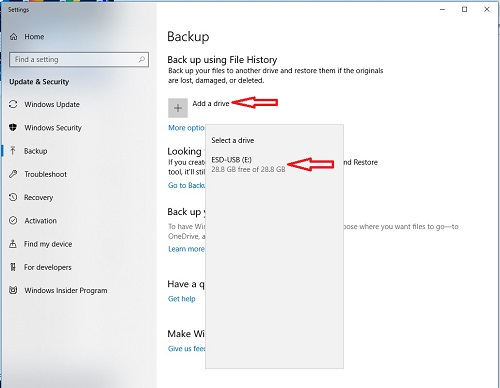
4. Connect the external drive to the computer and click on “Add a drive.” Select the drive to be used for backup.
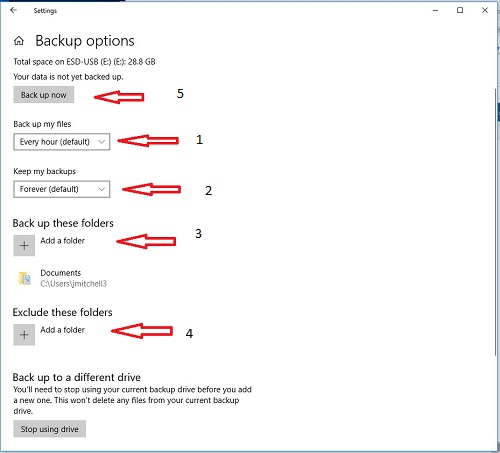
5. Click on More options
6. Click Back up my files and select the frequency of backups. Click on Keep my backups and select how long to keep backed up files.
Click on the “Add a folder” to add folders to be backed up. Clicking on a folder already in the list will give the option to remove the folder from backup.
Clicking on “Exclude these folders” will allow for excluding folders from backup.
Once preferences are set click on the Back up now button at the top of this screen and the backup will start.
Restore your files with File History
If you're missing an important file or folder that you've backed up, here's how to get it back:
- In the search box on the taskbar, type restore files and then select Restore your files with File History.
- Look for the file you need, then use the arrows to see all its versions.
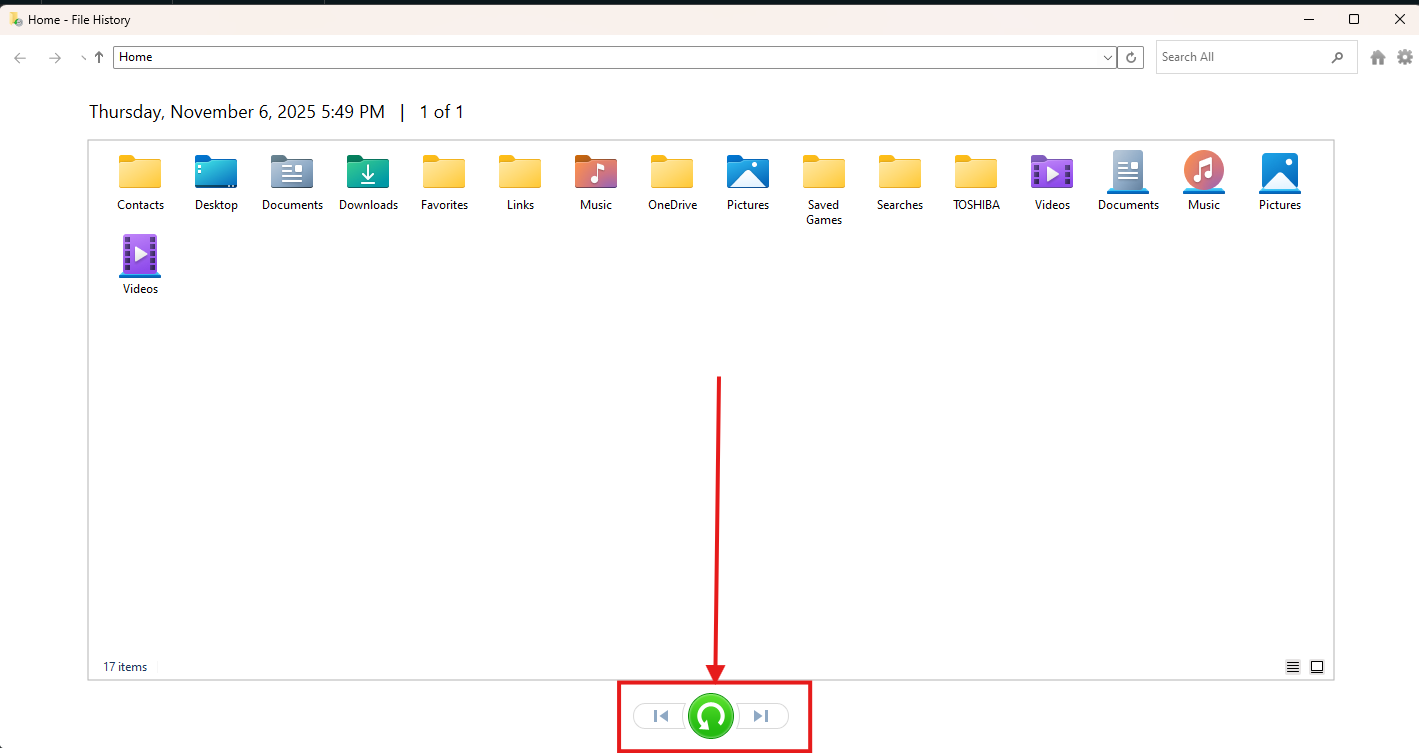
3. When you find the version you want, select Restore to save it in its original location. To save it in a different place, right-click Restore, select Restore to, and then choose a new location.