If you are looking to activate Office 2019/2021 or Office 365 for the first time, you may not have a Microsoft account. A Microsoft account is required to set up Office as it will register your product key to this account.
Here is how to create a new Microsoft account:
1. Open any web browser on your PC and navigate to www.office.com/setup. If this happens to be a new PC, open Microsoft Edge to get here.

2. Click on Create a new account.

3. It will take you to a sign-in screen. On this screen, click on "No account? Create one!"

4. There are two ways to set up your Microsoft account:
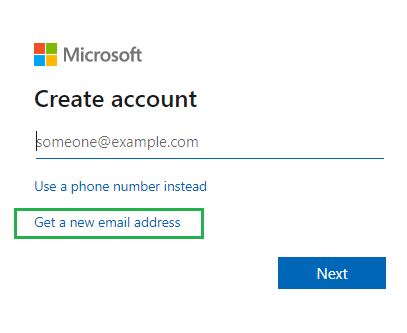
Option 1:) Enter an existing email address, such as a Gmail/Yahoo, etc. account into the box where it shows "someone@example.com"
Option 2:) Get a new email address - this will walk you through creating a new email address specifically with Microsoft.

Option 1: Set up a Microsoft Account with an Existing Email
First, we will go over the steps of using an existing email address with another provider and setting it up as a Microsoft account. If this option does not interest you, please skip ahead to the next set of steps.
1. Enter the email you'd like to use with Microsoft, then click on Next.

2. Create a password to use with your Microsoft account. Please note the password will need to meet the requirements listed. Once entered, click on Next.

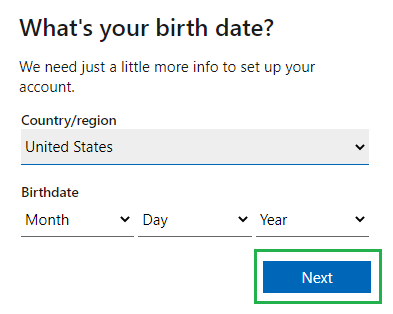
3. Fill in the account information on the next screens, and click Next after each step.

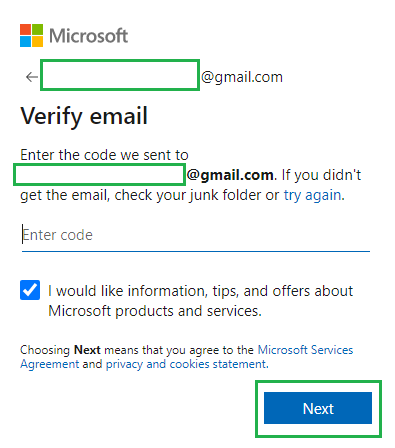
4. Once that information is filled in, you will need to check your current email for a verification code.
For example: if you are using a Gmail account, log in to your Gmail account and enter the code from the email sent to you by Microsoft.
Once completed, continue with the steps to set up Office. Please check out our article here for our full Office setup guide!
______________________________________________________________________________________
Option 2: Create a new email with Microsoft
1. Click on Get a new email address.
2. Enter the email name you'd like to use. If it is not available, it will provide suggestions to you. By default, this will be an @outlook.com account. Click Next once ready to continue.

3. Create a password to use with your Microsoft account. Please note the password will need to meet the requirements listed. Once entered, click on Next.

4. Fill in the account information on the next screens, and click Next after each step.
Once these are completed, continue with the steps to set up Office. Please check out our article here for our full Office setup guide!