This article explains how to export your emails and folder structure to a PST file in Outlook 2013 (including Microsoft Office 365) and newer. An Outlook Data File (.pst) contains your messages and other Outlook items and is saved on your computer.
Here is how to backup/export PST files:
1. Open Outlook on your PC.
You can get to it by clicking the Start button, typically found at the bottom of the screen, locate and open Outlook in the alphabetical list of programs:

2. Click on File at the top left of the Outlook window.

3. Click on Open & Export in the left column.

4. On the Open & Export menu, click on Import/Export.

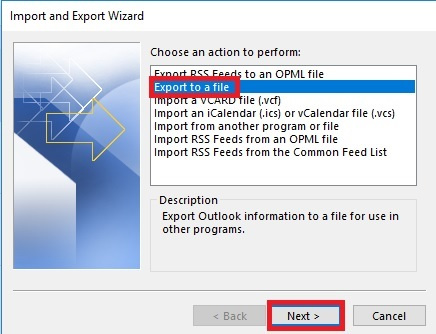
5. Select Export to a file from the list and click Next
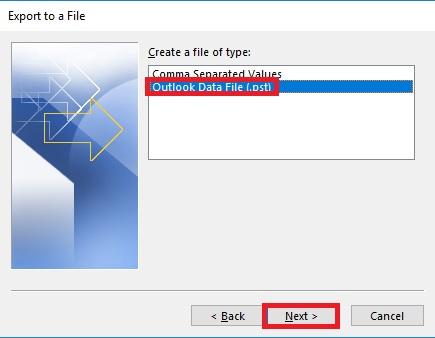
6. Select Outlook Data File (.pst) and click Next
7. Click on the folder you want to back up (usually “Inbox”). Be sure to check Include subfolders and click Next.

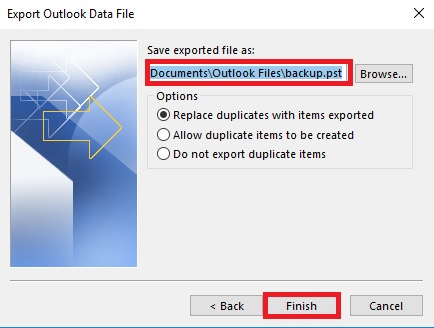
8. Pick where to save your file. It will default to your documents folder then click Finish.
9. You will be prompted to add a password. This step is not necessary but adds additional security. Either create a password or leave it blank, and click OK.

10. That's it! You can now find the PST file where you chose to save it back on step 8.