Computers
Computer Parts
Custom PC Builder
DIY/ Maker
{$smarty.capture.menu}
Activity
Categories
Discussions
Computers
Computer Parts
Custom PC Builder
DIY/ Maker
How to use Disk Cleanup on Windows 10 - Micro Center
<main> <article class="userContent"> <p>This article will show how to use disk cleanup in Windows 10. This can be used to help get rid of temporary files and clear up some space on any Windows 10 computer. </p><p><br></p><p>Here is how to use Disk Cleanup on Windows 10:</p><p>1. To open Disk Cleanup on your PC, press the <strong>Windows key</strong> on your keyboard and the <strong>letter R</strong> at the same time to open a <strong>Run </strong>window. Enter “cleanmgr.exe” into the Run window and press <strong>OK</strong>.</p><div class="embedExternal embedImage display-large float-none"> <div class="embedExternal-content"> <a class="embedImage-link" href="https://us.v-cdn.net/6031946/uploads/1G9R6FZA22FU/image1.jpg" rel="nofollow noreferrer noopener ugc" target="_blank"> <img class="embedImage-img" src="https://us.v-cdn.net/6031946/uploads/1G9R6FZA22FU/image1.jpg" alt="Image1.jpg"></img></a> </div> </div> <p></p><p><br></p><p>2. <strong>Disk Cleanup</strong> will open, there will be a variety of options under “Files to delete” that can be cleaned up. A description of each option can be viewed by clicking on an item in the list.</p><div class="embedExternal embedImage display-large float-none"> <div class="embedExternal-content"> <a class="embedImage-link" href="https://us.v-cdn.net/6031946/uploads/7QRBCVYF0311/image2.jpg" rel="nofollow noreferrer noopener ugc" target="_blank"> <img class="embedImage-img" src="https://us.v-cdn.net/6031946/uploads/7QRBCVYF0311/image2.jpg" alt="Image2.jpg"></img></a> </div> </div> <p></p><p><br></p><p>3. To delete any of the options, <strong>check the boxes</strong> next to the specific option. Click <strong>OK </strong>to start the Disk Cleanup process.</p><div class="embedExternal embedImage display-large float-none"> <div class="embedExternal-content"> <a class="embedImage-link" href="https://us.v-cdn.net/6031946/uploads/VP0JLOUJL14Z/image3.jpg" rel="nofollow noreferrer noopener ugc" target="_blank"> <img class="embedImage-img" src="https://us.v-cdn.net/6031946/uploads/VP0JLOUJL14Z/image3.jpg" alt="Image3.jpg"></img></a> </div> </div> <p></p><p><br></p><p>
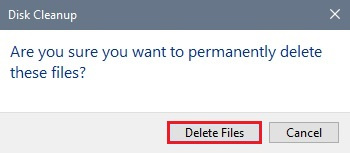
4. A new Disk Cleanup pop-up will appear to confirm deletion. Click on <strong>Delete Files</strong>.</p><div class="embedExternal embedImage display-large float-none"> <div class="embedExternal-content"> <a class="embedImage-link" href="https://us.v-cdn.net/6031946/uploads/0QDSU0UZIO1C/image4.jpg" rel="nofollow noreferrer noopener ugc" target="_blank"> <img class="embedImage-img" src="https://us.v-cdn.net/6031946/uploads/0QDSU0UZIO1C/image4.jpg" alt="Image4.jpg"></img></a> </div> </div> <p></p><p><br></p><p>
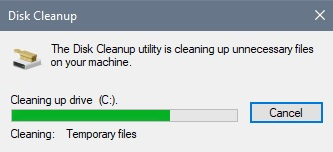
5. A new window will open with a progress bar showing the overall cleaning of files. Once this is complete the window will automatically close and no further action will be needed.</p><div class="embedExternal embedImage display-large float-none"> <div class="embedExternal-content"> <a class="embedImage-link" href="https://us.v-cdn.net/6031946/uploads/QURMQGPUZZ1Y/image5.jpg" rel="nofollow noreferrer noopener ugc" target="_blank"> <img class="embedImage-img" src="https://us.v-cdn.net/6031946/uploads/QURMQGPUZZ1Y/image5.jpg" alt="Image5.jpg"></img></a> </div> </div> <p><br></p> </article> </main>