This guide will show you how to import contacts from the Windows Contacts folder to Microsoft Outlook. This is especially helpful after a data migration is done if the contacts are not imported properly into Outlook but show up in the Contacts folder in File Explorer.
1. Using File Explorer, browse to the Windows Contacts folder for your user account - It is normally found using the path: C:/Users/Username/Contacts, but could be in a different location if your computer was set up differently. In this example, our username is Test.
2. Choose the contacts that you want to import or hold down + A on your keyboard to select all of the contacts.
3. Choose Export in the File Explorer toolbar.
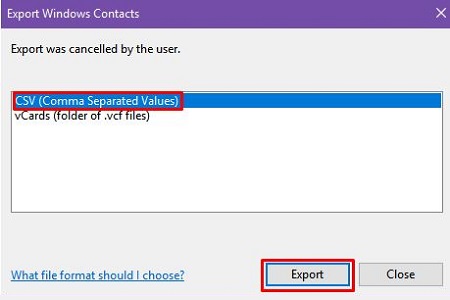
4. In the popup window select CSV (Comma Separated Values) and then Export.
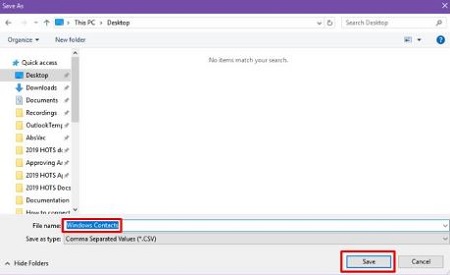
5. Next, Browse and specify the name of the file and where to save it. In this example, we chose to name our file Windows Contacts and saved it to the Desktop. Choose Save, then choose Next.
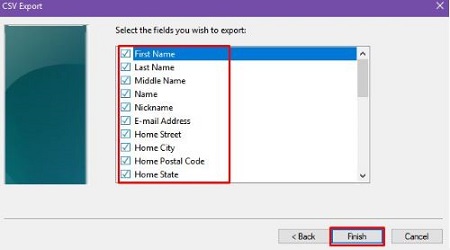
6. The next screen asks about what fields you want to import. We recommend checking each box so everything is brought over, but you can check which fields you want for your contacts if you prefer something different. Choose Finish.
7. The CSV file (the contacts file for Outlook) will save to the location you choose.
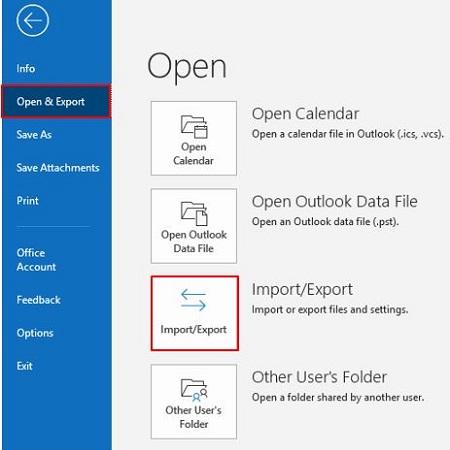
8. Open Outlook on your PC and select File at the top left of Outlook.
9. Select Open & Export, then Import/Export.
10. Choose Import from another program or file and then select Next.
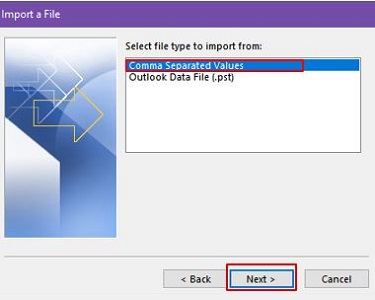
11. Choose Comma Separated Values and then Next.
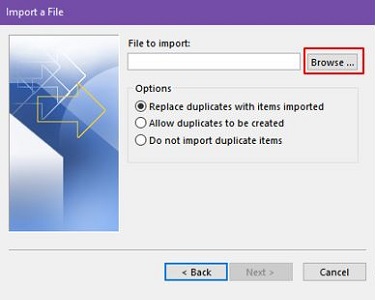
12. In File Explorer, Browse then navigate to the place where you saved your contacts folder in step 5 and choose Next.
13. Under the Select a destination folder box, select the Contacts folder. If you have multiple email accounts, choose the Contacts folder that is under the email account you want to be associated with the contacts. Select Next.
14. Select Finish. To see your contacts, choose the People icon in Outlook.