Under normal circumstances, Windows is pretty good about automatically using your monitor with the proper resolution. However, if you ever find your screen suddenly looks a lot larger and more pixelated or everything suddenly looks way too small. Maybe you just got a new monitor and it doesn't look how it did when you saw it at the store. You may simply need to change your screen resolution. Thankfully Windows makes this nice and easy.
Here is how to change the screen resolution on your Windows 10 PC:
1. Right click on any open space on the computer's desktop, then from the right-click menu that appears select Display Settings.

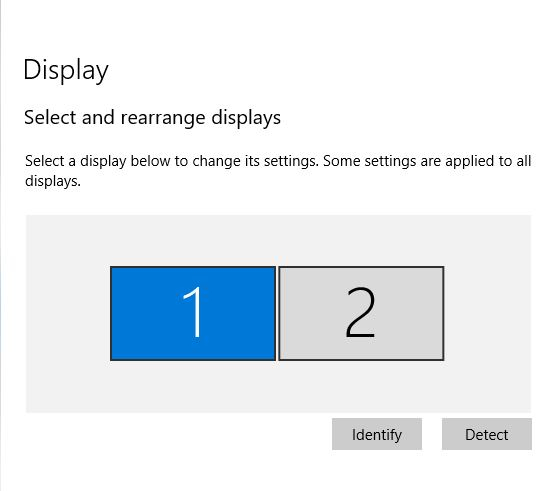
2. If you have multiple displays, first, you will need to select the monitor by clicking on it under "Display" listed here. If you are only using one display, you can skip this step.

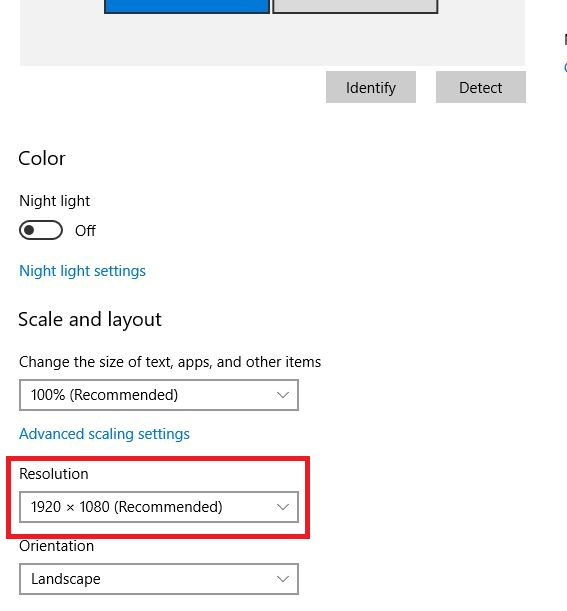
3. Scroll down on the Settings page until and locate the options for Resolution under "Scale and layout" Click the listed resolution to open a drop-down menu you can use to select the other options available.
Once a new screen resolution size is selected, it will automatically change the resolution of the monitor.
NOTE: Typically, the Recommended resolution is going to be the best option for your monitor.

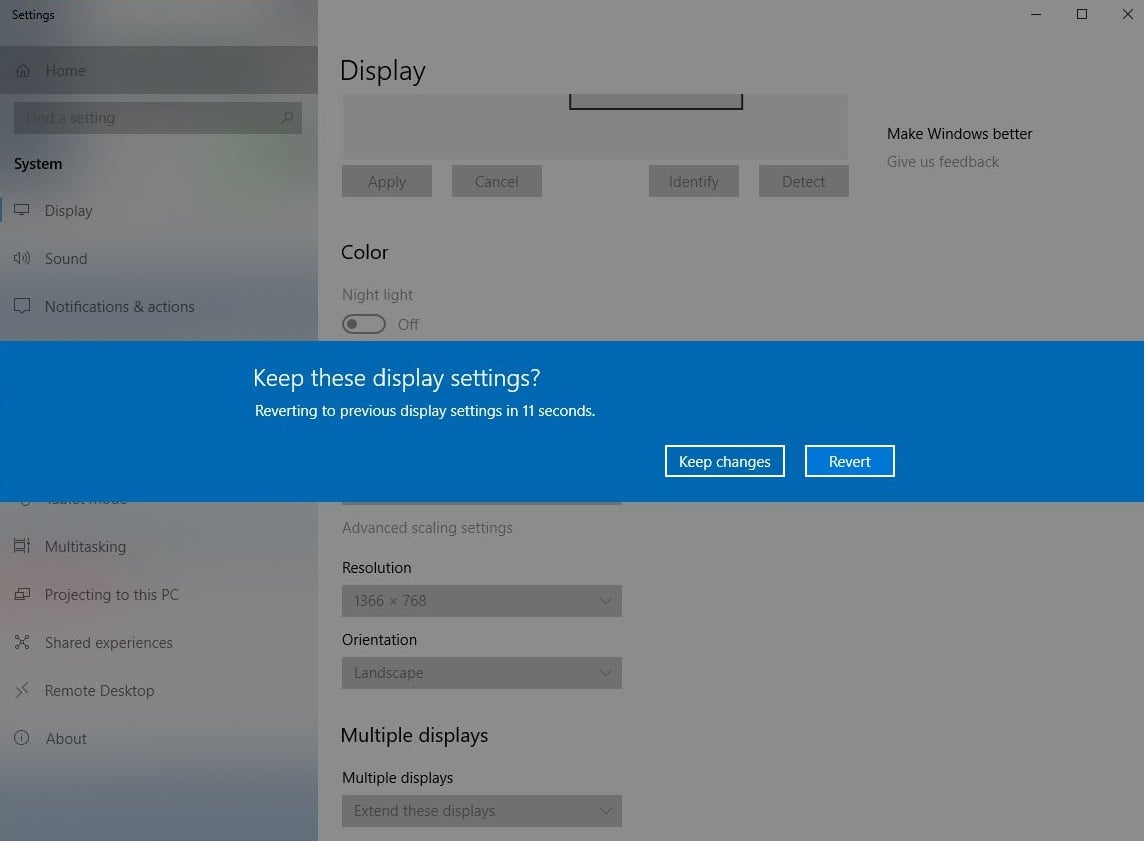
4. Once the resolution is selected and applied, a new pop-up selection screen will appear with a 15 second counter to either select Save changes for the new resolution or select Revert to return to the prior resolution setting.

If you do not make a selection within 15 seconds, any changes made to the resolution will revert automatically and you will need to re-select a resolution from the drop-down menu to make any changes and be prompted with another pop-up selection screen.