This is a guide on how to convert the format of a hard disk drive or SSD from Master Boot Record (MBR) to GUID Partition Table (GPT) formatting. Before moving forward, be sure to have backed up all the information from the drive as this process will completely clear everything from the drive.
Here is how to do this:
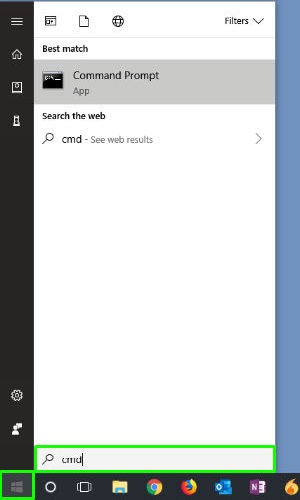
1. In the Start Menu Search Box, type cmd and then press Enter - this will bring up results including Command Prompt.
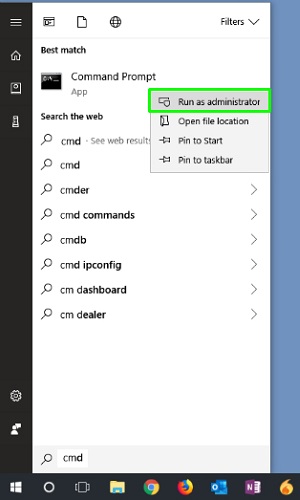
2. Right click on Command Prompt and select Run as Administrator.
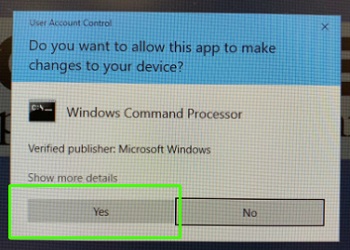
3. A User Account Control (UAC) prompt may show up next - choose Yes to proceed if it does.
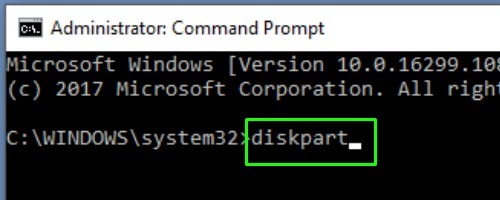
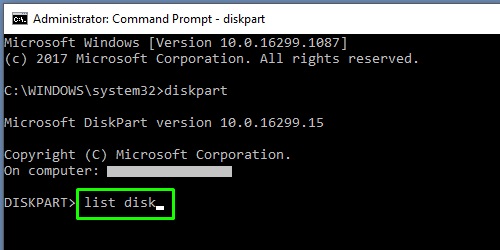
4. At the command prompt type diskpart then press enter. This will load the DISKPART utility.
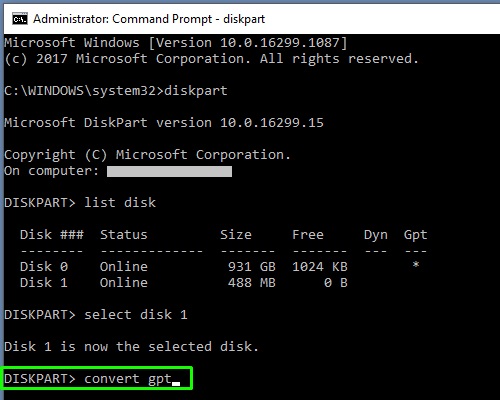
5. At the command prompt type list disk then press enter. This will list the disks on the computer.
6. At the command prompt type select disk x (where x is the number associated with the disk you wish to convert). This will select the disk in DISKPART. IMPORTANT: It is important to select the correct disk here because completing this step will clear EVERYTHING from the disk being selected.

7. At the command prompt type clean then press enter to clear all information from the selected disk. Next, at the command prompt type convert gpt then press enter and DISKPART will convert the disk to GPT.
8. Once this is complete type exit then press enter to exit DISKPART and then again type exit then press enter to exit the Command Prompt Mode.
The disk is now ready to be used for an OS installation or formatted for use as data storage.