This article will show how to change the mouse pointer size and color in Windows 10. This can be done with just a few simple steps!
1. Right click on the Start button, typically found at the lower left corner of the screen, then click on Settings.

2. From the Windows Settings screen that appears, click on Ease of Access.

3. From the Ease of Access menu, click on Cursor & pointer.

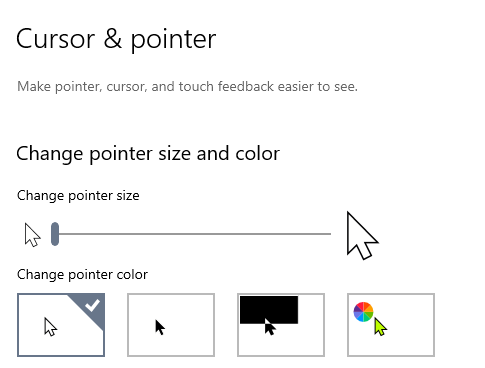
4. Under Change pointer size, adjust the slider to make changes to the size of the cursor. This updates automatically as you move the slider.
The default Windows setting is for the slider to be all the way to the left (smallest cursor).

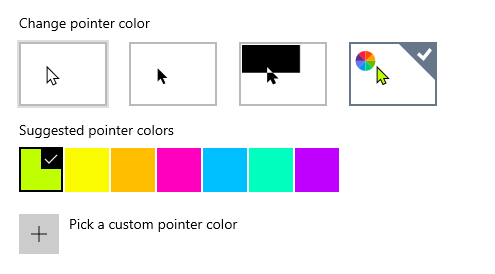
5.) Under Change pointer color, click on any of the boxes to change between a white, black inverted color or custom color mouse. When selecting the custom option, you may pick from one of the Windows custom colors, or select your own by clicking on Pick a custom pointer color. Changes are made automatically.
The default Windows setting is the white mouse - the farthest option to the left.

These settings may be changed/reverted at any time.