Computers
Computer Parts
Custom PC Builder
DIY/ Maker
{$smarty.capture.menu}
Activity
Categories
Discussions
Computers
Computer Parts
Custom PC Builder
DIY/ Maker
How to enable NVIDIA G-Sync Compatible Mode - Micro Center
<main> <article class="userContent"> <p>This guide will demonstrate how to enable NVIDIA G-Sync on a Windows PC. G-Sync is a feature found in some gaming monitors. G-Sync creates a better gaming experience as it eliminates screen tearing and minimizes display stutter and input lag. </p><p><br></p><p>1. Make sure the monitor supports NVIDIA's G-Sync technology - a list of supported monitors at the time of this article can be found on <a href="https://www.nvidia.com/en-us/geforce/products/g-sync-monitors/specs/" rel="nofollow noreferrer ugc"><strong>Nvidia's website.</strong></a></p><p>2. Make sure a DisplayPort cable is being used - G-Sync is only compatible with DisplayPort. or HDMI 2.1 (older HDMI versions do not work!). You cannot use converters or adapters. DVI and VGA are not supported.
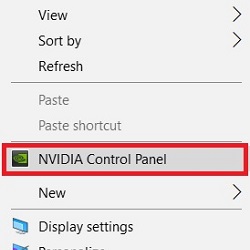
</p><p>3.<strong> Right click</strong> on the desktop background and select <strong>NVIDIA Control Panel</strong> from the list.</p><p><br></p><div class="embedExternal embedImage display-large float-none"> <div class="embedExternal-content"> <a class="embedImage-link" href="https://60a99bedadae98078522-a9b6cded92292ef3bace063619038eb1.ssl.cf2.rackcdn.com/10968Image1.jpg" rel="nofollow noreferrer noopener ugc" target="_blank"> <img class="embedImage-img" src="https://60a99bedadae98078522-a9b6cded92292ef3bace063619038eb1.ssl.cf2.rackcdn.com/10968Image1.jpg" alt="Windows 10 Desktop Context Menu Nvidia Control Panel"></img></a> </div> </div> <p><br></p><p>
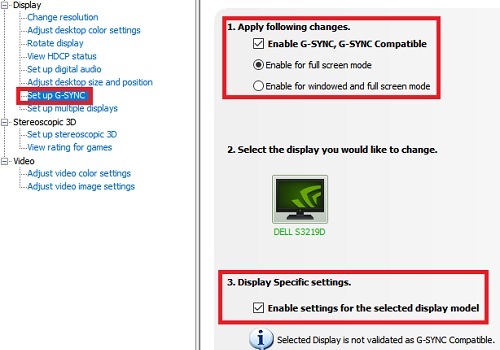
4. Under the Display tab on the left side of the NVIDIA Control Panel, choose <strong>Set up G-Sync</strong>, followed by <strong>Enable G-Sync, G-Sync Compatible checkbox</strong>. Note: <em>If the monitor has not been validated as G-Sync Compatible, select the box under Display Specific Settings to force G-Sync Compatible mode on</em>. See the warning NOTE at the end of the article before proceeding.</p><p><br></p><div class="embedExternal embedImage display-large float-none"> <div class="embedExternal-content"> <a class="embedImage-link" href="https://60a99bedadae98078522-a9b6cded92292ef3bace063619038eb1.ssl.cf2.rackcdn.com/10968Image2.jpg" rel="nofollow noreferrer noopener ugc" target="_blank"> <img class="embedImage-img" src="https://60a99bedadae98078522-a9b6cded92292ef3bace063619038eb1.ssl.cf2.rackcdn.com/10968Image2.jpg" alt="Nvidia Control Panel menu Set up G-Sync"></img></a> </div> </div> <p><br></p><p>
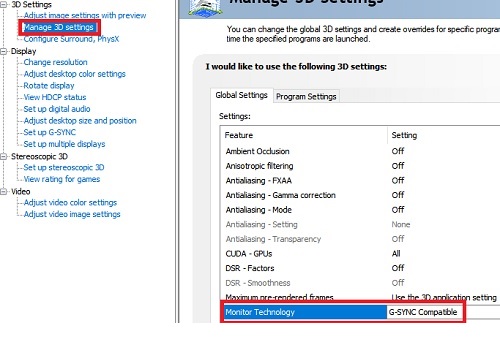
5. Under the Manage 3D Settings tab on the left side of the NVIDIA Control Panel, make sure Monitor Technology is set to G-SYNC.</p><p><br></p><div class="embedExternal embedImage display-large float-none"> <div class="embedExternal-content"> <a class="embedImage-link" href="https://60a99bedadae98078522-a9b6cded92292ef3bace063619038eb1.ssl.cf2.rackcdn.com/10968Image3.jpg" rel="nofollow noreferrer noopener ugc" target="_blank"> <img class="embedImage-img" src="https://60a99bedadae98078522-a9b6cded92292ef3bace063619038eb1.ssl.cf2.rackcdn.com/10968Image3.jpg" alt="Nvidia Control Panel menu Manage 3D Settings"></img></a> </div> </div> <p><br></p><p>6. G-Sync Compatible Mode is now enabled.</p><p><strong>NOTE</strong>: If the monitor supports<strong> VRR (Variable Refresh Rate)</strong> technologies but is not on the list above, use caution before proceeding. It may still work, however there may be issues when using the technology. Known issues include blanking, pulsing, flickering, ghosting and visual artifacts.</p> </article> </main>