This article will show you how to change your Windows 10 Account Picture to one of your own.
Here is how to change it:
1. Left click on the Start button (1), typically found at the lower left corner of the screen. From the Start Menu, select the Users icon (2). This icon may show your name or username if hovered over, then click on Change account settings (3).

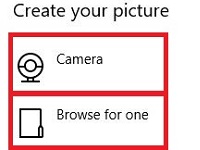
2. Click on either Camera to use your webcam to take a picture, or choose Browse for one to locate a picture you already have.

3. If you chose Camera and have a webcam, position yourself for the camera and take the picture.
If you chose to browse for one, find and select the picture that you are setting as your account picture.

4. Click on Choose picture to confirm and now whichever image you selected will be set as your account picture.

You may go back and adjust this picture at any time.