Computers
Computer Parts
Custom PC Builder
DIY/ Maker
{$smarty.capture.menu}
Activity
Categories
Discussions
Computers
Computer Parts
Custom PC Builder
DIY/ Maker
How to reinstall Mac OS (10.7 and later) - Micro Center
<main> <article class="userContent"> <p>This article will show you the steps to reinstall Mac OS X. This works for macOS 10.7 (Lion) and later versions. </p><p><br></p><p>1. Turn the Mac on and immediately press down the <strong>Command + R keys</strong>. The keys must be pressed before the grey screen appears. Hold them down until the Apple logo displays on the screen. </p><p><br></p><div class="embedExternal embedImage display-large float-none"> <div class="embedExternal-content"> <a class="embedImage-link" href="https://us.v-cdn.net/6031942/uploads/FCADYD0BIKH4/image1.jpg" rel="nofollow noreferrer noopener ugc" target="_blank"> <img class="embedImage-img" src="https://us.v-cdn.net/6031942/uploads/FCADYD0BIKH4/image1.jpg" alt="Image1.jpg"></img></a> </div> </div> <p><br></p><p>2. MacOS Utilities will open.</p><p> </p><p>3. If you need to wipe the system clean, select <strong>Disk Utility</strong>. Select <strong>Macintosh HD</strong> on the left and click <strong>Erase</strong> at the top. A window will display prompting you to select a format and name the drive. If you have MacOS 10.12 (Sierra) or earlier, select Mac OS Extended Journaled. If it is 10.13 (High Sierra) or later, select APFS and click<strong> Erase</strong>. The drive will be erased and all data on it will be lost, this action cannot be undone. If you need to keep your data you can skip this step and go to step 4. </p><p> </p><div class="embedExternal embedImage display-large float-none"> <div class="embedExternal-content"> <a class="embedImage-link" href="https://us.v-cdn.net/6031942/uploads/3FBB0YSNZIIF/image2.jpg" rel="nofollow noreferrer noopener ugc" target="_blank"> <img class="embedImage-img" src="https://us.v-cdn.net/6031942/uploads/3FBB0YSNZIIF/image2.jpg" alt="Image2.jpg"></img></a> </div> </div> <p><br></p><div class="embedExternal embedImage display-large float-none"> <div class="embedExternal-content"> <a class="embedImage-link" href="https://us.v-cdn.net/6031942/uploads/KMV7JSKU58PZ/image3.jpg" rel="nofollow noreferrer noopener ugc" target="_blank"> <img class="embedImage-img" src="https://us.v-cdn.net/6031942/uploads/KMV7JSKU58PZ/image3.jpg" alt="Image3.jpg"></img></a> </div> </div> <p><br></p><p>4. Close the Disk Utility window to return to MacOS Utilities. Click the Wi-Fi icon at the top right and make sure you’re connected to your internet and click <strong>Reinstall MacOS. </strong></p><p> </p><div class="embedExternal embedImage display-large float-none"> <div class="embedExternal-content"> <a class="embedImage-link" href="https://us.v-cdn.net/6031942/uploads/ANSOTPSSGGTE/image4.jpg" rel="nofollow noreferrer noopener ugc" target="_blank"> <img class="embedImage-img" src="https://us.v-cdn.net/6031942/uploads/ANSOTPSSGGTE/image4.jpg" alt="Image4.jpg"></img></a> </div> </div> <p><br></p><p>
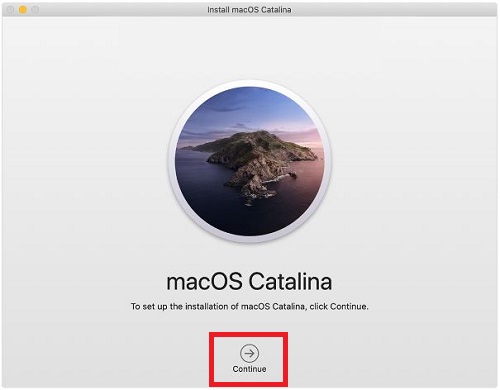
5. Follow the prompts to reinstall MacOS. Make sure to select the same drive that you erased before if it asks what drive you want to install to. Once the installation begins the process will take some time to complete. Keep your computer plugged in to ensure it doesn’t shut down and interrupt the install.</p><div class="embedExternal embedImage display-large float-none"> <div class="embedExternal-content"> <a class="embedImage-link" href="https://us.v-cdn.net/6031942/uploads/VORWC0R2INXA/image5.jpg" rel="nofollow noreferrer noopener ugc" target="_blank"> <img class="embedImage-img" src="https://us.v-cdn.net/6031942/uploads/VORWC0R2INXA/image5.jpg" alt="Image5.jpg"></img></a> </div> </div> <p><br></p><p>6. Once the installation is finished your system will restart. </p> </article> </main>