This article covers the process for importing an existing list of contacts into Outlook 2013 and later versions using a .csv file. Most email programs and services allow you to export your existing contacts as a .csv.
1. Open Outlook and select File in the top left corner.

2. On the left side, select Open & Export, then Import/Export.

3. Choose Import from another program or file, and then click Next.

4. Choose Comma Separated Values, and then click Next.

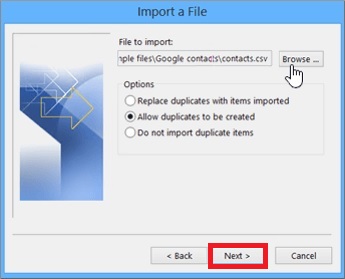
5. In the Import a File box, click browse, browse to the folder your contacts file is saved and then double-click the file to select it.

6. Choose how to handle duplicates by selecting one of these options:
a. Replace duplicates with items imported: When a duplicate already exists, it will be replaced with what you’re importing
b. Allow duplicates to be created: When a duplicate exists, it will be kept and both entries will be in your contacts
c. Do not import duplicate items: When a duplicate exists, it will be kept, and the entry being imported will be skipped

7. Click Next.
8. In the Select a destination folder box, select the Contacts folder. If you have multiple email accounts, choose the Contacts folder that's under the email account you want to be associated with the contacts. Then click Next.

9. On the next screen, select Finish. When the process is done, the Progress box will close automatically.

10. To see your contacts, choose the People icon at the bottom left of the Outlook window.
