This article covers how to load filament in the PowerSpec Ultra 3D 1.0 and 2.0 printers. This also works for similar models of 3D Printers.
1. Power on the 3D printer.
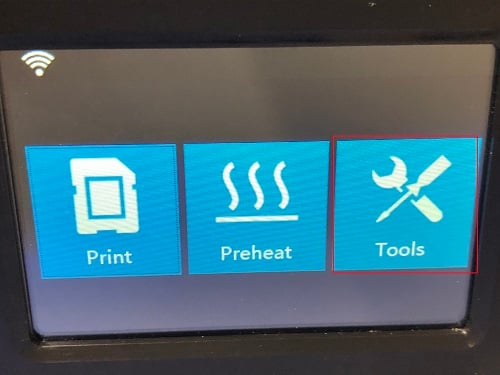
2. Select Tools from the Printer menu.
3. Select Filament.

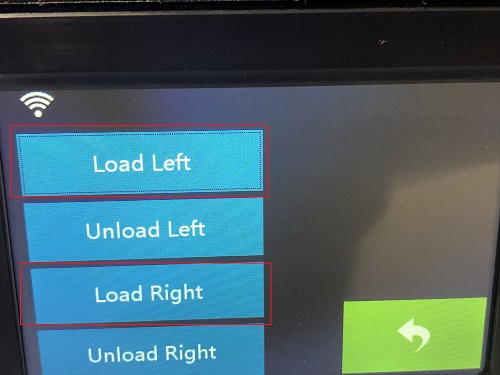
4. Select load left or load right. Standing in front of the printer, the extruder on the left will be the left extruder, and the extruder on the right will be the right extruder.
5. The printer will now heat up to 230°C.

6. Once the preheating hits 100%, load the filament. Do this by pushing the filament into the top of the extruder.

7. The filament will catch and the filament will slowly start oozing out of the nozzle.

8. If the filament does not ooze out of the nozzle, try again. If it still does not work, the extruder may be clogged.