This article will show how to set up the ASUS RT-N12 Wireless Router for Wi-Fi using the built-in Quick Internet Setup feature.
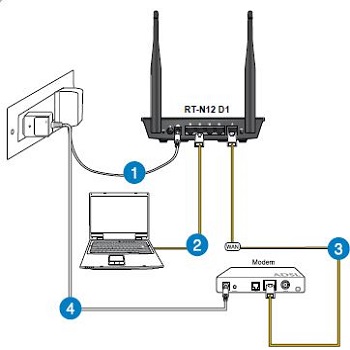
1. Complete the initial steps to set up the router: First, plug in the included power adapter to the router. After that, plug in the included Ethernet cable to one of the router’s LAN ports, and the other end to the computer’s Ethernet port. Connect your modem to the router’s WAN port, and then plug in your modem’s power adapter.
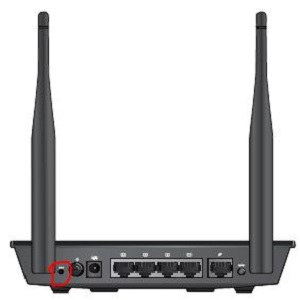
2. Press and hold the router's reset button for 10-20 seconds for it to reset.
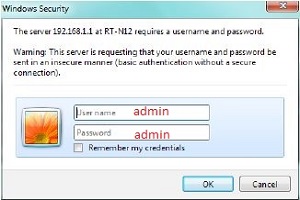
3. Open a web browser, type 192.168.1.1 into the address bar and press the Enter key.
When prompted, type in the username (admin) and the password (admin).
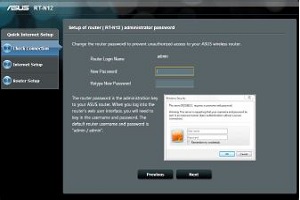
4. Once the password is entered, click on Quick Internet Setup.
5. You will then be prompted to enter a new administrator password.
6. Click Next and then choose Wireless Router Mode.

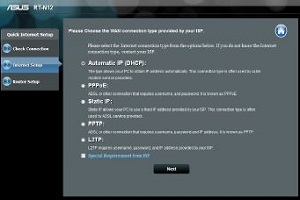
7. Click Next and then choose the connection type for your ISP if it was not detected automatically.
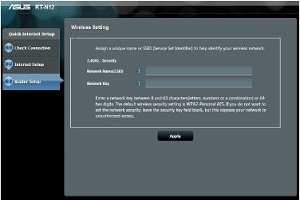
8. Click Next and enter a Network Name, and Network Key (password).
9. Click Next to show a summary of your settings.

10. Click Finish after reviewing the Wireless Network Connection Tutorial.