Computers
Computer Parts
Custom PC Builder
DIY/ Maker
{$smarty.capture.menu}
Activity
Categories
Discussions
Computers
Computer Parts
Custom PC Builder
DIY/ Maker
How to access the Router Settings Page on the Tenda F303 Router - Micro Center
<main> <article class="userContent"> <p>This article will show how to access the Router Settings Page on a Tenda F303 Wireless Router. You will need an Ethernet cable to complete this process.
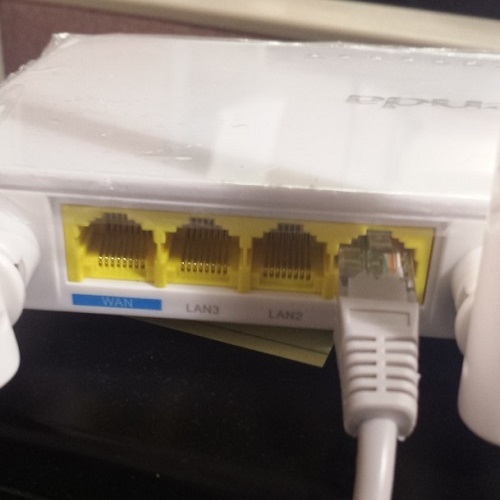
</p><p>1. Connect the router to the <strong>RJ-45 Ethernet port</strong> on your PC with an Ethernet cable - use one of the yellow <strong>LAN</strong> ports on your router.</p><div class="embedExternal embedImage display-large float-none"> <div class="embedExternal-content"> <a class="embedImage-link" href="https://60a99bedadae98078522-a9b6cded92292ef3bace063619038eb1.ssl.cf2.rackcdn.com/images_TechSupportArticlePix_7992Image1.jpg" rel="nofollow noreferrer noopener ugc" target="_blank"> <img class="embedImage-img" src="https://60a99bedadae98078522-a9b6cded92292ef3bace063619038eb1.ssl.cf2.rackcdn.com/images_TechSupportArticlePix_7992Image1.jpg" alt="Tenda Router Connection Ports" height="180" width="320" loading="lazy"></img></a> </div> </div> <p><br></p><p> </p><p>2. Open up any <strong>Internet browser </strong>on your computer. In the address bar of the browser type: <strong>192.168.0.1</strong> and press <strong>Enter</strong> on your keyboard. This will take you to the router login page.
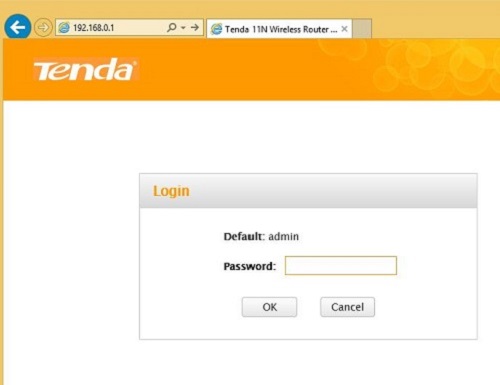
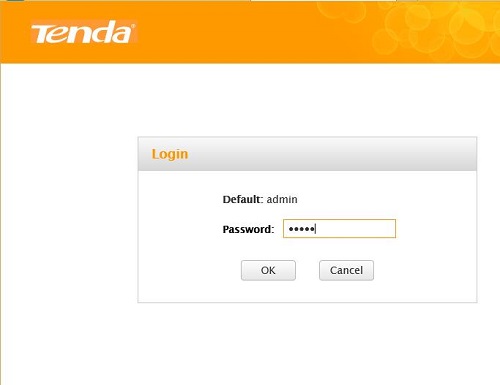
</p><div class="embedExternal embedImage display-large float-none"> <div class="embedExternal-content"> <a class="embedImage-link" href="https://60a99bedadae98078522-a9b6cded92292ef3bace063619038eb1.ssl.cf2.rackcdn.com/images_TechSupportArticlePix_7992Image4.jpg" rel="nofollow noreferrer noopener ugc" target="_blank"> <img class="embedImage-img" src="https://60a99bedadae98078522-a9b6cded92292ef3bace063619038eb1.ssl.cf2.rackcdn.com/images_TechSupportArticlePix_7992Image4.jpg" alt="Browser Router Login" height="180" width="320" loading="lazy"></img></a> </div> </div> <p></p><p><br></p><p>3. Enter <strong>admin</strong> as the default password, and click <strong>OK</strong>.</p><div class="embedExternal embedImage display-large float-none"> <div class="embedExternal-content"> <a class="embedImage-link" href="https://60a99bedadae98078522-a9b6cded92292ef3bace063619038eb1.ssl.cf2.rackcdn.com/images_TechSupportArticlePix_7992Image5.jpg" rel="nofollow noreferrer noopener ugc" target="_blank"> <img class="embedImage-img" src="https://60a99bedadae98078522-a9b6cded92292ef3bace063619038eb1.ssl.cf2.rackcdn.com/images_TechSupportArticlePix_7992Image5.jpg" alt="Browser Router Login Authentication" height="180" width="320" loading="lazy"></img></a> </div> </div> <p></p><p><br></p><p>4. Choose your <strong>Internet Connection type</strong> (given by your Internet Service Provider), and enter <strong>12345678</strong> for the default <strong>network key</strong> (or your own network key if you have set one previously).
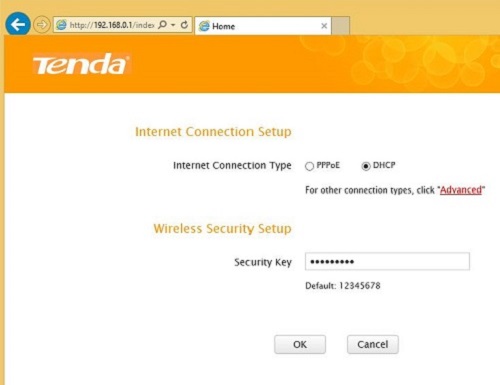
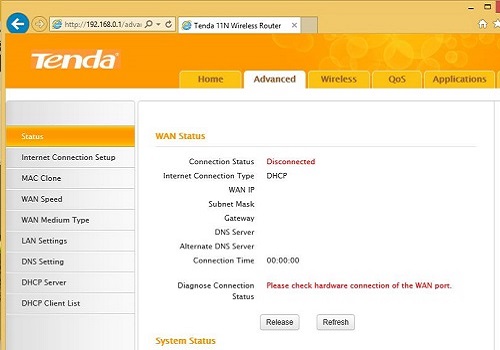
</p><div class="embedExternal embedImage display-large float-none"> <div class="embedExternal-content"> <a class="embedImage-link" href="https://60a99bedadae98078522-a9b6cded92292ef3bace063619038eb1.ssl.cf2.rackcdn.com/images_TechSupportArticlePix_7992Image6.jpg" rel="nofollow noreferrer noopener ugc" target="_blank"> <img class="embedImage-img" src="https://60a99bedadae98078522-a9b6cded92292ef3bace063619038eb1.ssl.cf2.rackcdn.com/images_TechSupportArticlePix_7992Image6.jpg" alt="Router Settings Page" height="180" width="320" loading="lazy"></img></a> </div> </div> <p></p><p><br></p><p>5. You are now able to access <strong>all settings</strong> assigned to the router.</p><div class="embedExternal embedImage display-large float-none"> <div class="embedExternal-content"> <a class="embedImage-link" href="https://60a99bedadae98078522-a9b6cded92292ef3bace063619038eb1.ssl.cf2.rackcdn.com/images_TechSupportArticlePix_7992Image7.jpg" rel="nofollow noreferrer noopener ugc" target="_blank"> <img class="embedImage-img" src="https://60a99bedadae98078522-a9b6cded92292ef3bace063619038eb1.ssl.cf2.rackcdn.com/images_TechSupportArticlePix_7992Image7.jpg" alt="Router Settings Page" height="180" width="320" loading="lazy"></img></a> </div> </div> <h2></h2><p><br></p> </article> </main>