Computers
Computer Parts
Custom PC Builder
DIY/ Maker
{$smarty.capture.menu}
Activity
Categories
Discussions
Computers
Computer Parts
Custom PC Builder
DIY/ Maker
How to set up a Tenda N301 Wireless Router - Micro Center
<main> <article class="userContent"> <p>This article will show how to complete the basic setup of a Tenda N301 wireless router, including the physical connection and basic wireless setup.</p><p>Here is how to set the Tenda router up:</p><p>
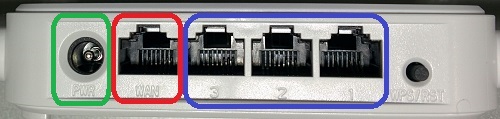
1. There are 3 cables that will need to be connected to the router:</p><ul><li>Connect the power cable to the wall outlet and to the <strong>PWR port</strong> on the router (shown in green). The router will automatically power on.</li><li>Connect an Ethernet cable from your computer to any one of the LAN ports on the router, labeled <strong>1, 2, and 3</strong> (shown in blue).</li><li>Connect an Ethernet cable from your cable/DSL modem to the <strong>WAN port</strong> on your Tenda router (shown in red).</li></ul><div class="embedExternal embedImage display-large float-none"> <div class="embedExternal-content"> <a class="embedImage-link" href="https://60a99bedadae98078522-a9b6cded92292ef3bace063619038eb1.ssl.cf2.rackcdn.com/images_TechSupportArticlePix_8153Image1.jpg" rel="nofollow noreferrer noopener ugc" target="_blank"> <img class="embedImage-img" src="https://60a99bedadae98078522-a9b6cded92292ef3bace063619038eb1.ssl.cf2.rackcdn.com/images_TechSupportArticlePix_8153Image1.jpg" alt="Tenda N301 back view" height="180" width="320" loading="lazy"></img></a> </div> </div> <p></p><p><br></p><p>2. Open any web browser on your computer, such as Microsoft Edge, Mozilla Firefox, or Google Chrome, and enter <strong>192.168.0.1</strong> in the address bar and then press <strong>Enter </strong>on your keyboard.</p><div class="embedExternal embedImage display-large float-none"> <div class="embedExternal-content"> <a class="embedImage-link" href="https://60a99bedadae98078522-a9b6cded92292ef3bace063619038eb1.ssl.cf2.rackcdn.com/images_TechSupportArticlePix_8153Image2.jpg" rel="nofollow noreferrer noopener ugc" target="_blank"> <img class="embedImage-img" src="https://60a99bedadae98078522-a9b6cded92292ef3bace063619038eb1.ssl.cf2.rackcdn.com/images_TechSupportArticlePix_8153Image2.jpg" alt="Browser Address Bar" height="180" width="320" loading="lazy"></img></a> </div> </div> <p></p><p><br></p><p>
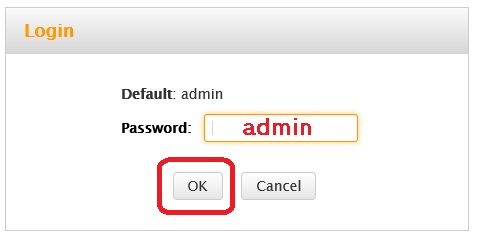
3. A login screen will appear. In the password box, type <strong>admin</strong> and then click <strong>OK</strong>.</p><div class="embedExternal embedImage display-large float-none"> <div class="embedExternal-content"> <a class="embedImage-link" href="https://60a99bedadae98078522-a9b6cded92292ef3bace063619038eb1.ssl.cf2.rackcdn.com/images_TechSupportArticlePix_8153Image3.jpg" rel="nofollow noreferrer noopener ugc" target="_blank"> <img class="embedImage-img" src="https://60a99bedadae98078522-a9b6cded92292ef3bace063619038eb1.ssl.cf2.rackcdn.com/images_TechSupportArticlePix_8153Image3.jpg" alt="Router Browser Authentication" height="180" width="320" loading="lazy"></img></a> </div> </div> <p></p><p><br></p><p>4. Select the connection type used for your internet connection. In most cases, select <strong>DHCP</strong>.</p><div class="embedExternal embedImage display-large float-none"> <div class="embedExternal-content"> <a class="embedImage-link" href="https://60a99bedadae98078522-a9b6cded92292ef3bace063619038eb1.ssl.cf2.rackcdn.com/images_TechSupportArticlePix_8153Image4.jpg" rel="nofollow noreferrer noopener ugc" target="_blank"> <img class="embedImage-img" src="https://60a99bedadae98078522-a9b6cded92292ef3bace063619038eb1.ssl.cf2.rackcdn.com/images_TechSupportArticlePix_8153Image4.jpg" alt="Browser DHCP Setting" height="180" width="320" loading="lazy"></img></a> </div> </div> <p></p><p><br></p><p>
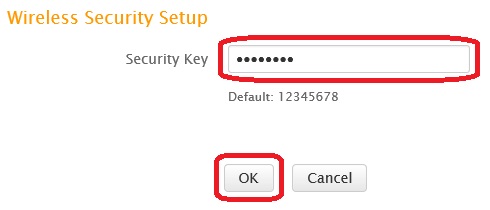
5. Enter the desired security key for the wireless connection in the <strong>Security Key</strong> box, and then click <strong>OK</strong>. This is the key that will be required to enter for every new wireless device connecting to the router.</p><div class="embedExternal embedImage display-large float-none"> <div class="embedExternal-content"> <a class="embedImage-link" href="https://60a99bedadae98078522-a9b6cded92292ef3bace063619038eb1.ssl.cf2.rackcdn.com/images_TechSupportArticlePix_8153Image5.jpg" rel="nofollow noreferrer noopener ugc" target="_blank"> <img class="embedImage-img" src="https://60a99bedadae98078522-a9b6cded92292ef3bace063619038eb1.ssl.cf2.rackcdn.com/images_TechSupportArticlePix_8153Image5.jpg" alt="Wireless Security Setup" height="180" width="320" loading="lazy"></img></a> </div> </div> <p></p><p><br></p><p>
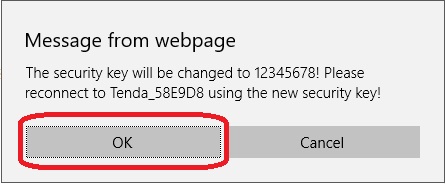
6. A confirmation window will open, confirming the wireless security key. Click <strong>OK</strong> to confirm the security key. The basic setup of the Tenda router has been completed!</p><div class="embedExternal embedImage display-large float-none"> <div class="embedExternal-content"> <a class="embedImage-link" href="https://60a99bedadae98078522-a9b6cded92292ef3bace063619038eb1.ssl.cf2.rackcdn.com/images_TechSupportArticlePix_8153Image6.jpg" rel="nofollow noreferrer noopener ugc" target="_blank"> <img class="embedImage-img" src="https://60a99bedadae98078522-a9b6cded92292ef3bace063619038eb1.ssl.cf2.rackcdn.com/images_TechSupportArticlePix_8153Image6.jpg" alt="OK to save changes" height="180" width="320" loading="lazy"></img></a> </div> </div> <p><br></p> </article> </main>