Computers
Computer Parts
Custom PC Builder
DIY/ Maker
{$smarty.capture.menu}
Activity
Categories
Discussions
Computers
Computer Parts
Custom PC Builder
DIY/ Maker
How to set up Parental Controls on an ASUS RT-AC68U Wireless Router - Micro Center
<main> <article class="userContent"> <p>This article will show how to set up Parental Controls on the ASUS RT-AC68U Wireless Router. This will allow specific devices to be allowed or denied access to the network at particular times of the day.</p><p>Here is how to modify these parental control settings:</p><p>1. Open any web browser on your computer, and type <strong>192.168.1.1</strong> into the address bar, and then press <strong>Enter </strong>on your keyboard.</p><div class="embedExternal embedImage display-large float-none"> <div class="embedExternal-content"> <a class="embedImage-link" href="https://60a99bedadae98078522-a9b6cded92292ef3bace063619038eb1.ssl.cf2.rackcdn.com/images_TechSupportArticlePix_8207Image1.jpg" rel="nofollow noreferrer noopener ugc" target="_blank"> <img class="embedImage-img" src="https://60a99bedadae98078522-a9b6cded92292ef3bace063619038eb1.ssl.cf2.rackcdn.com/images_TechSupportArticlePix_8207Image1.jpg" alt="User: "Browser address bar"" height="180" width="320" loading="lazy"></img></a> </div> </div> <p></p><p><br></p><p>2. Enter the administrator username and password for the router (not your Wi-Fi password) and then click <strong>OK.</strong></p><p>The default username and password are both <strong>admin</strong>.</p><div class="embedExternal embedImage display-large float-none"> <div class="embedExternal-content"> <a class="embedImage-link" href="https://60a99bedadae98078522-a9b6cded92292ef3bace063619038eb1.ssl.cf2.rackcdn.com/images_TechSupportArticlePix_8207Image2.jpg" rel="nofollow noreferrer noopener ugc" target="_blank"> <img class="embedImage-img" src="https://60a99bedadae98078522-a9b6cded92292ef3bace063619038eb1.ssl.cf2.rackcdn.com/images_TechSupportArticlePix_8207Image2.jpg" alt="User: "Browser authentication screen"" height="180" width="320" loading="lazy"></img></a> </div> </div> <p></p><p><br></p><p>
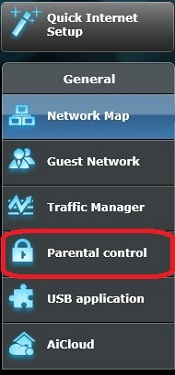
3. From the advanced menu on the left side of the router settings, click on <strong>Parental control</strong>.</p><div class="embedExternal embedImage display-large float-none"> <div class="embedExternal-content"> <a class="embedImage-link" href="https://60a99bedadae98078522-a9b6cded92292ef3bace063619038eb1.ssl.cf2.rackcdn.com/images_TechSupportArticlePix_8209Image3.jpg" rel="nofollow noreferrer noopener ugc" target="_blank"> <img class="embedImage-img" src="https://60a99bedadae98078522-a9b6cded92292ef3bace063619038eb1.ssl.cf2.rackcdn.com/images_TechSupportArticlePix_8209Image3.jpg" alt="ASUS Router Parental Control Settings" height="180" width="320" loading="lazy"></img></a> </div> </div> <p></p><p><br></p><p>4. Click the <strong>On / Off slider</strong> for <strong>Enable parental control</strong> to turn this On.</p><div class="embedExternal embedImage display-large float-none"> <div class="embedExternal-content"> <a class="embedImage-link" href="https://60a99bedadae98078522-a9b6cded92292ef3bace063619038eb1.ssl.cf2.rackcdn.com/images_TechSupportArticlePix_8209Image4.jpg" rel="nofollow noreferrer noopener ugc" target="_blank"> <img class="embedImage-img" src="https://60a99bedadae98078522-a9b6cded92292ef3bace063619038eb1.ssl.cf2.rackcdn.com/images_TechSupportArticlePix_8209Image4.jpg" alt="ASUS Router Parental Control Settings" height="180" width="320" loading="lazy"></img></a> </div> </div> <p></p><p><br></p><p>5. The client list will appear. Click the <strong>red arrow</strong> next to the client name box to show devices currently connected to the network and select the device. Otherwise, manually enter the name of the device, followed by the <strong>MAC Address</strong> of the device. This is sometimes known as the physical address.</p><div class="embedExternal embedImage display-large float-none"> <div class="embedExternal-content"> <a class="embedImage-link" href="https://60a99bedadae98078522-a9b6cded92292ef3bace063619038eb1.ssl.cf2.rackcdn.com/images_TechSupportArticlePix_8209Image5.jpg" rel="nofollow noreferrer noopener ugc" target="_blank"> <img class="embedImage-img" src="https://60a99bedadae98078522-a9b6cded92292ef3bace063619038eb1.ssl.cf2.rackcdn.com/images_TechSupportArticlePix_8209Image5.jpg" alt="ASUS Router Parental Control Settings" height="180" width="320" loading="lazy"></img></a> </div> </div> <p></p><p><br></p><p>6. After entering the device information, click the <strong>Add button</strong>.</p><div class="embedExternal embedImage display-large float-none"> <div class="embedExternal-content"> <a class="embedImage-link" href="https://60a99bedadae98078522-a9b6cded92292ef3bace063619038eb1.ssl.cf2.rackcdn.com/images_TechSupportArticlePix_8209Image6.jpg" rel="nofollow noreferrer noopener ugc" target="_blank"> <img class="embedImage-img" src="https://60a99bedadae98078522-a9b6cded92292ef3bace063619038eb1.ssl.cf2.rackcdn.com/images_TechSupportArticlePix_8209Image6.jpg" alt="ASUS Router Parental Control Settings" height="180" width="320" loading="lazy"></img></a> </div> </div> <p></p><p><br></p><p>7. To specify what times a device has access to the network, click the <strong>Time Management</strong> button next to the device.</p><div class="embedExternal embedImage display-large float-none"> <div class="embedExternal-content"> <a class="embedImage-link" href="https://60a99bedadae98078522-a9b6cded92292ef3bace063619038eb1.ssl.cf2.rackcdn.com/images_TechSupportArticlePix_8209Image7.jpg" rel="nofollow noreferrer noopener ugc" target="_blank"> <img class="embedImage-img" src="https://60a99bedadae98078522-a9b6cded92292ef3bace063619038eb1.ssl.cf2.rackcdn.com/images_TechSupportArticlePix_8209Image7.jpg" alt="ASUS Router Parental Control Settings" height="180" width="320" loading="lazy"></img></a> </div> </div> <p></p><p><br></p><p>8. A grid will appear with days of the week along the top and times along the left, each block representing an hour of the day. By default, the device is denied access at all times. Clicking in a specific box will turn the box a lighter color, indicating the device is allowed access at that time on that day.</p><div class="embedExternal embedImage display-large float-none"> <div class="embedExternal-content"> <a class="embedImage-link" href="https://60a99bedadae98078522-a9b6cded92292ef3bace063619038eb1.ssl.cf2.rackcdn.com/images_TechSupportArticlePix_8209Image8.jpg" rel="nofollow noreferrer noopener ugc" target="_blank"> <img class="embedImage-img" src="https://60a99bedadae98078522-a9b6cded92292ef3bace063619038eb1.ssl.cf2.rackcdn.com/images_TechSupportArticlePix_8209Image8.jpg" alt="ASUS Router Parental Control Settings" height="180" width="320" loading="lazy"></img></a> </div> </div> <p></p><p><br></p><p>9. Once the allowed times are set, click <strong>OK</strong> to save the changes.</p><div class="embedExternal embedImage display-large float-none"> <div class="embedExternal-content"> <a class="embedImage-link" href="https://60a99bedadae98078522-a9b6cded92292ef3bace063619038eb1.ssl.cf2.rackcdn.com/images_TechSupportArticlePix_8209Image9.jpg" rel="nofollow noreferrer noopener ugc" target="_blank"> <img class="embedImage-img" src="https://60a99bedadae98078522-a9b6cded92292ef3bace063619038eb1.ssl.cf2.rackcdn.com/images_TechSupportArticlePix_8209Image9.jpg" alt="ASUS Router Parental Control Settings" height="180" width="320" loading="lazy"></img></a> </div> </div> <p><br></p> </article> </main>