This article will show how to setup an ASUS RT-AC68U wireless router as a repeater. This will help to extend your wireless network’s range.
Here is how to configure the router as a repeater:
1. Open any web browser on your computer, and type 192.168.1.1 into the address bar, and then press Enter on your keyboard.

2. Enter the administrator username and password for the router (not your Wi-Fi password) and then click OK.
The default username and password are both admin.

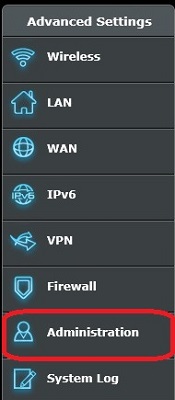
3. From the advanced menu on the left side of the router settings, click on Administration.
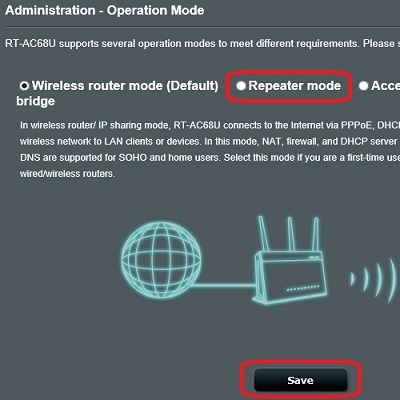
4. The Operation Mode tab will already be selected. By default, wireless router mode will be selected.
Click Repeater mode and then click the Save button.
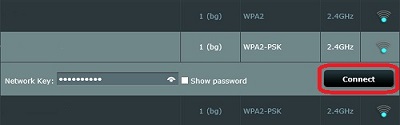
5. A list of nearby wireless networks will appear.
Select the network to be extended, enter the network security key (the Wi-Fi password), and then click Connect.
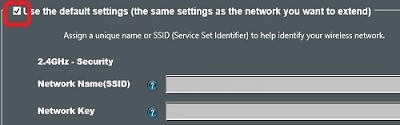
6. To use the same wireless settings as the network to be extended, keep the Use the default settings box checked.
Otherwise, uncheck the box and enter the SSID and network key that this router will be using. This information will be different from your current wireless network.
In most cases, it is best to keep this box checked.
7. Click the Apply button to save the changes. The router will apply the settings and restart. The wireless repeater has now been setup successfully.