Computers
Computer Parts
Custom PC Builder
DIY/ Maker
{$smarty.capture.menu}
Activity
Categories
Discussions
Computers
Computer Parts
Custom PC Builder
DIY/ Maker
How to set up wireless internet on a Tenda FH1201 Router - Micro Center
<main> <article class="userContent"> <p>This article will show you how to set up wireless internet on a Tenda FH1201 AC1200 Router.</p><p>Here is how to perform this set up:</p><p>1. Open up any browser, and in the address bar type <strong>192.168.0.1</strong> and then press <strong>Enter </strong>on your keyboard.</p><div class="embedExternal embedImage display-large float-none"> <div class="embedExternal-content"> <a class="embedImage-link" href="https://60a99bedadae98078522-a9b6cded92292ef3bace063619038eb1.ssl.cf2.rackcdn.com/images_TechSupportArticlePix_8189Image1.jpg" rel="nofollow noreferrer noopener ugc" target="_blank"> <img class="embedImage-img" src="https://60a99bedadae98078522-a9b6cded92292ef3bace063619038eb1.ssl.cf2.rackcdn.com/images_TechSupportArticlePix_8189Image1.jpg" alt="Browser Address Bar" height="180" width="320" loading="lazy"></img></a> </div> </div> <p></p><p><br></p><p>
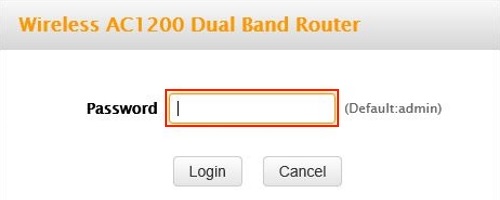
2. Type the password into the password field.</p><p>The default password is <strong>admin</strong> if you have not changed it. Click on <strong>Login</strong>.</p><div class="embedExternal embedImage display-large float-none"> <div class="embedExternal-content"> <a class="embedImage-link" href="https://60a99bedadae98078522-a9b6cded92292ef3bace063619038eb1.ssl.cf2.rackcdn.com/images_TechSupportArticlePix_8189Image2.jpg" rel="nofollow noreferrer noopener ugc" target="_blank"> <img class="embedImage-img" src="https://60a99bedadae98078522-a9b6cded92292ef3bace063619038eb1.ssl.cf2.rackcdn.com/images_TechSupportArticlePix_8189Image2.jpg" alt="Tenda Router Login Screen" height="180" width="320" loading="lazy"></img></a> </div> </div> <p></p><p><br></p><p>3. Click on the <strong>Advanced</strong> link.</p><div class="embedExternal embedImage display-large float-none"> <div class="embedExternal-content"> <a class="embedImage-link" href="https://60a99bedadae98078522-a9b6cded92292ef3bace063619038eb1.ssl.cf2.rackcdn.com/images_TechSupportArticlePix_8189Image3.jpg" rel="nofollow noreferrer noopener ugc" target="_blank"> <img class="embedImage-img" src="https://60a99bedadae98078522-a9b6cded92292ef3bace063619038eb1.ssl.cf2.rackcdn.com/images_TechSupportArticlePix_8189Image3.jpg" alt="Tenda Internet Connection Setup, Advanced" height="180" width="320" loading="lazy"></img></a> </div> </div> <p></p><p><br></p><p>4. Click on the <strong>Wireless</strong> tab.</p><div class="embedExternal embedImage display-large float-none"> <div class="embedExternal-content"> <a class="embedImage-link" href="https://60a99bedadae98078522-a9b6cded92292ef3bace063619038eb1.ssl.cf2.rackcdn.com/images_TechSupportArticlePix_8189Image4.jpg" rel="nofollow noreferrer noopener ugc" target="_blank"> <img class="embedImage-img" src="https://60a99bedadae98078522-a9b6cded92292ef3bace063619038eb1.ssl.cf2.rackcdn.com/images_TechSupportArticlePix_8189Image4.jpg" alt="Tenda Advanced Setup, Wireless" height="180" width="320" loading="lazy"></img></a> </div> </div> <p></p><p><br></p><p>5. Click on <strong>Basic</strong> from the menu on the left.</p><div class="embedExternal embedImage display-large float-none"> <div class="embedExternal-content"> <a class="embedImage-link" href="https://60a99bedadae98078522-a9b6cded92292ef3bace063619038eb1.ssl.cf2.rackcdn.com/images_TechSupportArticlePix_8189Image5.jpg" rel="nofollow noreferrer noopener ugc" target="_blank"> <img class="embedImage-img" src="https://60a99bedadae98078522-a9b6cded92292ef3bace063619038eb1.ssl.cf2.rackcdn.com/images_TechSupportArticlePix_8189Image5.jpg" alt="Tenda Wireless Setup, Basic" height="180" width="320" loading="lazy"></img></a> </div> </div> <p></p><p><br></p><p>
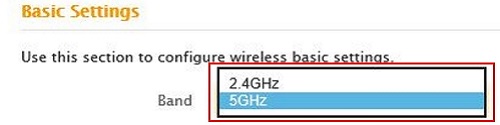
6. Click on the drop down menu next to band and choose which band to configure. You have <strong>5GHz</strong> and <strong>2.4GHz </strong>options available.</p><div class="embedExternal embedImage display-large float-none"> <div class="embedExternal-content"> <a class="embedImage-link" href="https://60a99bedadae98078522-a9b6cded92292ef3bace063619038eb1.ssl.cf2.rackcdn.com/images_TechSupportArticlePix_8189Image6.jpg" rel="nofollow noreferrer noopener ugc" target="_blank"> <img class="embedImage-img" src="https://60a99bedadae98078522-a9b6cded92292ef3bace063619038eb1.ssl.cf2.rackcdn.com/images_TechSupportArticlePix_8189Image6.jpg" alt="Tenda Wireless Basic Setup, Configure" height="180" width="320" loading="lazy"></img></a> </div> </div> <p></p><p><br></p><p>7. The 5GHz and 2.4GHz Wireless checkboxes are to <strong>Enable or Disable </strong>the selected band.</p><div class="embedExternal embedImage display-large float-none"> <div class="embedExternal-content"> <a class="embedImage-link" href="https://60a99bedadae98078522-a9b6cded92292ef3bace063619038eb1.ssl.cf2.rackcdn.com/images_TechSupportArticlePix_8189Image7.jpg" rel="nofollow noreferrer noopener ugc" target="_blank"> <img class="embedImage-img" src="https://60a99bedadae98078522-a9b6cded92292ef3bace063619038eb1.ssl.cf2.rackcdn.com/images_TechSupportArticlePix_8189Image7.jpg" alt="Tenda Wireless Basic Setup, Configure" height="180" width="320" loading="lazy"></img></a> </div> </div> <p></p><p><br></p><p>8. In the country drop down box, select your current <strong>country</strong>.</p><div class="embedExternal embedImage display-large float-none"> <div class="embedExternal-content"> <a class="embedImage-link" href="https://60a99bedadae98078522-a9b6cded92292ef3bace063619038eb1.ssl.cf2.rackcdn.com/images_TechSupportArticlePix_8189Image8.jpg" rel="nofollow noreferrer noopener ugc" target="_blank"> <img class="embedImage-img" src="https://60a99bedadae98078522-a9b6cded92292ef3bace063619038eb1.ssl.cf2.rackcdn.com/images_TechSupportArticlePix_8189Image8.jpg" alt="Tenda Wireless Basic Setup, Configure" height="180" width="320" loading="lazy"></img></a> </div> </div> <p></p><p><br></p><p>9.) Next you can <strong>Enable or Disable SSID Broadcast.</strong></p><p>If enabled, causes your network to show up<strong> </strong>as a network on all wireless devices in range. Having this enabled will make connecting to the network easier. Having it disabled will have your network hidden and therefore more secure but you will need to configure the wireless on each new device that you wish to connect.</p><div class="embedExternal embedImage display-large float-none"> <div class="embedExternal-content"> <a class="embedImage-link" href="https://60a99bedadae98078522-a9b6cded92292ef3bace063619038eb1.ssl.cf2.rackcdn.com/images_TechSupportArticlePix_8189Image9.jpg" rel="nofollow noreferrer noopener ugc" target="_blank"> <img class="embedImage-img" src="https://60a99bedadae98078522-a9b6cded92292ef3bace063619038eb1.ssl.cf2.rackcdn.com/images_TechSupportArticlePix_8189Image9.jpg" alt="Tenda Wireless Basic Setup, Configure" height="180" width="320" loading="lazy"></img></a> </div> </div> <p></p><p><br></p><p>10. In the SSID field, type in what you want the name of your network to be.</p><div class="embedExternal embedImage display-large float-none"> <div class="embedExternal-content"> <a class="embedImage-link" href="https://60a99bedadae98078522-a9b6cded92292ef3bace063619038eb1.ssl.cf2.rackcdn.com/images_TechSupportArticlePix_8189Image10.jpg" rel="nofollow noreferrer noopener ugc" target="_blank"> <img class="embedImage-img" src="https://60a99bedadae98078522-a9b6cded92292ef3bace063619038eb1.ssl.cf2.rackcdn.com/images_TechSupportArticlePix_8189Image10.jpg" alt="Tenda Wireless Basic Setup, Configure" height="180" width="320" loading="lazy"></img></a> </div> </div> <p></p><p><br></p><p>
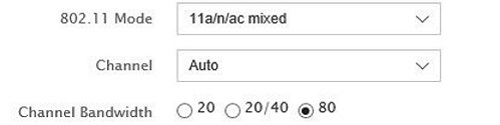
11. Next you can select settings for 802.11 mode, Channel, and Channel Bandwidth but the default settings of <strong>11a/n/ac mixed, Auto and 80</strong> are recommended to use.</p><div class="embedExternal embedImage display-large float-none"> <div class="embedExternal-content"> <a class="embedImage-link" href="https://60a99bedadae98078522-a9b6cded92292ef3bace063619038eb1.ssl.cf2.rackcdn.com/images_TechSupportArticlePix_8189Image11.jpg" rel="nofollow noreferrer noopener ugc" target="_blank"> <img class="embedImage-img" src="https://60a99bedadae98078522-a9b6cded92292ef3bace063619038eb1.ssl.cf2.rackcdn.com/images_TechSupportArticlePix_8189Image11.jpg" alt="Tenda Wireless Basic Setup, Configure" height="180" width="320" loading="lazy"></img></a> </div> </div> <p></p><p><br></p><p>12. Once everything is configured, click on <strong>Save </strong>to finish setup.</p><div class="embedExternal embedImage display-large float-none"> <div class="embedExternal-content"> <a class="embedImage-link" href="https://60a99bedadae98078522-a9b6cded92292ef3bace063619038eb1.ssl.cf2.rackcdn.com/images_TechSupportArticlePix_8189Image12.jpg" rel="nofollow noreferrer noopener ugc" target="_blank"> <img class="embedImage-img" src="https://60a99bedadae98078522-a9b6cded92292ef3bace063619038eb1.ssl.cf2.rackcdn.com/images_TechSupportArticlePix_8189Image12.jpg" alt="Save Changes" height="180" width="320" loading="lazy"></img></a> </div> </div> <p><br></p> </article> </main>