This article will show you how to how to use Diskpart while installing a fresh installation of Windows 10. This is helpful if your drive is not showing up in the Windows installation partition screen and you cannot format it in any other way. This type of situation can also come up when trying to do a clean installation on a working drive that has been previously used with different formatting than is currently being used. This tool offers a way to work around this type of situation.
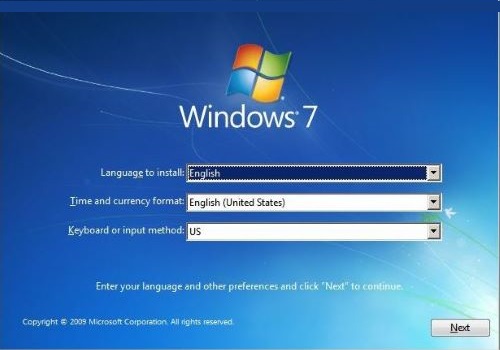
1. On the Windows installation screen, hold down Shift + F10 on the keyboard to bring up the command prompt window. In this example, you see a Windows 7 installation screen, but this process is the same for Windows 7, Windows 8, and Windows 10 to date.
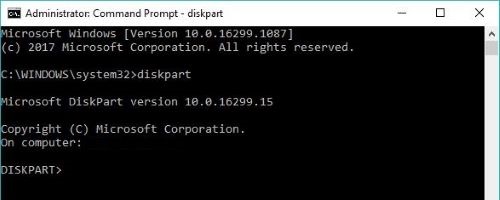
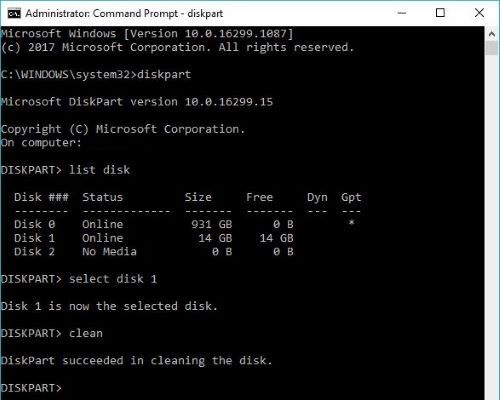
2. Type diskpart and then press Enter on the keyboard.
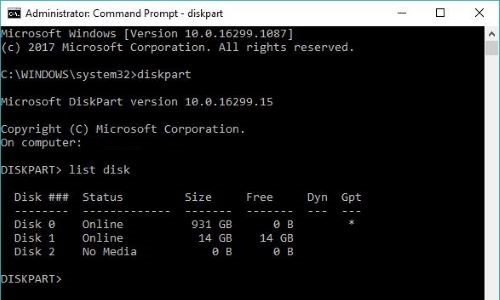
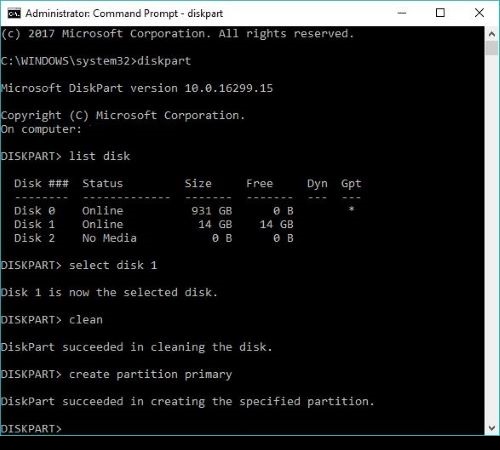
3. Type list disk and then press enter on the keyboard. This will show a list of numbered drives in the system starting at 0. Carefully check for the disk number that is to be cleaned.
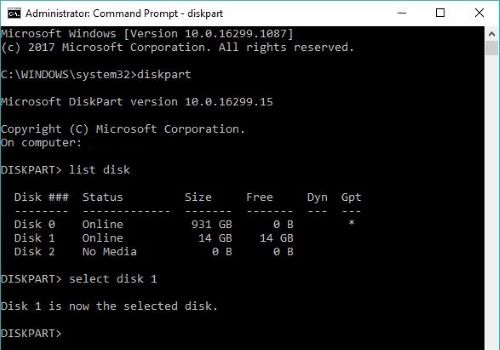
4. Type select disk followed by the number of the drive that is to be cleaned and then press Enter on the keyboard - example: select disk 1 .
There will be a confirmation message stating it is now the selected disk. Double check to be sure that this is the drive intended to be cleaned - a mistake at this point could easily wipe the wrong partition from the drive.
5. Type clean and press enter on the keyboard. This will completely remove any data or formatting on the drive.
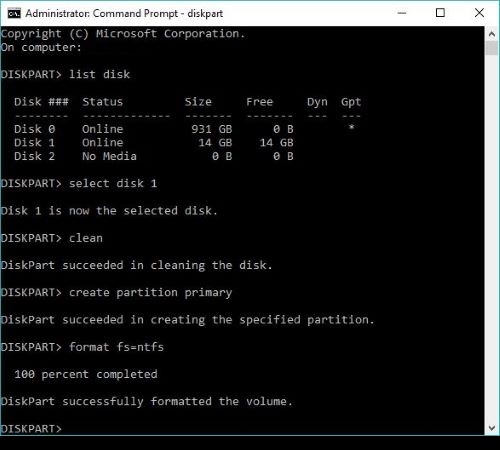
6. Type create partition primary and then press enter on the keyboard. This will add a partition to the drive and make it accessible.
7. Format the drive by typing format fs= followed by the file system you want to use. Current Windows computers use NTFS, other devices typically use either FAT32 or exFAT.
Example: format fs=ntfs .
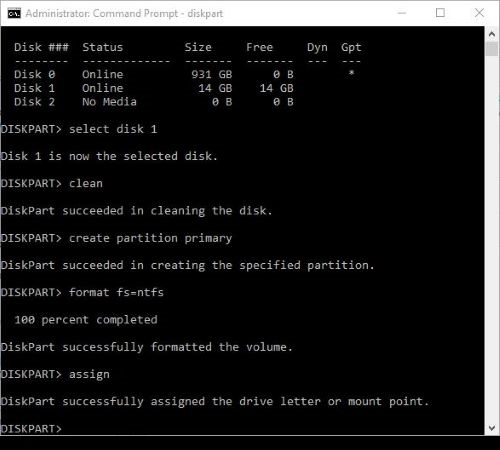
8. Type assign and then press enter on the keyboard to assign a drive letter.
The drive will now show up with a drive letter.
9. Type Exit and press Enter on the keyboard.
Your drive is now ready to use for installation.