This article will show how to turn your Tenda W316R into a Wireless Range Extender.
Here is how to do this:
1. To begin, log into your router by entering 192.168.0.1 into your browser address bar and then press Enter on your keyboard.
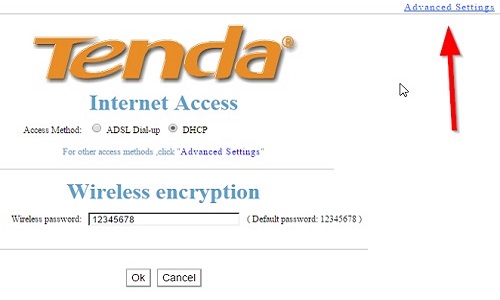
2. Click Advanced Settings in the upper right.
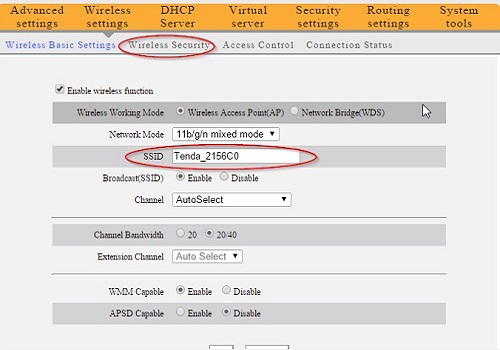
3. Go to Wireless Settings.
4. Change the SSID, security key, and channel to match your main router. If you are not sure how to do this, please reference our articles on changing the network name and security key. The key can be changed from the Wireless Security tab.
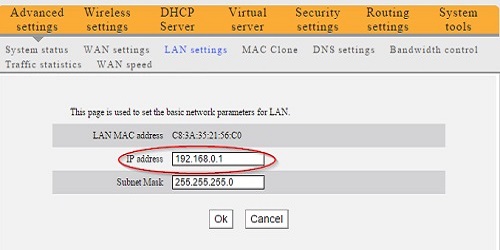
5. Click Advanced Settings and then go to the LAN Settings tab.
6. You must change the router's IP address to something else, so the two routers do not conflict. Keep the same range, but change the last set of digits to something between 1 and 100. For example: 192.168.0.15.
7. Go to System Tools, then Reboot the Router and click Reboot the router.
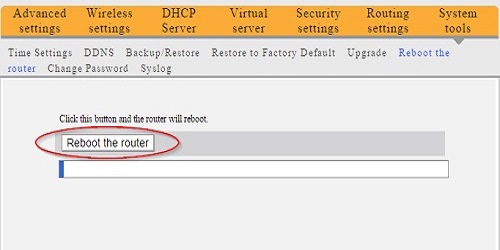
8. Wait at least 30 seconds while the router reboots.
9. Go back into the router settings (see step 1 above) and navigate to DHCP Server.
10. Uncheck the box for DHCP Server Enable.
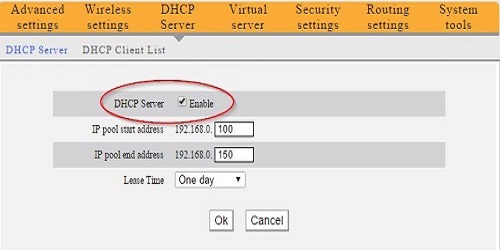
11. Click on OK.
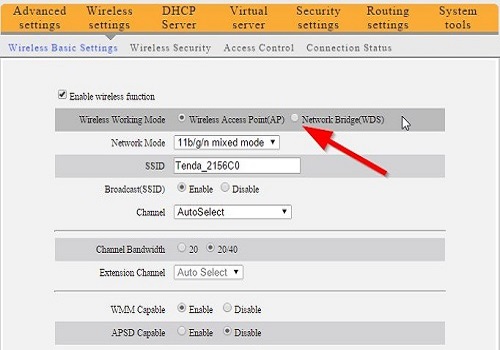
12. Click on Wireless Settings.
13. Click the radio button for Network Bridge(WDS).
14. Click Open Scan. Please note it will take up to 30 seconds to populate.
15. Select your main router by selecting the radio button next to it.
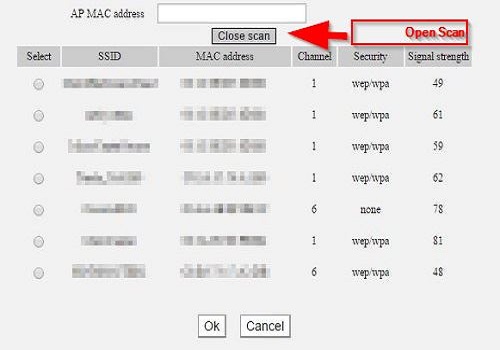
16. It will ask you if you want to connect to this AP. Click OK.