This article will show how to change the network security key on the Tenda F303 wireless router. If you have forgotten or do not know your Wi-Fi password you will need to connect to the router via an Ethernet cable in order to reset it.
Here is how to change the network security key:
1. In your browser, enter the following in the address bar: 192.168.0.1 and then press enter.
2. After doing this, you will be taken to the Connection Setup screen. (pictured below) On this screen you will be prompted to set a password. Type the password you would like in the Security Key field and choose OK.
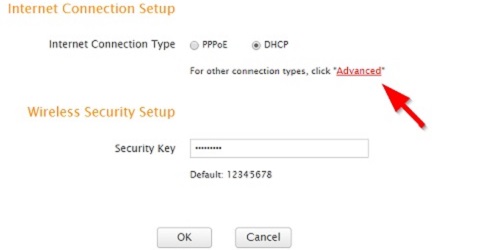
3. If you are not prompted or need to alter more settings, click Advanced.
4. Once in the Advanced section, select the Wireless tab at the top, then change the wireless password under the Wireless Security tab.
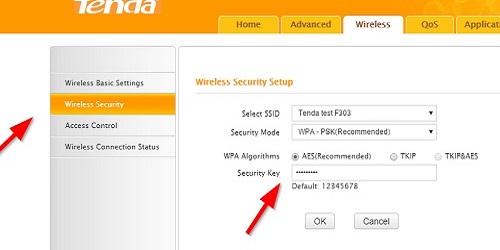
5. Click on OK to save any changes.