Computers
Computer Parts
Custom PC Builder
DIY/ Maker
{$smarty.capture.menu}
Activity
Categories
Discussions
Computers
Computer Parts
Custom PC Builder
DIY/ Maker
How to mount an Intel D34010WYK NUC to a Monitor - Micro Center
<main> <article class="userContent"> <p>The NUC (Next Unit of Computing) is an ultra-compact 4 X 4 powerful full featured machine that weighs less than 18 ounces. These systems come barebones. To be fully functional you will need to add an SSD drive, RAM and a wireless card. These are small enough to be mounted on the back of a monitor using standard VESA mounts. Mounting bracket is included. This article will show you how to mount this unit to a monitor.</p><p><strong>NOTE: While this model is no longer sold by Micro Center or the manufacturer, this information may still be useful to those using this model of computer.</strong></p><p><br></p><p>
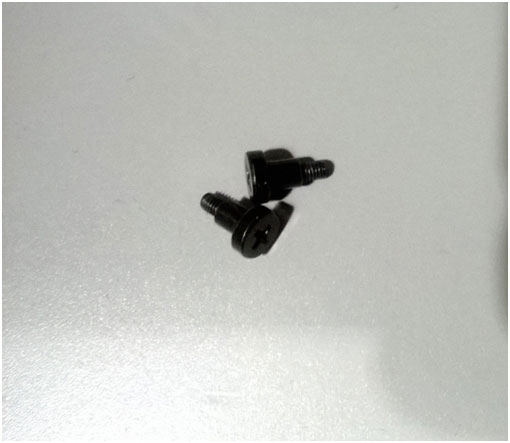
1. The first step is to locate the mounting screws in the accessories bag.</p><div class="embedExternal embedImage display-large float-none"> <div class="embedExternal-content"> <a class="embedImage-link" href="https://60a99bedadae98078522-a9b6cded92292ef3bace063619038eb1.ssl.cf2.rackcdn.com/images_TechSupportArticlePix_7687Image1.jpg" rel="nofollow noreferrer noopener ugc" target="_blank"> <img class="embedImage-img" src="https://60a99bedadae98078522-a9b6cded92292ef3bace063619038eb1.ssl.cf2.rackcdn.com/images_TechSupportArticlePix_7687Image1.jpg" alt="Intel NUC Mounting Screws" height="180" width="320" loading="lazy"></img></a> </div> </div> <p></p><p><br></p><p>
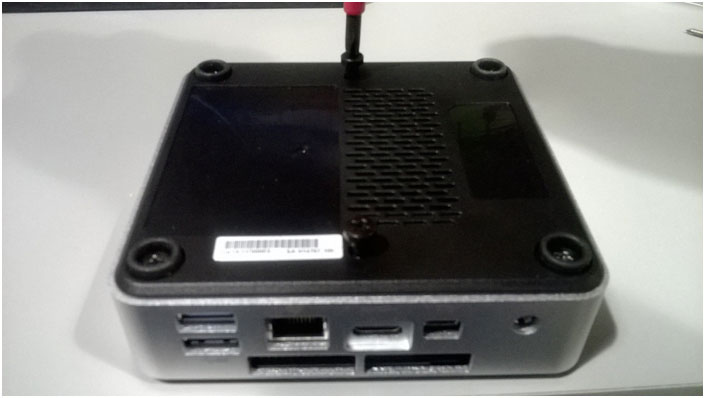
2. Mount the screws into the back of the NUC as shown below.</p><div class="embedExternal embedImage display-large float-none"> <div class="embedExternal-content"> <a class="embedImage-link" href="https://60a99bedadae98078522-a9b6cded92292ef3bace063619038eb1.ssl.cf2.rackcdn.com/images_TechSupportArticlePix_7687Image2.jpg" rel="nofollow noreferrer noopener ugc" target="_blank"> <img class="embedImage-img" src="https://60a99bedadae98078522-a9b6cded92292ef3bace063619038eb1.ssl.cf2.rackcdn.com/images_TechSupportArticlePix_7687Image2.jpg" alt="Bottom View Intel NUC, Mounting Screw Install" height="180" width="320" loading="lazy"></img></a> </div> </div> <p></p><p><br></p><p>
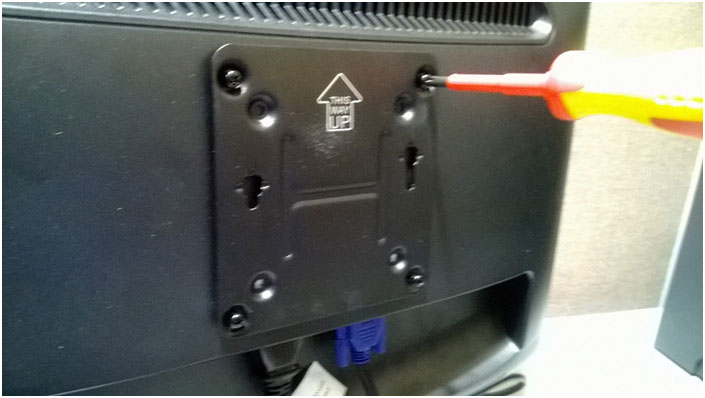
3. Locate the VESA mounting holes on the back of your monitor.</p><div class="embedExternal embedImage display-large float-none"> <div class="embedExternal-content"> <a class="embedImage-link" href="https://60a99bedadae98078522-a9b6cded92292ef3bace063619038eb1.ssl.cf2.rackcdn.com/images_TechSupportArticlePix_7687Image3.jpg" rel="nofollow noreferrer noopener ugc" target="_blank"> <img class="embedImage-img" src="https://60a99bedadae98078522-a9b6cded92292ef3bace063619038eb1.ssl.cf2.rackcdn.com/images_TechSupportArticlePix_7687Image3.jpg" alt="VESA Mounts on Back of Monitor" height="180" width="320" loading="lazy"></img></a> </div> </div> <p></p><p><br></p><p>
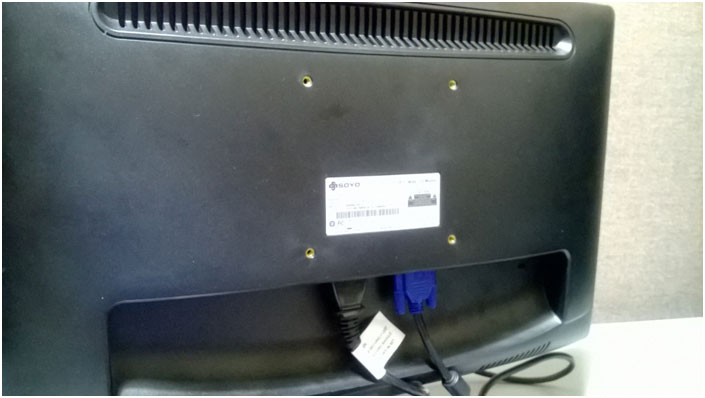
4. Attach the mounting bracket (included) to the back of the monitor as shown. Taking care to mount with the arrow facing up.</p><div class="embedExternal embedImage display-large float-none"> <div class="embedExternal-content"> <a class="embedImage-link" href="https://60a99bedadae98078522-a9b6cded92292ef3bace063619038eb1.ssl.cf2.rackcdn.com/images_TechSupportArticlePix_7687Image4.jpg" rel="nofollow noreferrer noopener ugc" target="_blank"> <img class="embedImage-img" src="https://60a99bedadae98078522-a9b6cded92292ef3bace063619038eb1.ssl.cf2.rackcdn.com/images_TechSupportArticlePix_7687Image4.jpg" alt="Intel NUC Bracket Attached to VESA Mounts" height="180" width="320" loading="lazy"></img></a> </div> </div> <p></p><p><br></p><p>
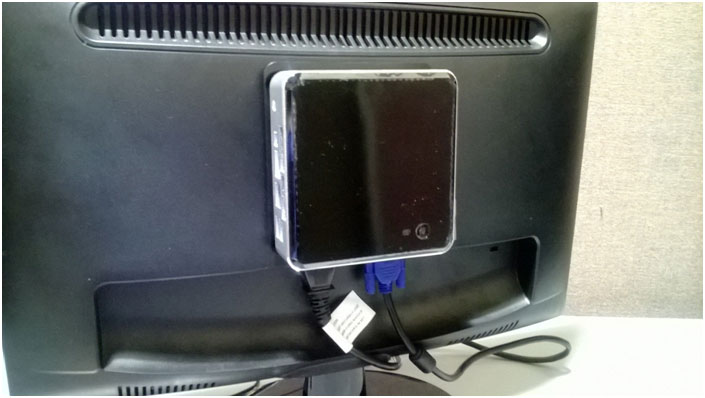
5. Insert the NUC with the mounting screws into the holes and push down firmly.</p><div class="embedExternal embedImage display-large float-none"> <div class="embedExternal-content"> <a class="embedImage-link" href="https://60a99bedadae98078522-a9b6cded92292ef3bace063619038eb1.ssl.cf2.rackcdn.com/images_TechSupportArticlePix_7687Image5.jpg" rel="nofollow noreferrer noopener ugc" target="_blank"> <img class="embedImage-img" src="https://60a99bedadae98078522-a9b6cded92292ef3bace063619038eb1.ssl.cf2.rackcdn.com/images_TechSupportArticlePix_7687Image5.jpg" alt="Intel NUC Insert to Bracket" height="180" width="320" loading="lazy"></img></a> </div> </div> <p></p><p><br></p><p>
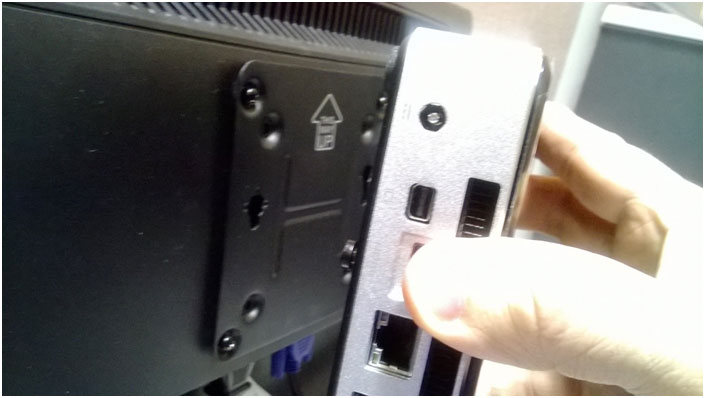
6. The NUC is now mounted unto the monitor. The NUC unit will now take up little space more than the monitor alone would.</p><div class="embedExternal embedImage display-large float-none"> <div class="embedExternal-content"> <a class="embedImage-link" href="https://60a99bedadae98078522-a9b6cded92292ef3bace063619038eb1.ssl.cf2.rackcdn.com/images_TechSupportArticlePix_7687Image6.jpg" rel="nofollow noreferrer noopener ugc" target="_blank"> <img class="embedImage-img" src="https://60a99bedadae98078522-a9b6cded92292ef3bace063619038eb1.ssl.cf2.rackcdn.com/images_TechSupportArticlePix_7687Image6.jpg" alt="Intel NUC Mounted on Monitor" height="180" width="320" loading="lazy"></img></a> </div> </div> <p><br></p> </article> </main>