This article will show you how to setup WPS (Wi-Fi Protected Setup) for either Push Button Connect mode or PIN mode, allowing devices to connect without entering the network's password.
1. First, we need to access the router's configuration page. This can be done by opening an internet browser window, such as Internet Explorer, Firefox, or Chrome. Next, enter 192.168.0.1 into the address bar at the top.
2. Login to the router. This can be done on a new router by using admin as both the username and password.
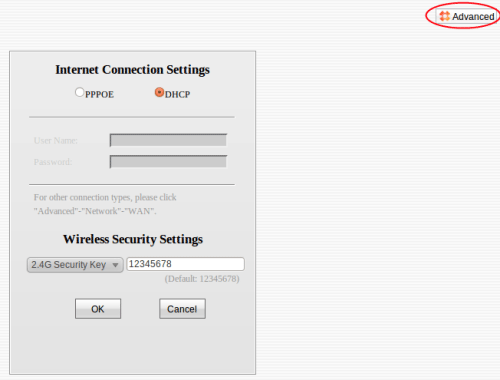
3. Once logged in, the main screen, shown below, will appear. Click on Advanced in the upper-right.
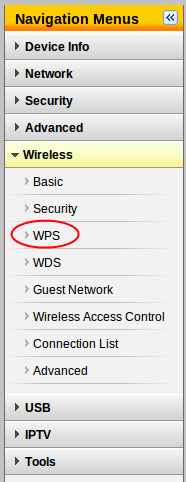
4. Once logged in, open the Wireless menu and click on WPS.
5. WPS is disabled by default. In order to enable it, simply switch the selected radio button to Enable. Once WPS is enabled, another option for WPS Mode will appear. This can be set to PBC or PIN. PBC mode allows devices to connect using the physical WPS/Reset button on the back of the router instead of typing in the network password. Pin mode allows devices to enter a pre-defined PIN instead of the network password. The Reset OOB button will reset all of the settings on the current band (2.4 or 5GHz) to factory defaults.
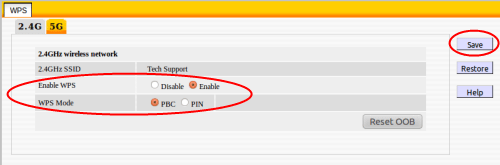
6. If physical access to the device is possible for most users, then PBC is the recommended setting. Otherwise, a PIN may be set for the router that can be used for WPS connections. Once the settings are selected, click on the Save button in the upper right.
7. By clicking on the 5G tab at the top, WPS may also be configured for the 5GHz band of the router. The steps for this process are the same as for the 2.4GHz band.