This article will show how to configure the P2P settings on a WinBook D5008DH DVR. By default P2P is enabled and preconfigured, and should only be changed if there is a necessary reason to do so.
Here is how to do that:
1. Right click on the preview screen and select Main Menu.

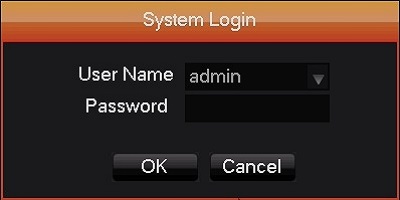
2. Select the admin username, enter the password and click OK. The default password for the account is 123456 if you have not previously changed it. NOTE: This prompt may not show if you are already logged in. Proceed to the next step once logged in.
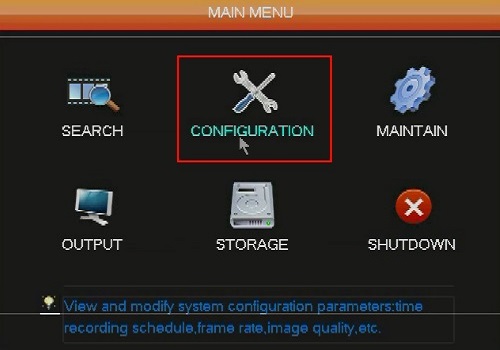
3. Click on Configuration.
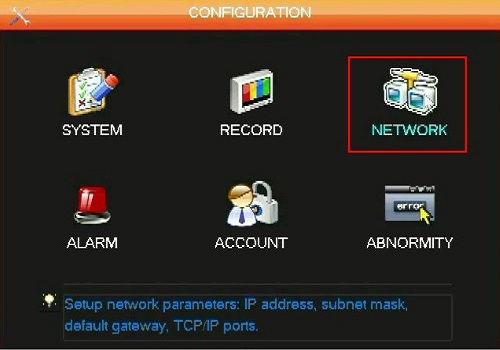
4. Click on Network.
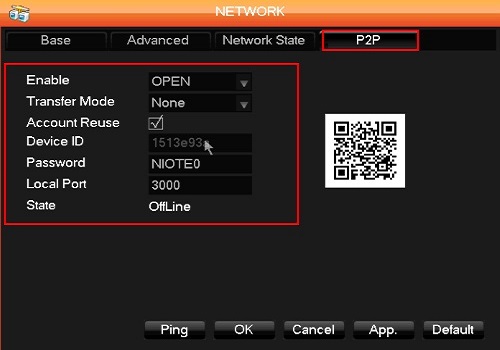
5. Select the P2P Tab and change the settings below as needed:
State: Online status of DVR
Local Port: TCP Port for P2P
Password: Security
Device ID: Not changeable
Account Reuse: If enabled multiple devices can access DVR through P2P
Transfer Mode: Fluency for faster video and Latency for higher quality
Enable: Enable or Disable P2P