Computers
Computer Parts
Custom PC Builder
DIY/ Maker
{$smarty.capture.menu}
Activity
Categories
Discussions
Computers
Computer Parts
Custom PC Builder
DIY/ Maker
How to enable Bandwidth Control on a Tenda AC15 Router - Micro Center
<main> <article class="userContent"> <p>This article will show how to enable bandwidth control for devices connected to the Tenda AC15 AC1900 router.</p><p>Here is how to do this:</p><p>1. First, to change the settings of the router, connect to the router by going to its default address: <strong>192.168.1.1</strong>. Here the default router password will be needed to sign in to change settings.</p><div class="embedExternal embedImage display-large float-none"> <div class="embedExternal-content"> <a class="embedImage-link" href="https://60a99bedadae98078522-a9b6cded92292ef3bace063619038eb1.ssl.cf2.rackcdn.com/images_TechSupportArticlePix_8677Image1.jpg" rel="nofollow noreferrer noopener ugc" target="_blank"> <img class="embedImage-img" src="https://60a99bedadae98078522-a9b6cded92292ef3bace063619038eb1.ssl.cf2.rackcdn.com/images_TechSupportArticlePix_8677Image1.jpg" alt="Browser Address Bar" height="180" width="320" loading="lazy"></img></a> </div> </div> <p></p><p><br></p><p>
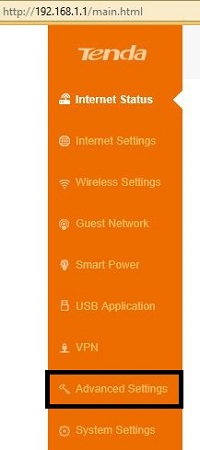
2. Once signed in on the router, on the left side, there will be a menu. Select <strong>Advanced Settings</strong>.</p><div class="embedExternal embedImage display-large float-none"> <div class="embedExternal-content"> <a class="embedImage-link" href="https://60a99bedadae98078522-a9b6cded92292ef3bace063619038eb1.ssl.cf2.rackcdn.com/images_TechSupportArticlePix_8677Image2.jpg" rel="nofollow noreferrer noopener ugc" target="_blank"> <img class="embedImage-img" src="https://60a99bedadae98078522-a9b6cded92292ef3bace063619038eb1.ssl.cf2.rackcdn.com/images_TechSupportArticlePix_8677Image2.jpg" alt="Tenda Router Menu, Internet Status" height="180" width="320" loading="lazy"></img></a> </div> </div> <p></p><p><br></p><p>
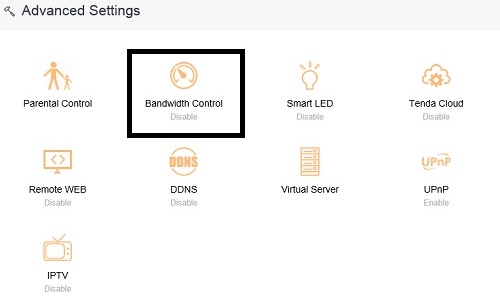
3. Once Advanced Settings is selected, new options to the right will appear. Select <strong>Bandwidth Control</strong>.</p><div class="embedExternal embedImage display-large float-none"> <div class="embedExternal-content"> <a class="embedImage-link" href="https://60a99bedadae98078522-a9b6cded92292ef3bace063619038eb1.ssl.cf2.rackcdn.com/images_TechSupportArticlePix_8677Image3.jpg" rel="nofollow noreferrer noopener ugc" target="_blank"> <img class="embedImage-img" src="https://60a99bedadae98078522-a9b6cded92292ef3bace063619038eb1.ssl.cf2.rackcdn.com/images_TechSupportArticlePix_8677Image3.jpg" alt="Tenda Internet Status, Bandwidth Control" height="180" width="320" loading="lazy"></img></a> </div> </div> <p></p><p><br></p><p>
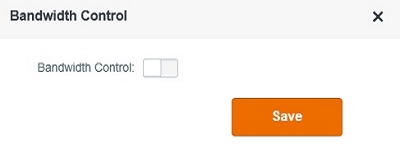
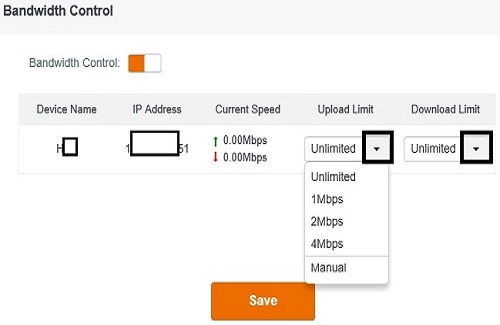
4. By default, Bandwidth Control will be slid to the left on the options screen, which means it is Off. <strong>Click on the right side to turn it on</strong> and more options will appear below.</p><div class="embedExternal embedImage display-large float-none"> <div class="embedExternal-content"> <a class="embedImage-link" href="https://60a99bedadae98078522-a9b6cded92292ef3bace063619038eb1.ssl.cf2.rackcdn.com/images_TechSupportArticlePix_8677Image4.jpg" rel="nofollow noreferrer noopener ugc" target="_blank"> <img class="embedImage-img" src="https://60a99bedadae98078522-a9b6cded92292ef3bace063619038eb1.ssl.cf2.rackcdn.com/images_TechSupportArticlePix_8677Image4.jpg" alt="Tenda Bandwidth Control, Toggle On Off" height="180" width="320" loading="lazy"></img></a> </div> </div> <p></p><p><br></p><p>5. Once turned on, it will show all devices connected to your network.</p><div class="embedExternal embedImage display-large float-none"> <div class="embedExternal-content"> <a class="embedImage-link" href="https://60a99bedadae98078522-a9b6cded92292ef3bace063619038eb1.ssl.cf2.rackcdn.com/images_TechSupportArticlePix_8677Image5.jpg" rel="nofollow noreferrer noopener ugc" target="_blank"> <img class="embedImage-img" src="https://60a99bedadae98078522-a9b6cded92292ef3bace063619038eb1.ssl.cf2.rackcdn.com/images_TechSupportArticlePix_8677Image5.jpg" alt="Tenda Bandwidth Control On, Settings" height="180" width="320" loading="lazy"></img></a> </div> </div> <p></p><p><br></p><p>
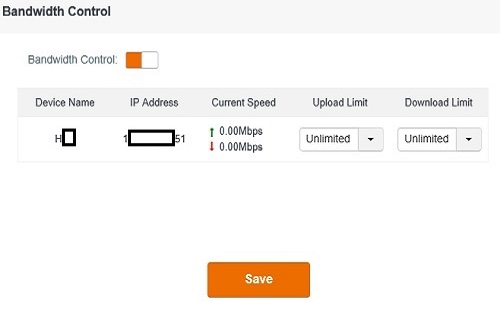
6. Here there are two options for each connected device, which can limit the download and upload speed of specific devices. Clicking on either option will allow this setting to be changed to a preset speed, unlimited, or manually entered.</p><div class="embedExternal embedImage display-large float-none"> <div class="embedExternal-content"> <a class="embedImage-link" href="https://60a99bedadae98078522-a9b6cded92292ef3bace063619038eb1.ssl.cf2.rackcdn.com/images_TechSupportArticlePix_8677Image6.jpg" rel="nofollow noreferrer noopener ugc" target="_blank"> <img class="embedImage-img" src="https://60a99bedadae98078522-a9b6cded92292ef3bace063619038eb1.ssl.cf2.rackcdn.com/images_TechSupportArticlePix_8677Image6.jpg" alt="Tenda Bandwidth Control, Additional Settings" height="180" width="320" loading="lazy"></img></a> </div> </div> <p></p><p><br></p><p>7. Once the settings are updated, choose <strong>Save</strong>. A Saving… window will appear and once finished the new settings will be in place.</p><div class="embedExternal embedImage display-large float-none"> <div class="embedExternal-content"> <a class="embedImage-link" href="https://60a99bedadae98078522-a9b6cded92292ef3bace063619038eb1.ssl.cf2.rackcdn.com/images_TechSupportArticlePix_8677Image7.jpg" rel="nofollow noreferrer noopener ugc" target="_blank"> <img class="embedImage-img" src="https://60a99bedadae98078522-a9b6cded92292ef3bace063619038eb1.ssl.cf2.rackcdn.com/images_TechSupportArticlePix_8677Image7.jpg" alt="Saving Settings" height="180" width="320" loading="lazy"></img></a> </div> </div> <p><br></p> </article> </main>