Computers
Computer Parts
Custom PC Builder
DIY/ Maker
{$smarty.capture.menu}
Activity
Categories
Discussions
Computers
Computer Parts
Custom PC Builder
DIY/ Maker
How to back up the Configuration of a Tenda AC15 Router - Micro Center
<main> <article class="userContent"> <p>This article will show how to back up the router system configuration of a Tenda AC15 AC1900 router.</p><p>Here is how to do this:</p><p>1. To get to the settings of the Tenda AC15 AC1900 to back up the configuration of the router, connect to the router by going to <strong>192.168.1.1</strong> in your browser address bar.</p><div class="embedExternal embedImage display-large float-none"> <div class="embedExternal-content"> <a class="embedImage-link" href="https://60a99bedadae98078522-a9b6cded92292ef3bace063619038eb1.ssl.cf2.rackcdn.com/images_TechSupportArticlePix_8717Image1.jpg" rel="nofollow noreferrer noopener ugc" target="_blank"> <img class="embedImage-img" src="https://60a99bedadae98078522-a9b6cded92292ef3bace063619038eb1.ssl.cf2.rackcdn.com/images_TechSupportArticlePix_8717Image1.jpg" alt="Browser Address Bar" height="180" width="320" loading="lazy"></img></a> </div> </div> <p></p><p><br></p><p>
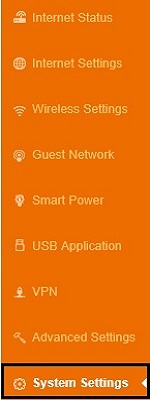
2. Once signed in to the router using the router login password (this may be different from your wireless network security key), from the left, select <strong>System Settings</strong>.</p><div class="embedExternal embedImage display-large float-none"> <div class="embedExternal-content"> <a class="embedImage-link" href="https://60a99bedadae98078522-a9b6cded92292ef3bace063619038eb1.ssl.cf2.rackcdn.com/images_TechSupportArticlePix_8717Image2.jpg" rel="nofollow noreferrer noopener ugc" target="_blank"> <img class="embedImage-img" src="https://60a99bedadae98078522-a9b6cded92292ef3bace063619038eb1.ssl.cf2.rackcdn.com/images_TechSupportArticlePix_8717Image2.jpg" alt="Tenda Router Menu, System Settings" height="180" width="320" loading="lazy"></img></a> </div> </div> <p></p><p><br></p><p>3. The settings to the right of the menu will now update. Select <strong>Backup/Restore</strong>.</p><div class="embedExternal embedImage display-large float-none"> <div class="embedExternal-content"> <a class="embedImage-link" href="https://60a99bedadae98078522-a9b6cded92292ef3bace063619038eb1.ssl.cf2.rackcdn.com/images_TechSupportArticlePix_8717Image3.jpg" rel="nofollow noreferrer noopener ugc" target="_blank"> <img class="embedImage-img" src="https://60a99bedadae98078522-a9b6cded92292ef3bace063619038eb1.ssl.cf2.rackcdn.com/images_TechSupportArticlePix_8717Image3.jpg" alt="Tenda System Settings, Backup and Restore" height="180" width="320" loading="lazy"></img></a> </div> </div> <p></p><p><br></p><p>4. A new screen will appear. Select <strong>Backup</strong> next to where it says <strong>Backup a File</strong>.</p><div class="embedExternal embedImage display-large float-none"> <div class="embedExternal-content"> <a class="embedImage-link" href="https://60a99bedadae98078522-a9b6cded92292ef3bace063619038eb1.ssl.cf2.rackcdn.com/images_TechSupportArticlePix_8717Image4.jpg" rel="nofollow noreferrer noopener ugc" target="_blank"> <img class="embedImage-img" src="https://60a99bedadae98078522-a9b6cded92292ef3bace063619038eb1.ssl.cf2.rackcdn.com/images_TechSupportArticlePix_8717Image4.jpg" alt="Tenda Backup and Restore" height="180" width="320" loading="lazy"></img></a> </div> </div> <p></p><p><br></p><p>
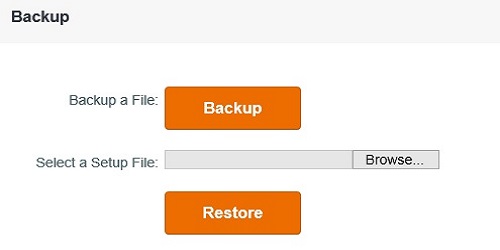
5. A popup will appear once Backup is selected. It will show up verifying that a backup will be made. Choose <strong>OK</strong> to start the backup process.</p><div class="embedExternal embedImage display-large float-none"> <div class="embedExternal-content"> <a class="embedImage-link" href="https://60a99bedadae98078522-a9b6cded92292ef3bace063619038eb1.ssl.cf2.rackcdn.com/images_TechSupportArticlePix_8717Image5.jpg" rel="nofollow noreferrer noopener ugc" target="_blank"> <img class="embedImage-img" src="https://60a99bedadae98078522-a9b6cded92292ef3bace063619038eb1.ssl.cf2.rackcdn.com/images_TechSupportArticlePix_8717Image5.jpg" alt="Confirmation Message from Router" height="180" width="320" loading="lazy"></img></a> </div> </div> <p></p><p><br></p><p>
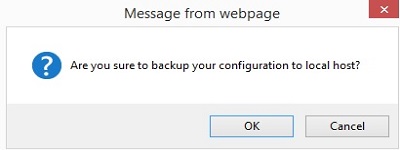
6. Once finished, the browser being used will ask you to save the file to the computer. This will allow a restore of these settings to be done at a later time.</p> </article> </main>