If you have never owned a Windows 10 PC or are just setting up the operating system for the very first time on a new Windows 10 PC, then you may not be used to the new setup process Microsoft has created. Don't worry though! This guide will walk you through it step-by-step.
NOTE: This guide was created using Windows 10 - version 2004.
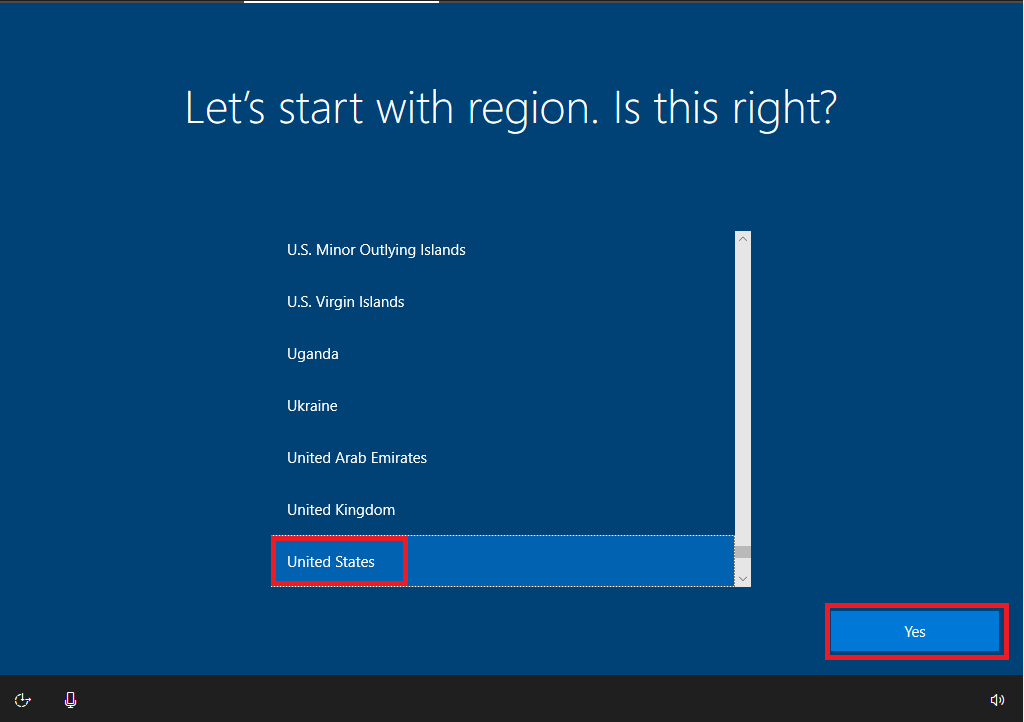
The first thing to do is to select your region. Most of you will want to click United States, then click Yes
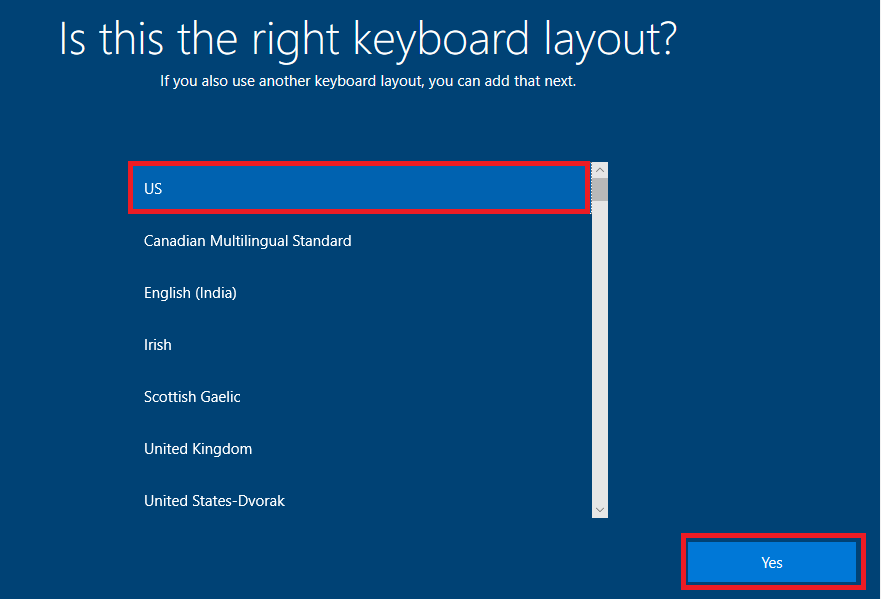
Select your keyboard layout. Click US, then click Yes
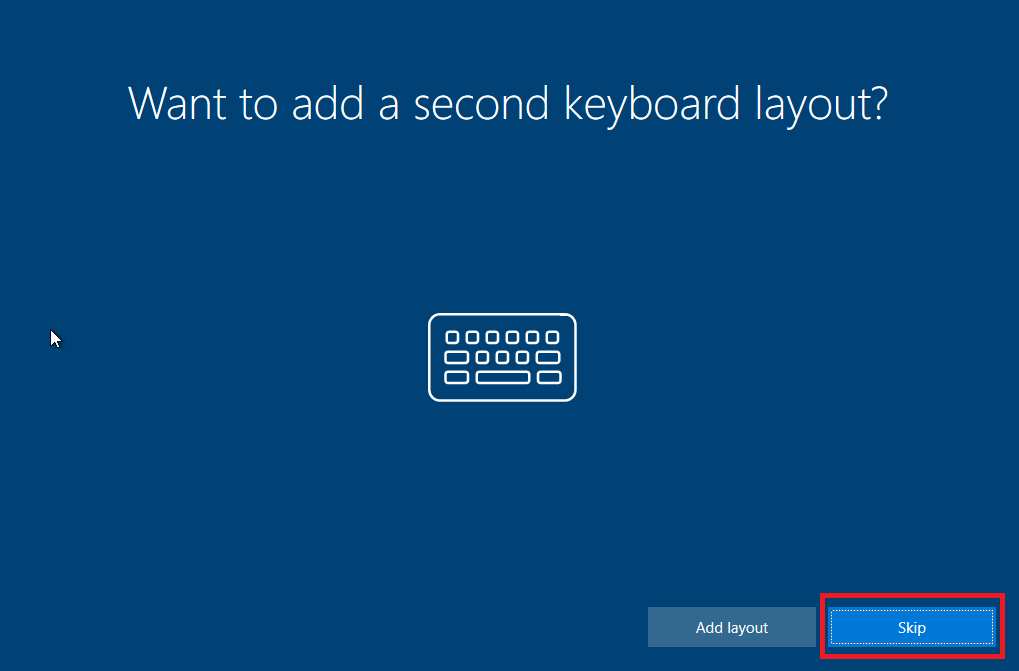
If you want to add a second keyboard layout, you are welcome to do that now. Most users will not need this so you will want to click Skip.
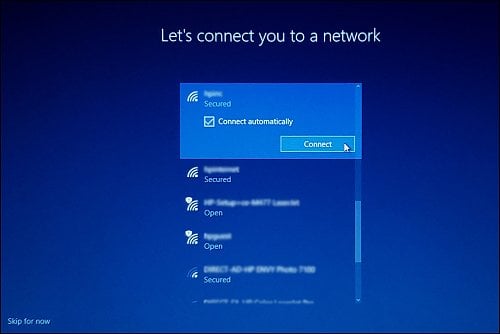
If you plan to connect to the internet through Wi-Fi then you will have the option to do that now. Click on your Wi-Fi network, click connect, enter the password, then click Next.
If you are already connected to the internet with an ethernet cable then Windows will likely skip this step.
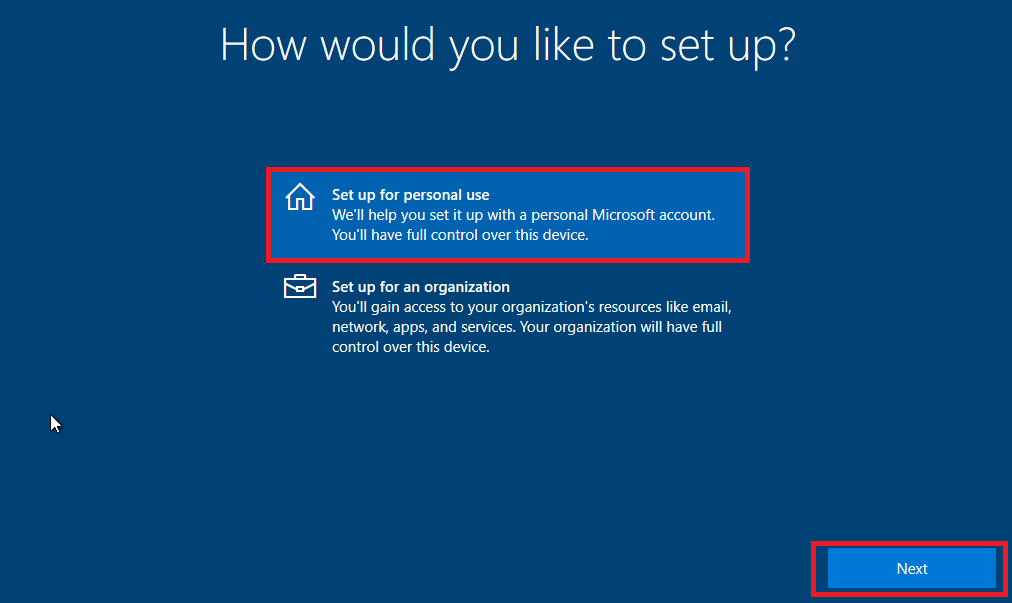
This is an important step. Even if you intend to use the PC for work, you will NOT want to select Set up for an organization unless you are connecting to a domain. Nearly all of you will want to select Set up for personal use, then click Next
You will have a few options here. If you already have a Microsoft account and you know the credentials, then you can enter that here, click Next, then continue to step 6. If you do not have a Microsoft account, then click Create Account. If you do not want to create a Microsoft Account, then click Offline Account.
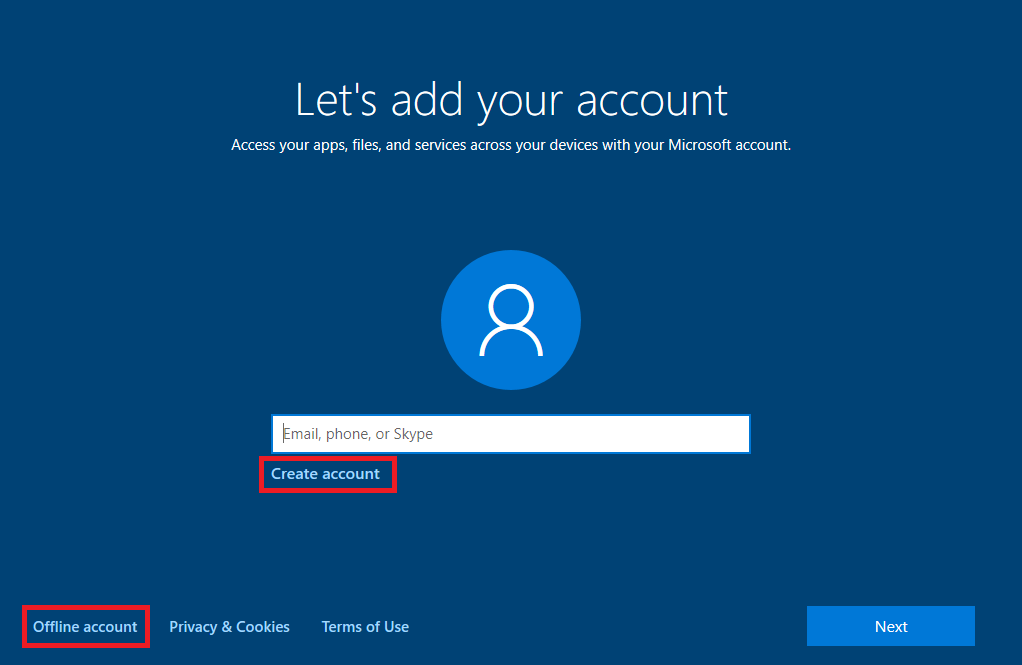
To continue, there are two ways to set up your account, a Microsoft account or an offline account.
Option 1: Setting up Windows 10 with a Microsoft Account
If you wish to create an offline account, please skip over the steps to "Option 2" below.
Type in your email address here or you can click Use a phone number instead and enter that, then click Next

Once you enter the email address or phone number, you will need to create a password. After you enter the password, click Next

Next, you will need to enter your birthdate. Once you click in the box below Birthdate and a drop-down menu will appear. Set the month, the day and the year then you will need to click the Checkmark below this drop-down menu. After you click that checkmark, click Next

Since you are using a Microsoft Account, you must create a PIN. You will then be able to use either the password or your PIN to sign into your PC. On this screen, just click Create PIN

Next, you will need to type the PIN in twice to confirm it (You can include letters and symbols in your PIN by checking the box below, but I do not recommend doing this). Then click OK.

After you created your PIN, you should now see Choose privacy settings for your device.
If you have chosen this option, please skip over the steps for "Option 2"
Option 2: Creating an Offline/Local Account
To set up Windows 10 without a Microsoft account, you can create an Offline or Local account. On this screen, click Offline Account.

Next, click Limited experience in the bottom left corner.

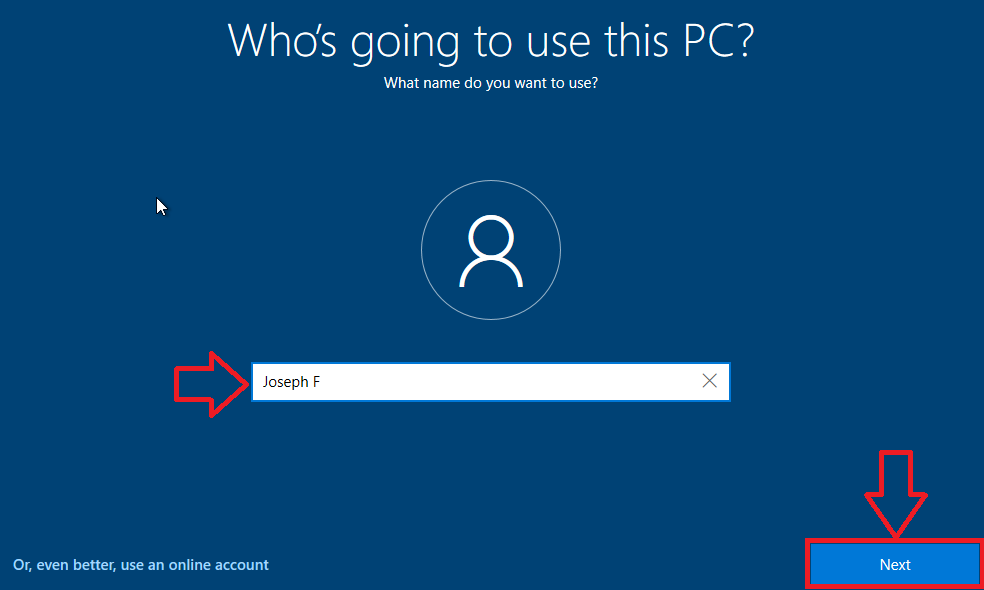
On this next step, you will just need to type in the Username then click Next
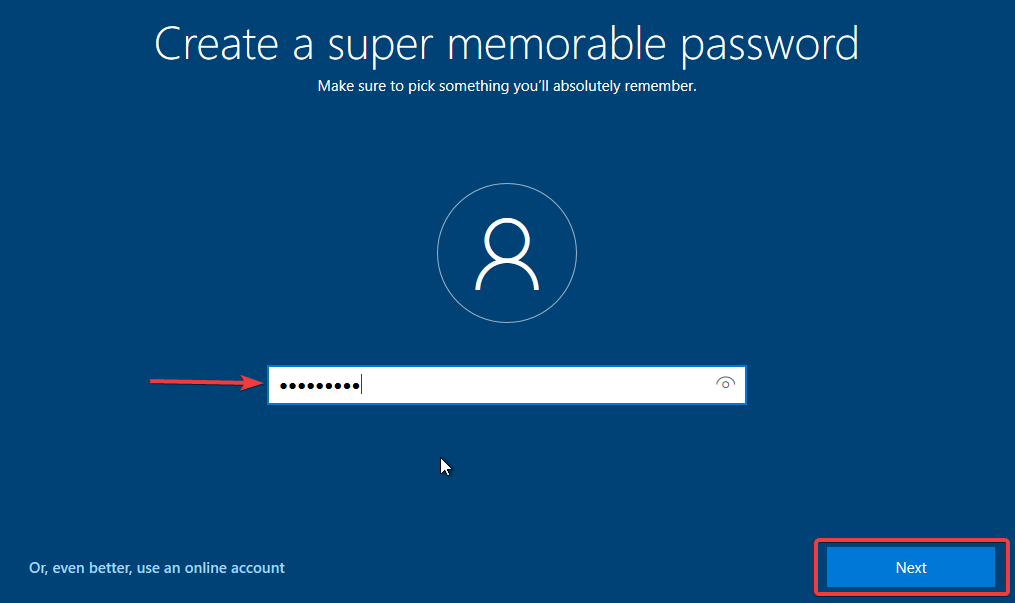
Now, you will need to create a password. Once you type it in, click Next
You will need to type the password again to confirm it. Then click Next

Next, you will have to set up 3 different security questions for the account. Just click the dropdown arrow and enter the answer to the question in the box below. Then click Next and you will be able to set up the next security question.

After setting up the security questions, you should now see Choose privacy settings for your device.
Final Steps: Finish Setting up Windows 10
After you created your PIN, you should now see Choose privacy settings for your device. All of these settings are a matter of personal preference, you can read each one and decide if it is something you will want.
Once you have these set to your preference, click Accept.

Now, you have the option to sync your Windows 10 devices if you have more than one. It is entirely optional so you can click either Yes or No.

Next, Windows will ask you if you want to sync your android phone to your PC. Again, this is an optional feature, so you can type in your phone number and click Next or you can click Do it later in the bottom left corner to opt-out of this feature.

The next screen will ask if you want to set up Cortana. Cortana is a virtual assistant developed by Microsoft (Just like Siri is the virtual assistant on an iPhone). You can click either Accept or Not now

After this, you should see this screen below. If you do, then your Windows 10 PC is now set up! Just wait for Windows to finish setting up your PC and you are good to go. It will take you to the computer's desktop screen with your icons and start menu once completed!
