Windows offers a few different ways to back up your files. The most common choice, especially for those who have an external hard drive, is to use File History. File History is the primary offline data backup tool for Windows 11. It allows you to automatically save data to a drive and restore it. It has some similarities with the Time Machine feature in Mac computers where you will be able to restore multiple previous versions of a document or file if it has accumulated changes over time. For example, on a Word document, that you've had several variations for, with File History you could restore to the first save, or even the third or fourth depending on how far back you need to go.
Setting up File History
Setting up file history is relatively simple; this section of the guide will walk you through Initial setup as well as setting the frequency that file history backs up your files:
Initial setup
1. Click on the Start button, or on the Search on the Taskbar, and type in “Control Panel” then click on it to open it.
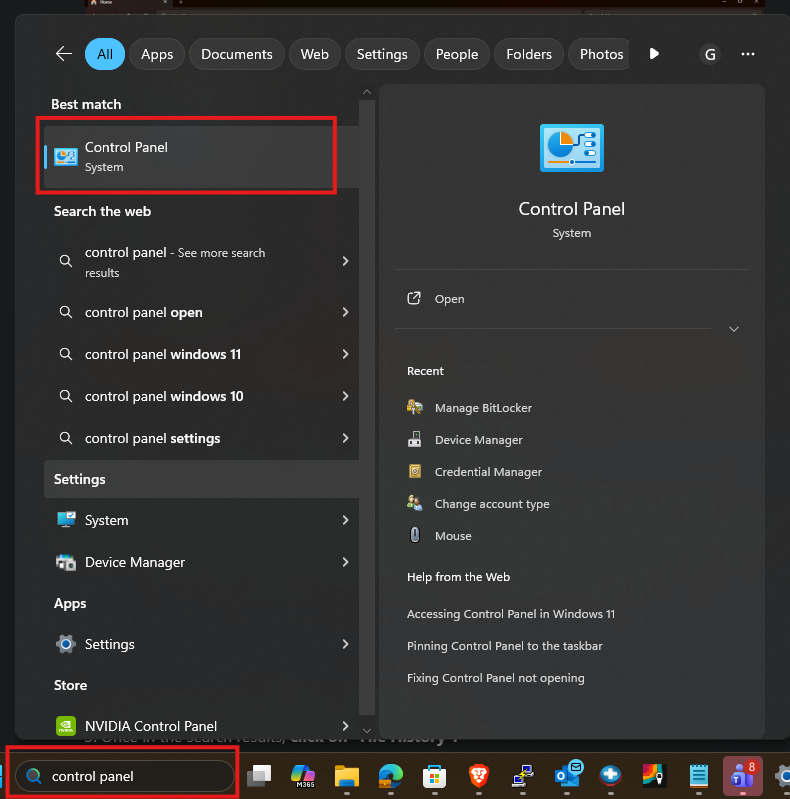
2. Find the search box in the upper right hand corner, click inside it and type in “File History” then press the enter key:

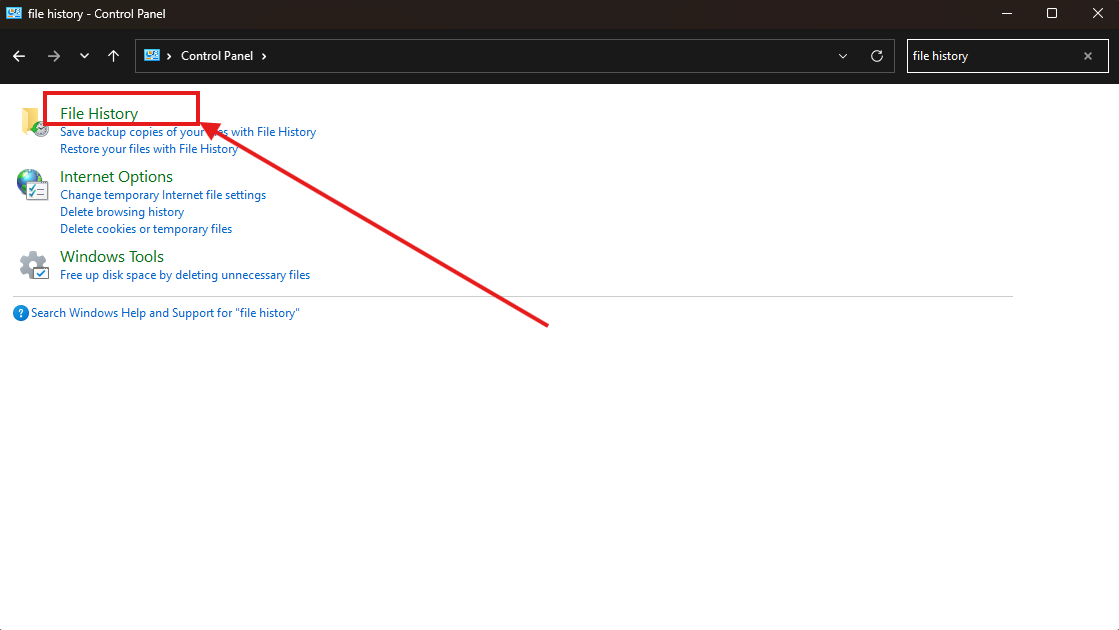
3. Once in the search results, click on “File History”:
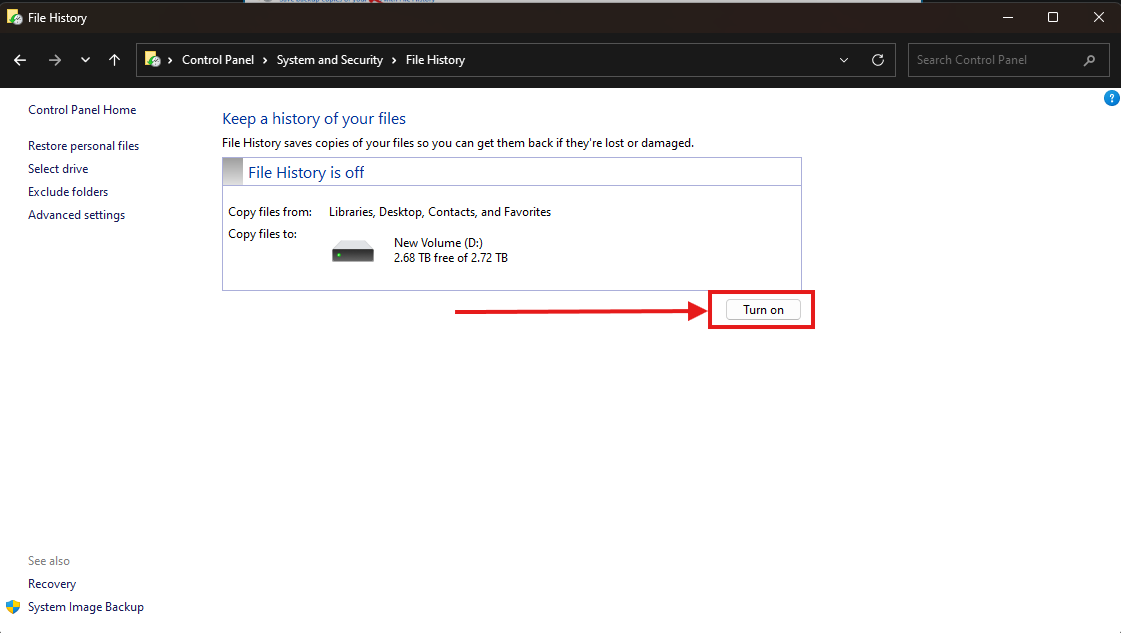
4. Plug in a drive if you have not already (for this example we are using a Hard drive, but you can use any type of external or internal hard drive for this(as long as it's not your C drive) you would like to back up your files to and then click on “Turn on”:
Changing the frequency that file history backs up
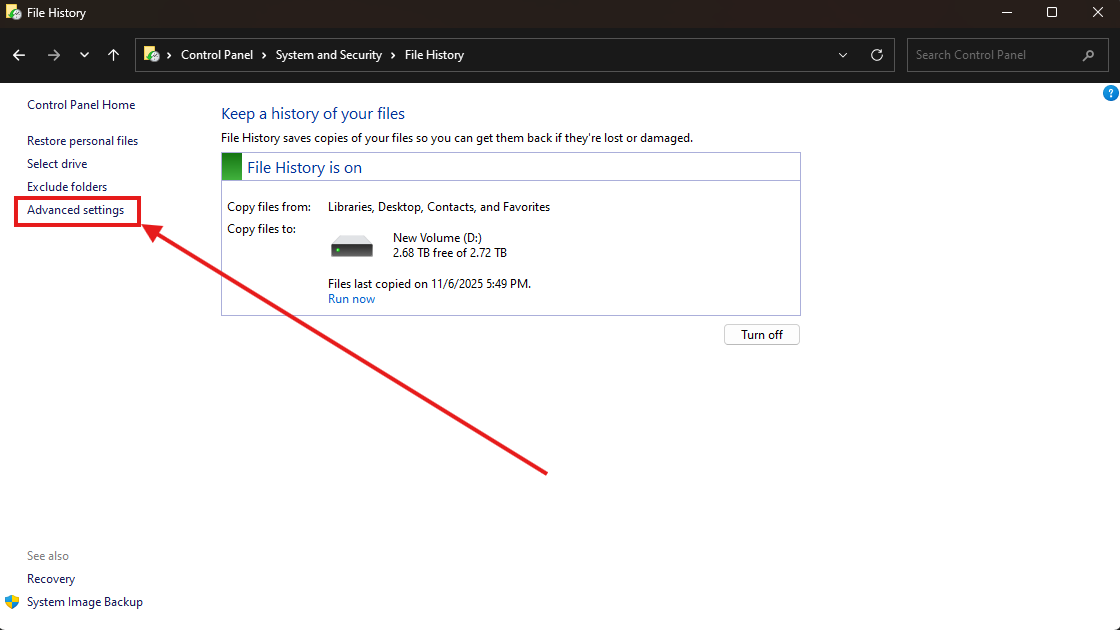
1. To change the frequency file history saves and deletes your files, you can go to the main page here and click on Advanced settings:
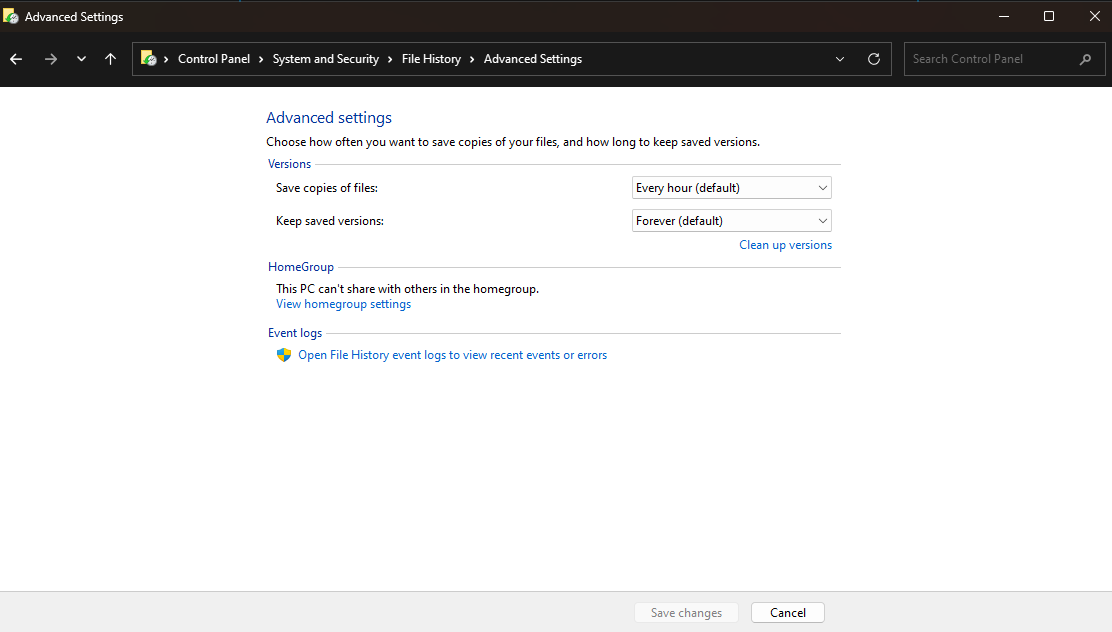
2. In Advanced settings you will see two drop down menus, one determining how often it will copy files, and the other determining how long to keep saved copies, set these how you prefer:
Restoring files
There are several ways you can restore your files using File History, this section will go over restoring everything, restoring individual files, and restoring folders:
Restoring everything backed up
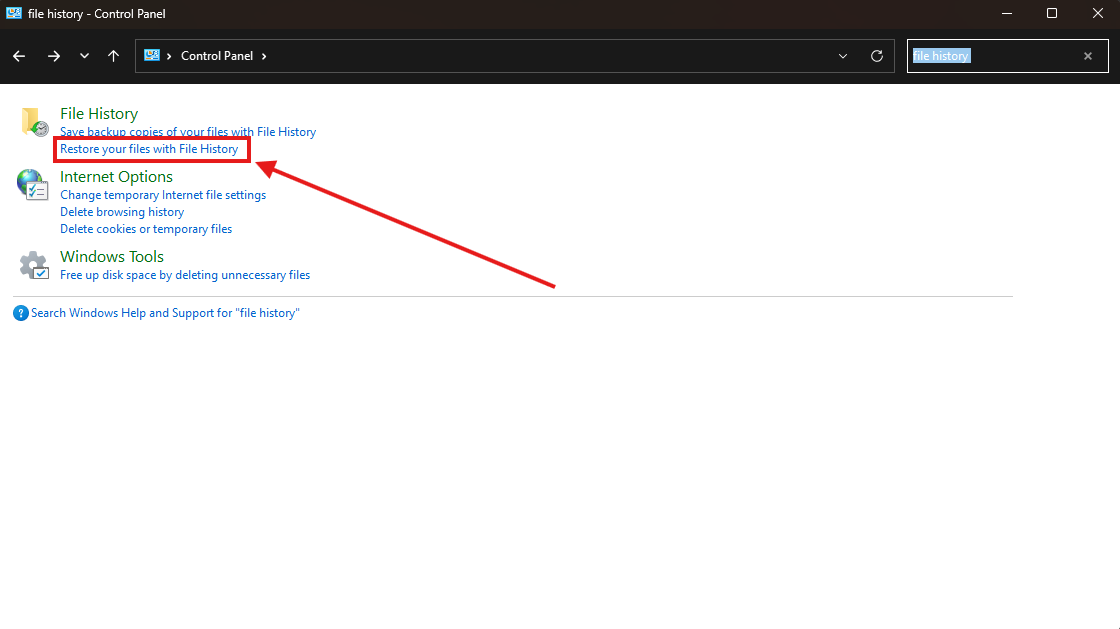
1. To restore files, go to the Control Panel again and type in “file history” into the search box in the upper right hand corner of the window, then select “Restore your files with File History”:
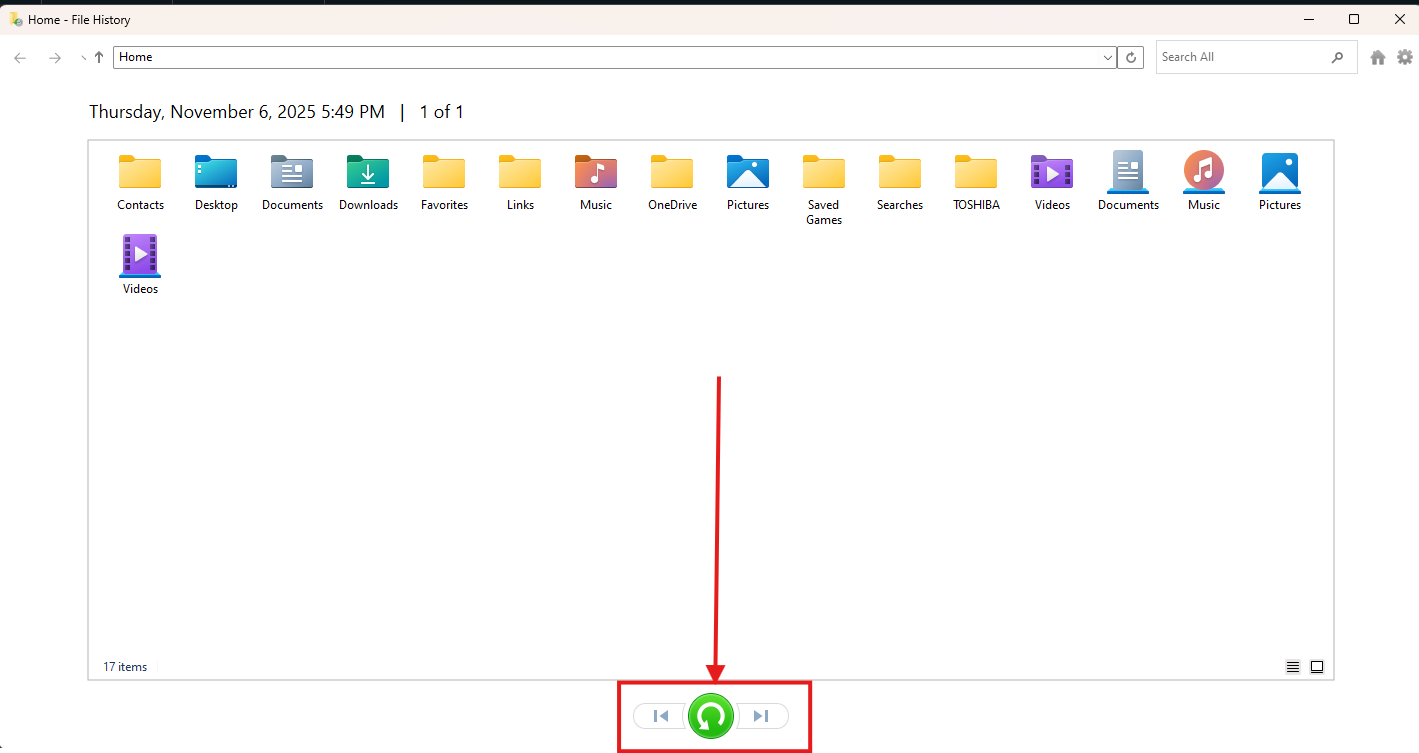
2. Select the date you want to restore from using the arrow buttons at the bottom and then click the green button, it will restore all files from the backup you selected.
Restoring individual files
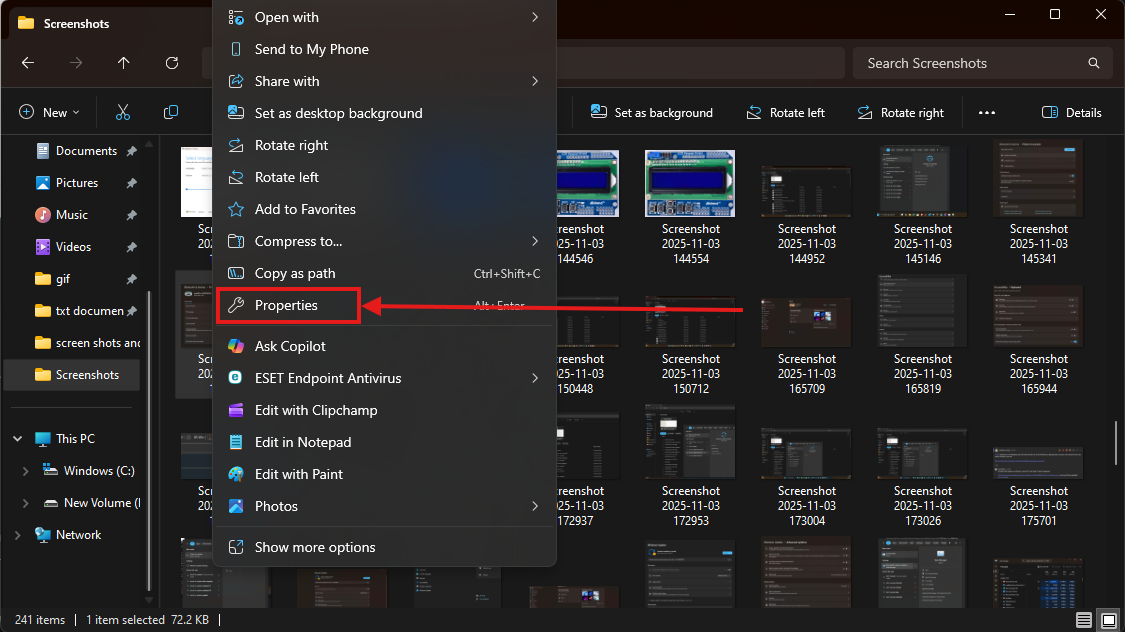
1. You can also go into a folder, and then select an individual file you would like to restore, right click on it and select properties:
2. Select the Previous Versions tab:
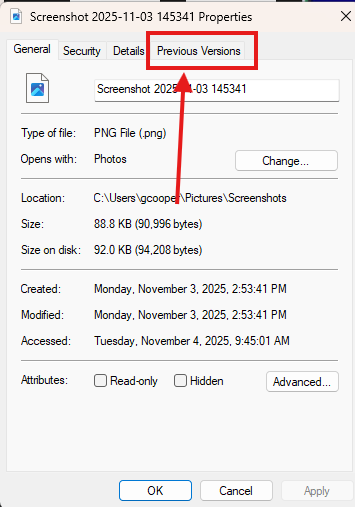
3. Choose the version of the file you want to restore from, then click Restore:

Restoring a folder
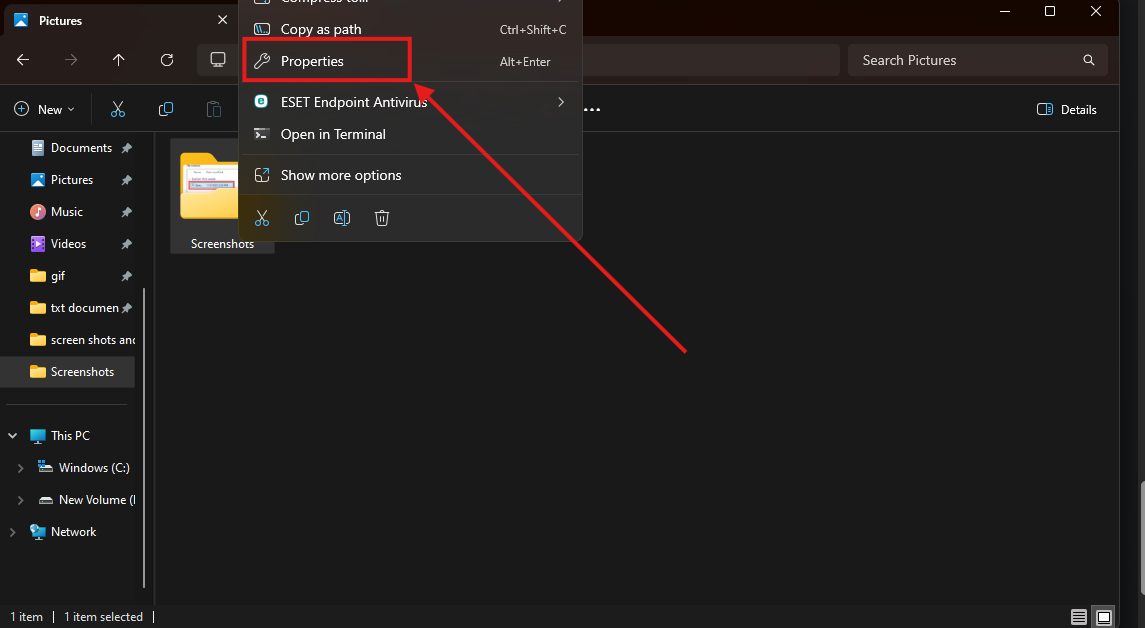
1. With multiple backups, you can restore your folders to previous versions. You just need to right-click on a folder and click on Properties:
2. It will pull this page up, you will need to select “Previous Versions” :
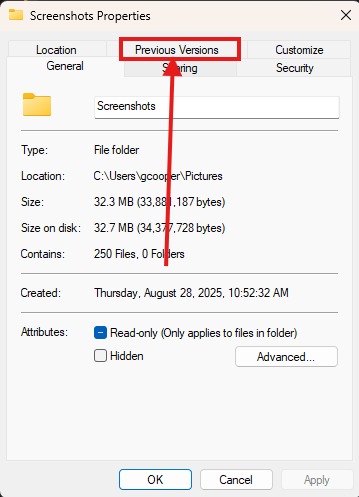
3. In the Previous Versions tab, you will see a list of all the backups of that folder, select the backup you want to restore from, then click restore:

That is everything you need to know about how to use File History!