If you have gotten a new printer for your PC, and still see the option for your old, unused printer, this process explains how to remove a printer in Windows 11, which will remove the option of it being available to print to.
Here is how to do this:
1. Click on the Windows icon, typically found at the bottom of the screen, type in “Printers and Scanners”, and click Printers and Scanners at the top.

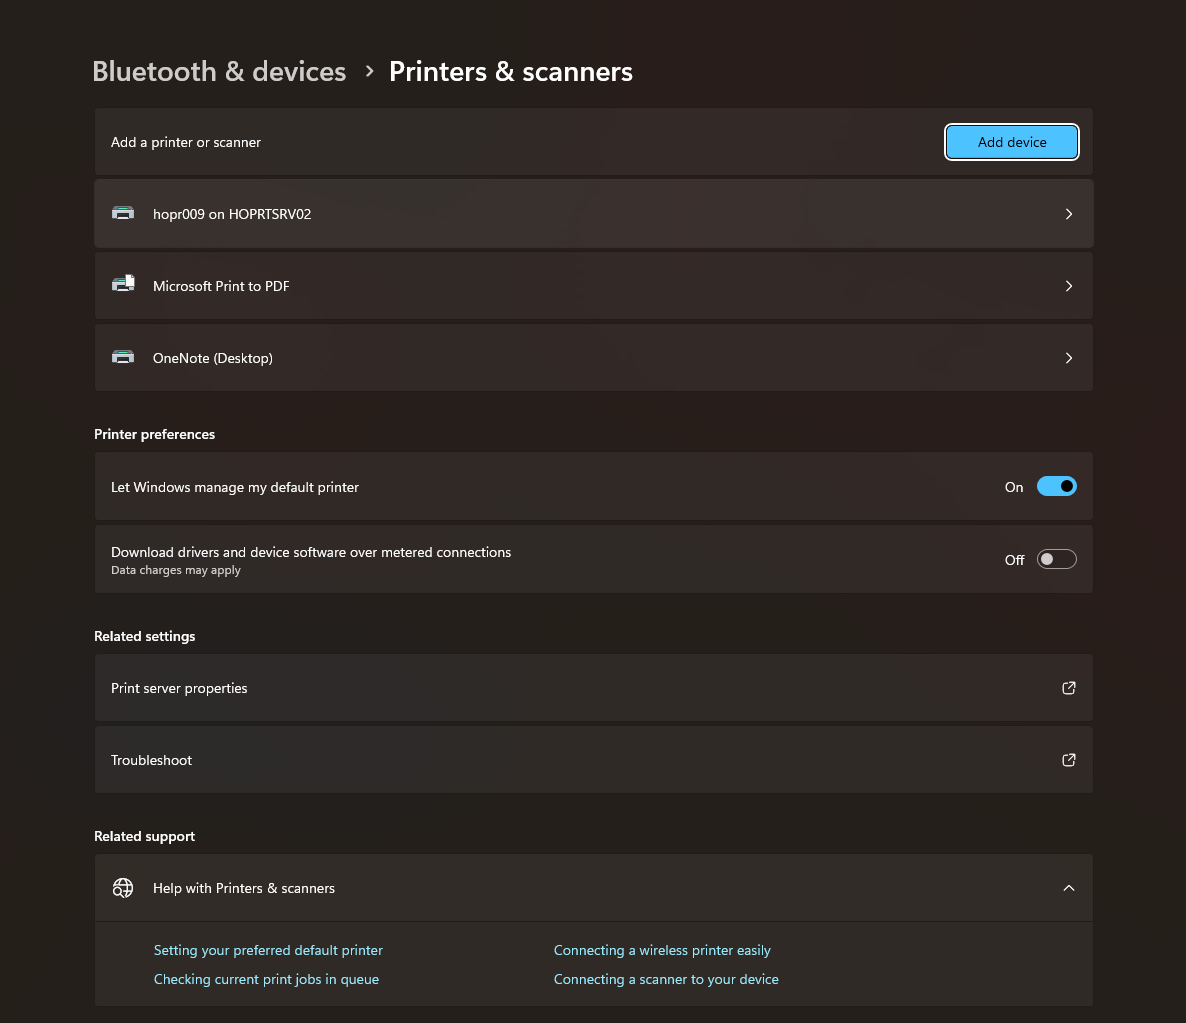
2. This will open the Printers & scanners window, here you will want to click on the device you would like to remove (Note, your printer will be named differently than the one in the example).
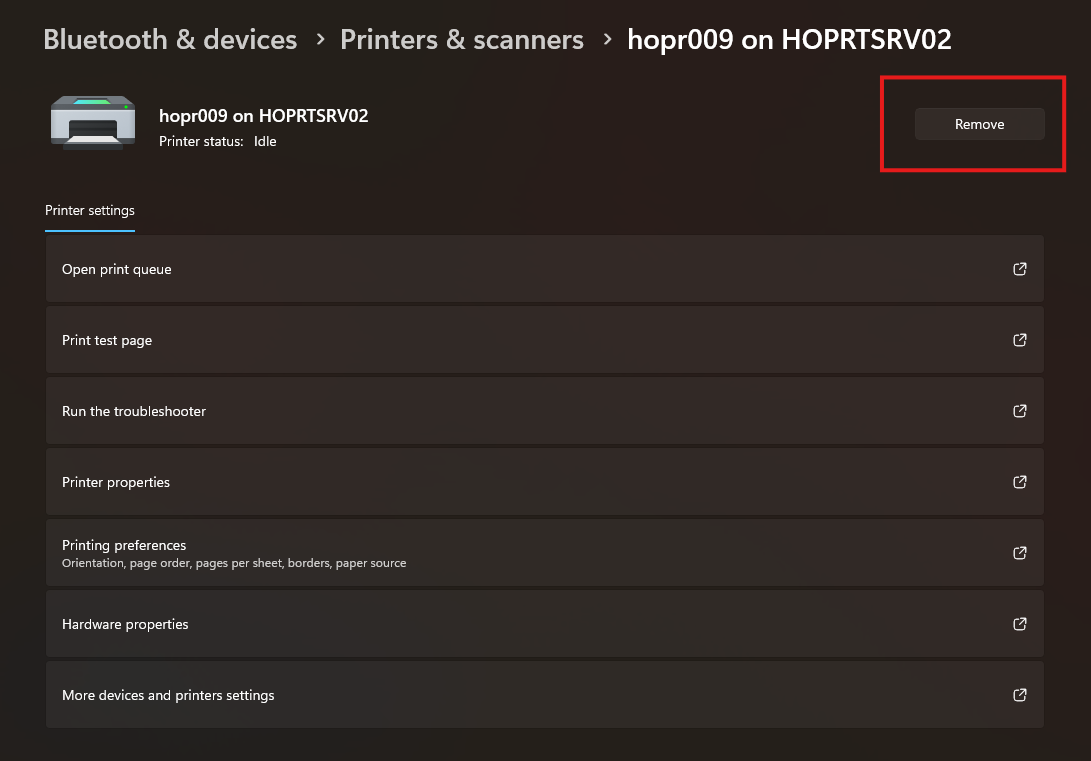
3. Click on Remove.
That’s all you need to do to remove a printer in Windows 11!