S Mode is a restricted version of Windows 10 that can only install Microsoft verified applications through the Windows Store. S Mode is intended to provide added security by only allowing applications approved by Microsoft to be installed. For example, this means you cannot open a web browser and install a program from a website.
However, this can be overly restrictive for most users. If you bought a computer with Windows S Mode enabled, you can switch to the full version of Windows at no cost. It is advisable to make a backup of your files before making this change.
NOTE: Once switched out of Windows 10 S Mode, the changes cannot be reverted.
Here's how to switch out of Windows 10 S Mode:
1. Open Windows Settings by clicking on the start button, typically found at the lower left corner of the screen and then click on Settings (the gear icon).

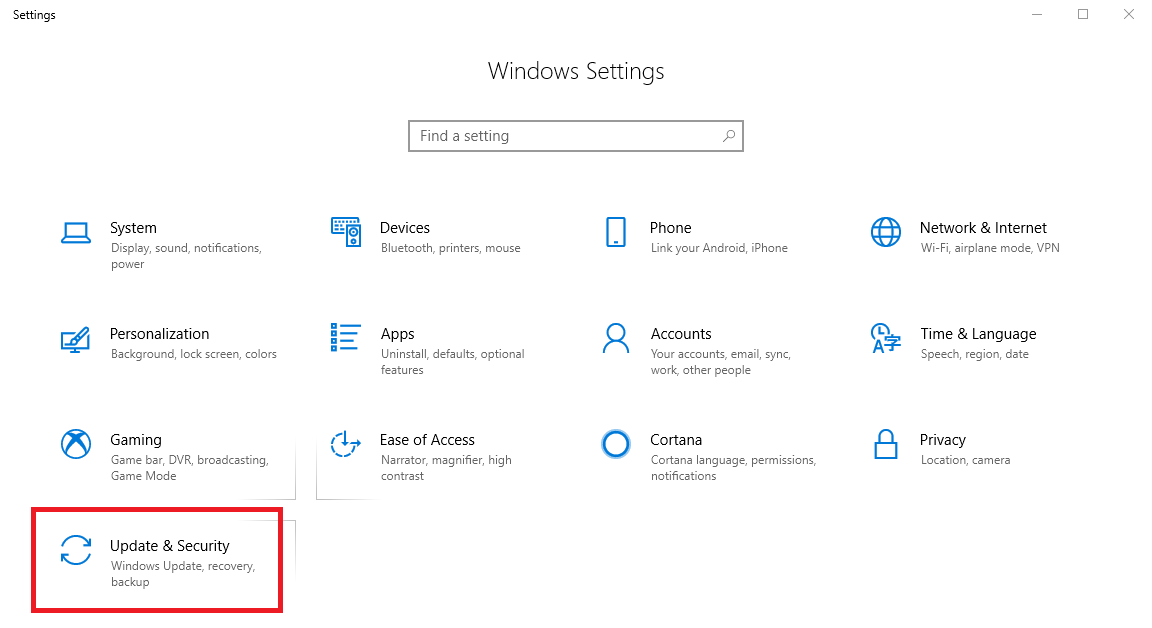
2. From the Windows Settings pop-up window, select the option for Update and Security, this should be the last item in the list.

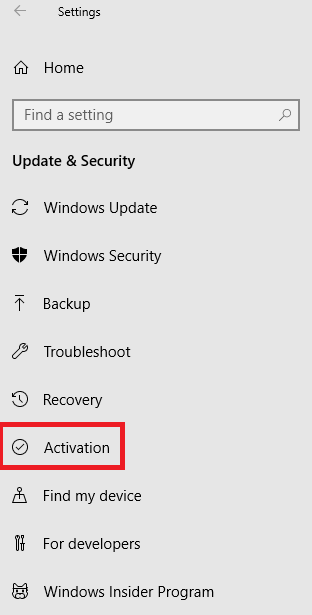
3. Click on Activation under "Update & Security" on the left side of the screen.

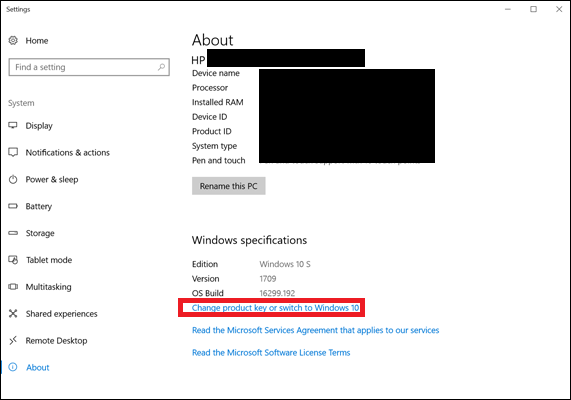
4. Under "Windows specifications" on the About screen, click Change Product Key or switch to Windows 10 (Home or Pro - this will vary by computer)

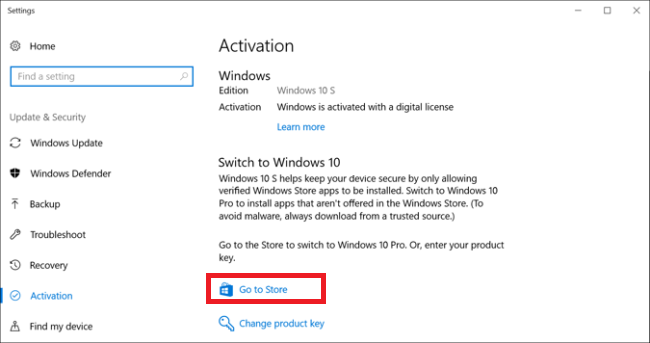
5. On the Activation window, click Go to Store below where you see “Switch to Windows 10 Home” or “Switch to Windows 10 Pro.”

6. Once in the Microsoft Store, click the Get button under “Switch out of S mode.”

7. Then click Install on the next screen.

8. A prompt will ask if you have saved all your files. To proceed, click "Yes, let's go"
9. The upgrade will take place in the background over the next few minutes after which you will no longer be running S Mode.