Computers
Computer Parts
Custom PC Builder
DIY/ Maker
{$smarty.capture.menu}
Activity
Categories
Discussions
Computers
Computer Parts
Custom PC Builder
DIY/ Maker
How to clean install video card drivers in Windows 10/11 - Micro Center
<main> <article class="userContent"> <p>If you are experiencing an issue with your video card after various troubleshooting, including rolling back your drivers, then it could be due to a failed update, or perhaps the driver did not roll back properly.</p><p>If this is this case, we recommend performing a clean install utilizing a program known as <strong>DDU (Display Driver Uninstaller). </strong></p><p>Here is how to download, install and run that program:
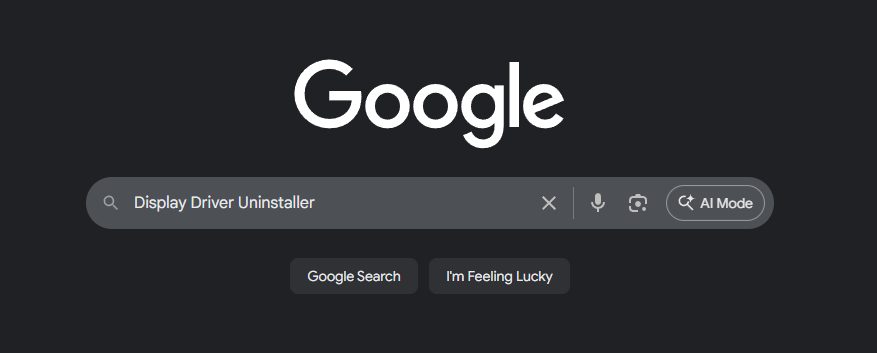
</p><p>1) You will need to go to<strong> www.google.com</strong> and type in <strong>Display Driver Uninstaller</strong> (or DDU)</p><div class="embedExternal embedImage display-large float-none"> <div class="embedExternal-content"> <a class="embedImage-link" href="https://us.v-cdn.net/6031942/uploads/editor/ie/u6n6tqdgk1ad.jpg" rel="nofollow noreferrer noopener ugc" target="_blank"> <img class="embedImage-img" src="https://us.v-cdn.net/6031942/uploads/editor/ie/u6n6tqdgk1ad.jpg" alt="u6n6tqdgk1ad.jpg" height="180" width="320" loading="lazy" data-display-size="large" data-float="none"></img></a> </div> </div> <p><a href="https://www.guru3d.com/files-categories/videocards-handy-utilities.html" rel="nofollow noreferrer ugc">https://www.guru3d.com/files-categories/videocards-handy-utilities.html</a></p><p><br></p><p>2) Select the <strong>www.guru3d.com</strong> link that should state "Display Driver Uninstaller Download" </p><div class="embedExternal embedImage display-large float-none"> <div class="embedExternal-content"> <a class="embedImage-link" href="https://us.v-cdn.net/6031946/uploads/FS2Q6BXSQ4Y2/image.png" rel="nofollow noreferrer noopener ugc" target="_blank"> <img class="embedImage-img" src="https://us.v-cdn.net/6031946/uploads/FS2Q6BXSQ4Y2/image.png" alt="image.png" height="180" width="320" loading="lazy" data-display-size="large" data-float="none"></img></a> </div> </div> <p><br></p><p>3) Now scroll down on this page, and under "Download Locations," <strong>select one of the two US Mirror links </strong>to start the download.</p><div class="embedExternal embedImage display-large float-none"> <div class="embedExternal-content"> <a class="embedImage-link" href="https://us.v-cdn.net/6031942/uploads/editor/uj/2oe66iazuddm.jpg" rel="nofollow noreferrer noopener ugc" target="_blank"> <img class="embedImage-img" src="https://us.v-cdn.net/6031942/uploads/editor/uj/2oe66iazuddm.jpg" alt="2oe66iazuddm.jpg" height="180" width="320" loading="lazy" data-display-size="large" data-float="none"></img></a> </div> </div> <p></p><p><br></p><p>4) Once downloaded to your PC, you will need to <strong>open the zip file</strong> labeled DDU. If you want to open your <strong>Downloads</strong> window in your browser, press <strong>CTRL and the letter J </strong>on your keyboard.</p><p><br></p><div class="embedExternal embedImage display-large float-none"> <div class="embedExternal-content"> <a class="embedImage-link" href="https://us.v-cdn.net/6031942/uploads/editor/83/p0xg58kmxlnk.jpg" rel="nofollow noreferrer noopener ugc" target="_blank"> <img class="embedImage-img" src="https://us.v-cdn.net/6031942/uploads/editor/83/p0xg58kmxlnk.jpg" alt="p0xg58kmxlnk.jpg" height="180" width="320" loading="lazy" data-display-size="large" data-float="none"></img></a> </div> </div> <p></p><p><br></p><p>5) This will show another zipped file which will say <strong>DDUvXXXX</strong>. (the X's indicate the version number). You will need to open this DDU file by double-clicking on it.</p><p><br></p><div class="embedExternal embedImage display-large float-none"> <div class="embedExternal-content"> <a class="embedImage-link" href="https://us.v-cdn.net/6031942/uploads/editor/90/r3986w6atyr9.jpg" rel="nofollow noreferrer noopener ugc" target="_blank"> <img class="embedImage-img" src="https://us.v-cdn.net/6031942/uploads/editor/90/r3986w6atyr9.jpg" alt="r3986w6atyr9.jpg" height="180" width="320" loading="lazy" data-display-size="large" data-float="none"></img></a> </div> </div> <p></p><p><br></p><p>6) Once you open this file, select <strong>Extract all</strong>.</p><p><br></p><div class="embedExternal embedImage display-large float-none"> <div class="embedExternal-content"> <a class="embedImage-link" href="https://us.v-cdn.net/6031942/uploads/editor/8d/4lsh23p8gaao.jpg" rel="nofollow noreferrer noopener ugc" target="_blank"> <img class="embedImage-img" src="https://us.v-cdn.net/6031942/uploads/editor/8d/4lsh23p8gaao.jpg" alt="4lsh23p8gaao.jpg" height="180" width="320" loading="lazy" data-display-size="large" data-float="none"></img></a> </div> </div> <p></p><p><br></p><p>
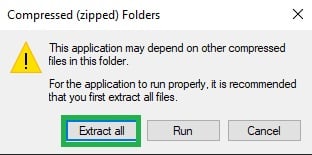
7) This will then pop up a window showing where it will extract. Select <strong>Extract</strong>.</p><p><br></p><div class="embedExternal embedImage display-large float-none"> <div class="embedExternal-content"> <a class="embedImage-link" href="https://us.v-cdn.net/6031942/uploads/editor/b7/4yffnu1rbhyn.jpg" rel="nofollow noreferrer noopener ugc" target="_blank"> <img class="embedImage-img" src="https://us.v-cdn.net/6031942/uploads/editor/b7/4yffnu1rbhyn.jpg" alt="4yffnu1rbhyn.jpg" height="180" width="320" loading="lazy" data-display-size="large" data-float="none"></img></a> </div> </div> <p></p><p><br></p><p>
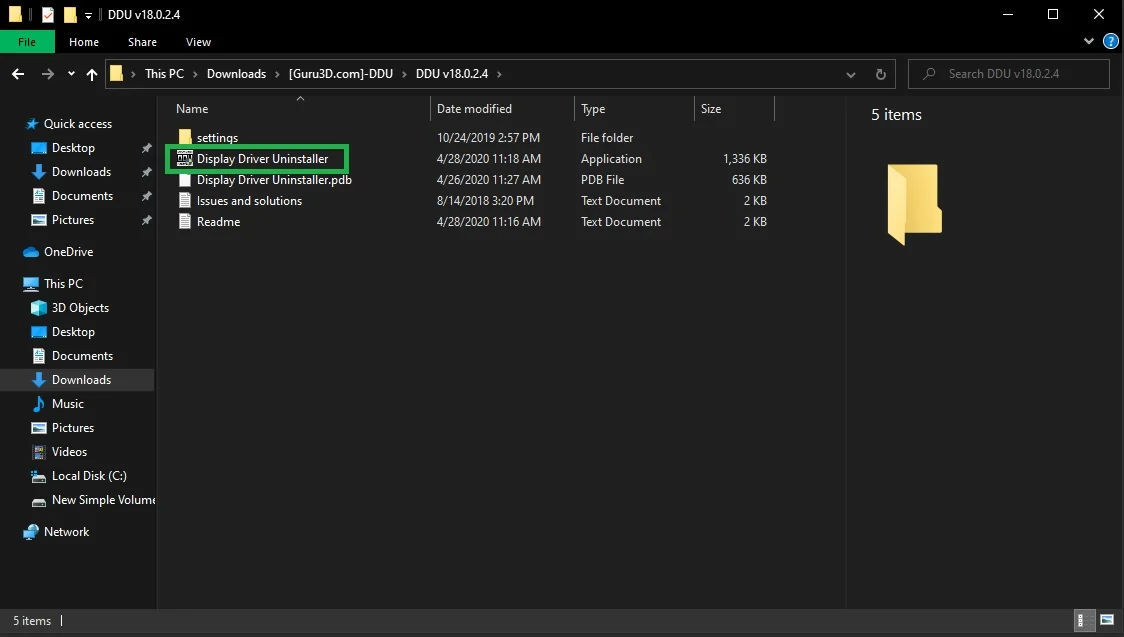
8) Now, it will take you back to the file explorer where the files were extracted. <strong>Open</strong> the <strong>DDUvXXXXXX folder</strong>.</p><p><br></p><div class="embedExternal embedImage display-large float-none"> <div class="embedExternal-content"> <a class="embedImage-link" href="https://us.v-cdn.net/6031942/uploads/editor/0v/a3y7hoqesy7z.jpg" rel="nofollow noreferrer noopener ugc" target="_blank"> <img class="embedImage-img" src="https://us.v-cdn.net/6031942/uploads/editor/0v/a3y7hoqesy7z.jpg" alt="a3y7hoqesy7z.jpg" height="180" width="320" loading="lazy" data-display-size="large" data-float="none"></img></a> </div> </div> <p></p><p><br></p><p>9) Select the <strong>Display Driver Uninstaller application</strong> file, double click on it to open the file</p><div class="embedExternal embedImage display-large float-none"> <div class="embedExternal-content"> <a class="embedImage-link" href="https://us.v-cdn.net/6031946/uploads/08J7UGKS5LVS/image.png" rel="nofollow noreferrer noopener ugc" target="_blank"> <img class="embedImage-img" src="https://us.v-cdn.net/6031946/uploads/08J7UGKS5LVS/image.png" alt="image.png" height="180" width="320" loading="lazy" data-display-size="large" data-float="none"></img></a> </div> </div> <p></p><p><br></p><p>10) Now, this will open the DDU software. Click <strong>OK </strong>on the initial pop-up window.</p><div class="embedExternal embedImage display-large float-none"> <div class="embedExternal-content"> <a class="embedImage-link" href="https://us.v-cdn.net/6031946/uploads/NC1OFF25CQC0/image.png" rel="nofollow noreferrer noopener ugc" target="_blank"> <img class="embedImage-img" src="https://us.v-cdn.net/6031946/uploads/NC1OFF25CQC0/image.png" alt="image.png" height="180" width="320" loading="lazy" data-display-size="large" data-float="none"></img></a> </div> </div> <p></p><p><br></p><p>11) <strong>Do not change</strong> any settings on this page that appears after the initial pop-up. Click <strong>Close </strong>on this options page.</p><p><br></p><div class="embedExternal embedImage display-large float-none"> <div class="embedExternal-content"> <a class="embedImage-link" href="https://us.v-cdn.net/6031942/uploads/editor/6d/wtblqvm0kp50.jpg" rel="nofollow noreferrer noopener ugc" target="_blank"> <img class="embedImage-img" src="https://us.v-cdn.net/6031942/uploads/editor/6d/wtblqvm0kp50.jpg" alt="wtblqvm0kp50.jpg" height="180" width="320" loading="lazy" data-display-size="large" data-float="none"></img></a> </div> </div> <p></p><p><br></p><p>12) The next message is advising to perform in Safe Mode for better results. Click <strong>OK</strong>.</p><p><br></p><div class="embedExternal embedImage display-large float-none"> <div class="embedExternal-content"> <a class="embedImage-link" href="https://us.v-cdn.net/6031942/uploads/editor/zo/yzw2ujc25hm7.jpg" rel="nofollow noreferrer noopener ugc" target="_blank"> <img class="embedImage-img" src="https://us.v-cdn.net/6031942/uploads/editor/zo/yzw2ujc25hm7.jpg" alt="yzw2ujc25hm7.jpg" height="180" width="320" loading="lazy" data-display-size="large" data-float="none"></img></a> </div> </div> <p></p><p><br></p><p>13) Now, you will need to <strong>select your driver </strong>from the <strong>drop-down</strong> <strong>menu </strong>on the right (1) and then select <strong>Clean and restart </strong>(2).</p><p><br></p><div class="embedExternal embedImage display-large float-none"> <div class="embedExternal-content"> <a class="embedImage-link" href="https://us.v-cdn.net/6031942/uploads/editor/eq/7wdt7atcq3m3.jpg" rel="nofollow noreferrer noopener ugc" target="_blank"> <img class="embedImage-img" src="https://us.v-cdn.net/6031942/uploads/editor/eq/7wdt7atcq3m3.jpg" alt="7wdt7atcq3m3.jpg" height="180" width="320" loading="lazy" data-display-size="large" data-float="none"></img></a> </div> </div> <p></p><p><br></p><p>14) This will start the cleaning process of the driver, and the program will automatically create a restore point in case of an issue. This will <strong>automatically restart</strong> the computer once the driver software has been removed.</p><p><br></p><div class="embedExternal embedImage display-large float-none"> <div class="embedExternal-content"> <a class="embedImage-link" href="https://us.v-cdn.net/6031942/uploads/editor/qh/pb8fomc4czo0.jpg" rel="nofollow noreferrer noopener ugc" target="_blank"> <img class="embedImage-img" src="https://us.v-cdn.net/6031942/uploads/editor/qh/pb8fomc4czo0.jpg" alt="pb8fomc4czo0.jpg" height="180" width="320" loading="lazy" data-display-size="large" data-float="none"></img></a> </div> </div> <p></p><p><br></p><p>15) Now that the computer has restarted, you will need to install the latest driver. If you have an NVIDIA card, go to <a href="https://www.nvidia.com/en-us/geforce/drivers/" rel="nofollow noreferrer ugc">https://www.nvidia.com/en-us/geforce/drivers/</a>.If you have an AMD card, go to <a href="https://www.amd.com/en/support" rel="nofollow noreferrer ugc">https://www.amd.com/en/support</a></p><p><br></p><p>16) Select your graphics card from the menu on either website, download the latest driver and run the .exe file it downloads. This may bring up a prompt asking you to allow the app to make changes to your device, like the example below. If so, select <strong>Yes.</strong></p><p><br></p><div class="embedExternal embedImage display-large float-none"> <div class="embedExternal-content"> <a class="embedImage-link" href="https://us.v-cdn.net/6031942/uploads/editor/cs/4ch75h7y7wrr.jpg" rel="nofollow noreferrer noopener ugc" target="_blank"> <img class="embedImage-img" src="https://us.v-cdn.net/6031942/uploads/editor/cs/4ch75h7y7wrr.jpg" alt="4ch75h7y7wrr.jpg" height="180" width="320" loading="lazy" data-display-size="large" data-float="none"></img></a> </div> </div> <p></p><p><br></p><p>17) If prompted for an installation type, select <strong>Express</strong>, then let the driver install. Your computer monitor will flash on and off during this process. Once it's finished installing, you can close the window. </p><div class="embedExternal embedImage display-large float-none"> <div class="embedExternal-content"> <a class="embedImage-link" href="https://us.v-cdn.net/6031942/uploads/editor/63/xc110fii8ngl.jpg" rel="nofollow noreferrer noopener ugc" target="_blank"> <img class="embedImage-img" src="https://us.v-cdn.net/6031942/uploads/editor/63/xc110fii8ngl.jpg" alt="xc110fii8ngl.jpg" height="180" width="320" loading="lazy" data-display-size="large" data-float="none"></img></a> </div> </div> <p></p><p><br></p><p>That's it! You have successfully performed a clean install of your video card drivers.</p> </article> </main>