How to Create and Restore from a System Image in Windows 10
This discussion has a more recent version.


Windows offers multiple options for backing up data on your system. Things like OneDrive and File History are designed to back up your personal data: documents, pictures, music files, etc... but they don't carry your software programs over. If you are looking for a backup that includes data as well as programs, System Image Recovery is the option you want. It's essentially making a clone: an exact copy of your drive including any
programs from that time. The benefit of this method is that it will ensure you can recover not
just data, but software as well. The downside is that system images cannot be
set to automatically update with any new data or information you add to your
computer, you'll have to re-do the whole process again if your system image is outdated. I'll go over how to create a system image as well as restore from a system image backup.
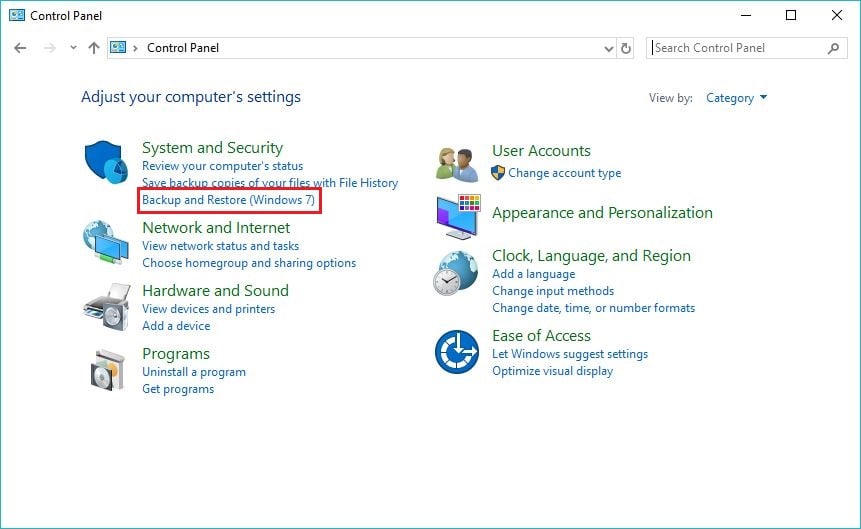
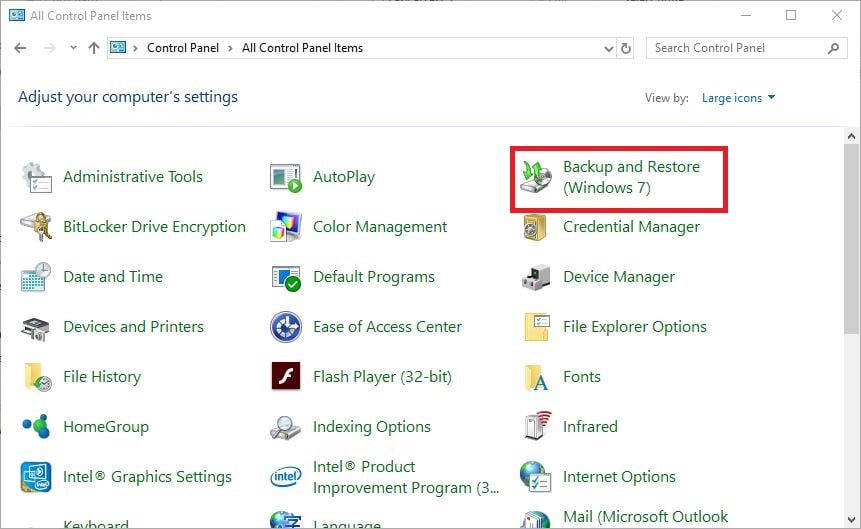
2. On the main Control Panel window go to Backup and Restore (Windows 7), located under System and Security. If you see an alphabetical list instead it should be near the top.
3. Click Create a system image on the left.
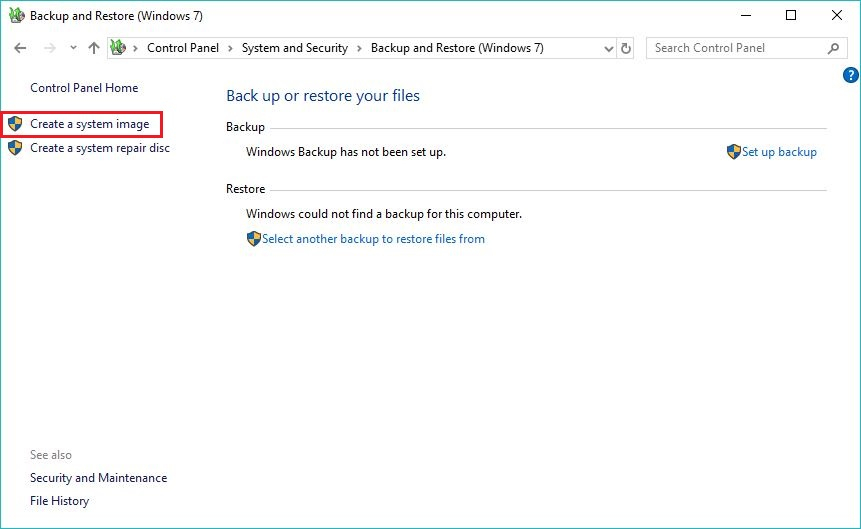
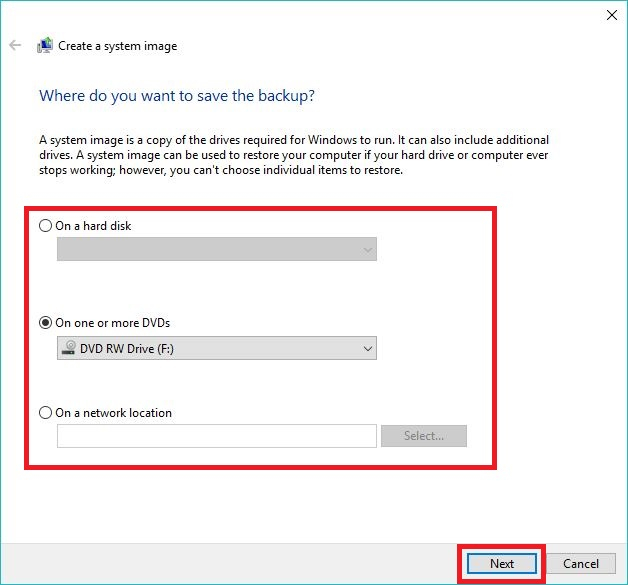
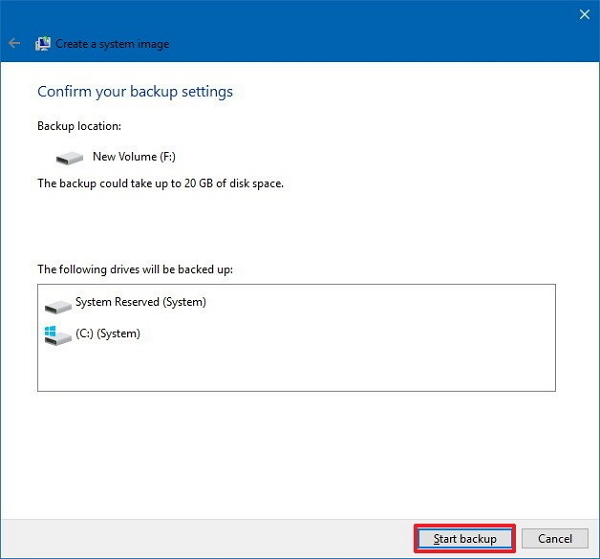
4. You'll be presented with a new window where you can select your method of creating a system image. You can use an external hard drive, blank DVDs, or use a network drive if you have one set up. If using blank DVDs you will need multiple disks. Windows takes up about 20GB of space not including any programs or data, and most DVDs are either 4.7GB or 8.5GB of space in total. We would recommended using an external hard drive for ease of use. Choose your preferred option and click Next, then Start Backup.
If your computer is crashing on startup or stuck in an automatic repair loop, it should let you choose to check advanced recovery options or automatically load into the recovery environment. If you cannot load into Windows at all (including automatic repair or recovery options), you'll need to go into your BIOS/Boot menu and boot from the system repair disk created previously. When your computer starts, you'll need to press the BIOS or Boot Menu key (usually DEL, F2, F8 or F10, depending on the manufacturer of the computer), then set the system repair disk as the primary boot device. Standard Windows 10 installation or recovery media can be used in place of a system repair disk as well.
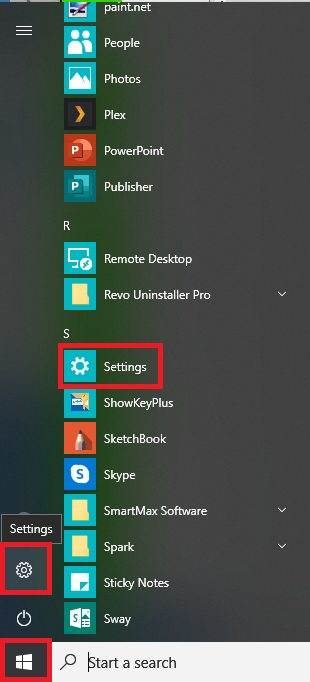
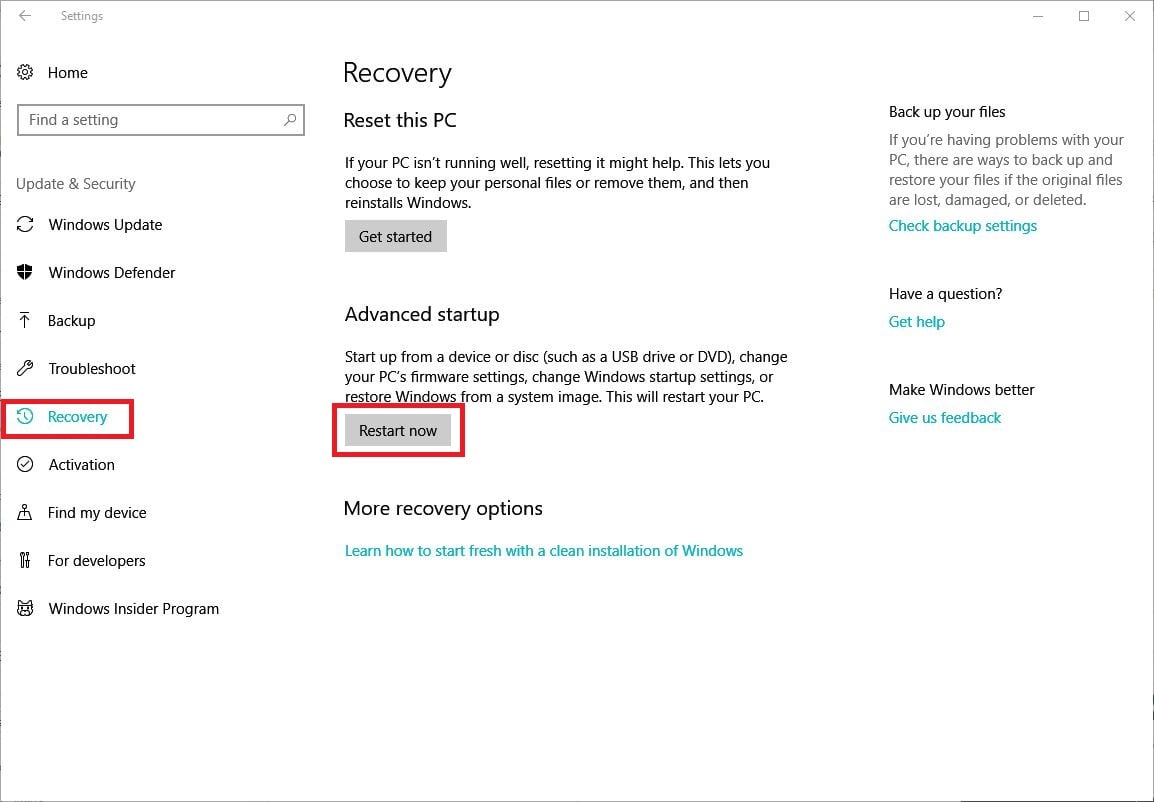
If you are able to boot all the way into Windows, open Settings from the Start Menu
Go to Recovery on the left, then click Restart now under "Advanced Startup"
How to create a system image:
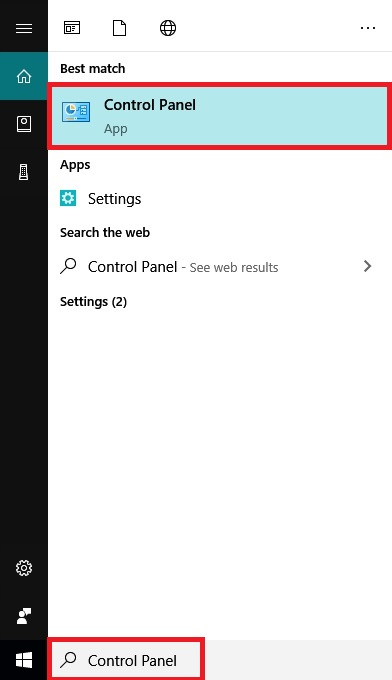
1. Click the search bar next to your start button, then type Control Panel. Click the Control Panel app at the top of your search results.2. On the main Control Panel window go to Backup and Restore (Windows 7), located under System and Security. If you see an alphabetical list instead it should be near the top.
3. Click Create a system image on the left.
4. You'll be presented with a new window where you can select your method of creating a system image. You can use an external hard drive, blank DVDs, or use a network drive if you have one set up. If using blank DVDs you will need multiple disks. Windows takes up about 20GB of space not including any programs or data, and most DVDs are either 4.7GB or 8.5GB of space in total. We would recommended using an external hard drive for ease of use. Choose your preferred option and click Next, then Start Backup.
How to restore from a system image:
Once you have your system image, if anything goes wrong with your computer you'll be able to restore from it by going into the Windows Recovery Environment. You can access the Windows Recovery Environment in multiple ways.If your computer is crashing on startup or stuck in an automatic repair loop, it should let you choose to check advanced recovery options or automatically load into the recovery environment. If you cannot load into Windows at all (including automatic repair or recovery options), you'll need to go into your BIOS/Boot menu and boot from the system repair disk created previously. When your computer starts, you'll need to press the BIOS or Boot Menu key (usually DEL, F2, F8 or F10, depending on the manufacturer of the computer), then set the system repair disk as the primary boot device. Standard Windows 10 installation or recovery media can be used in place of a system repair disk as well.
If you are able to boot all the way into Windows, open Settings from the Start Menu
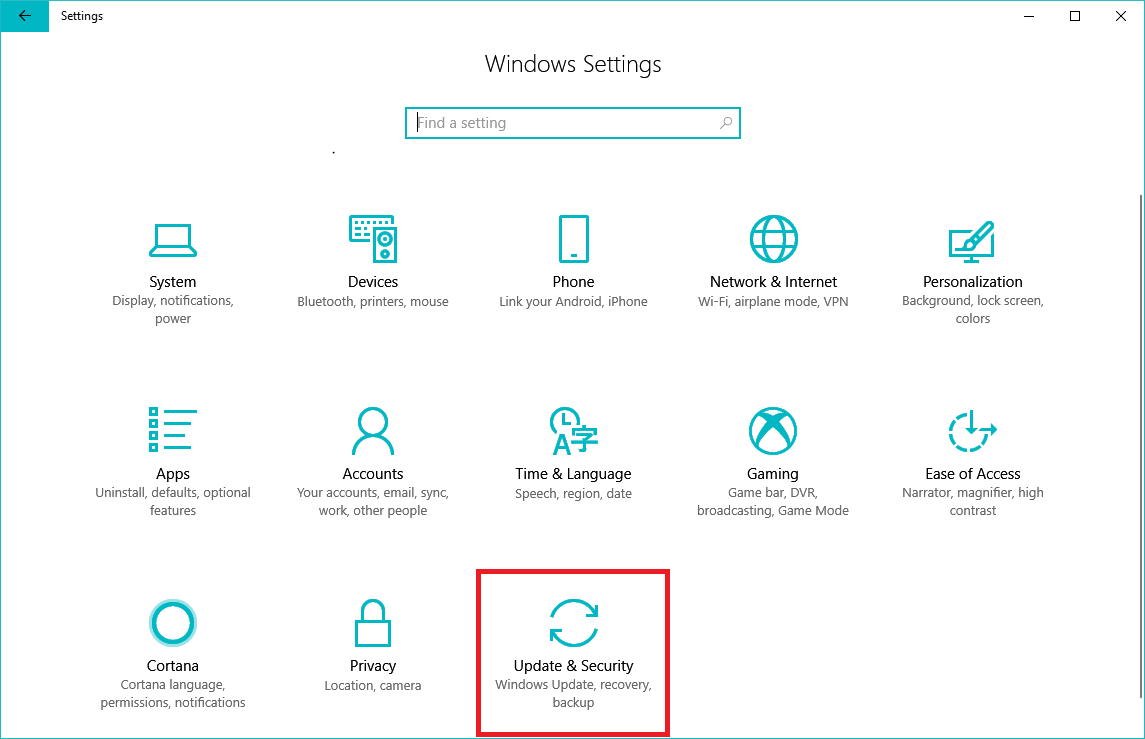
Go to Update and Security
Go to Recovery on the left, then click Restart now under "Advanced Startup"
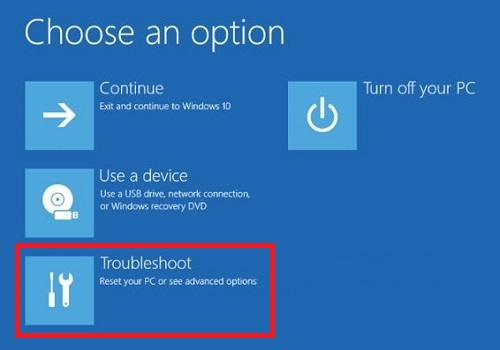
Your computer will restart and take you to the main recovery screen.
Once you're in the recovery menu, you'll be presented with a few options. Select Troubleshoot
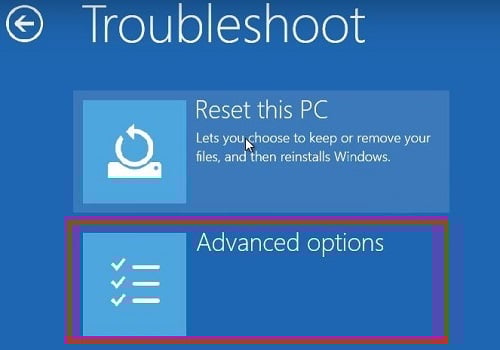
After that select Advanced Options
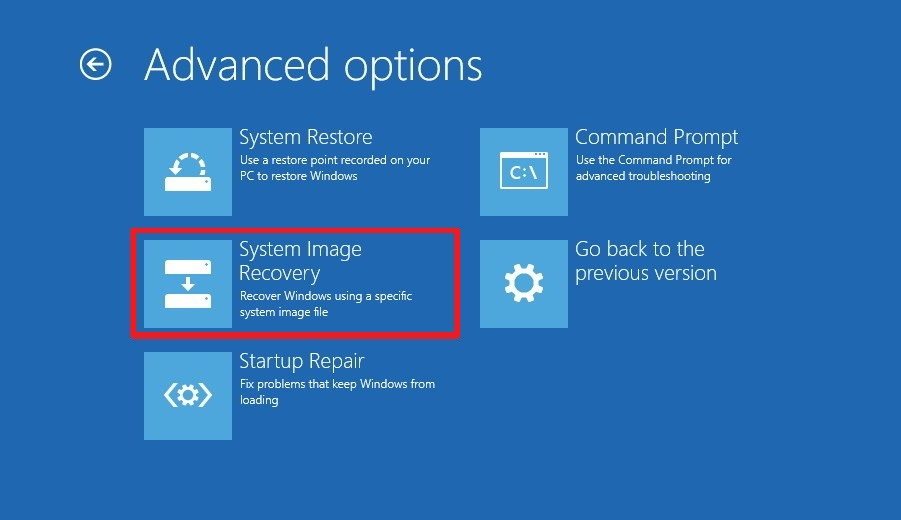
Then select System Image Recovery
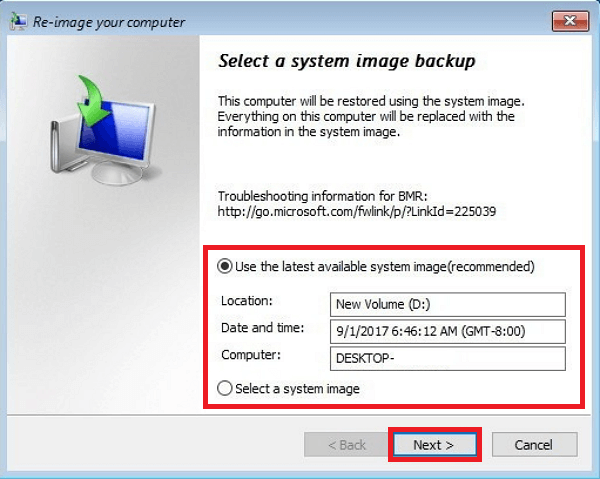
At this point you may be prompted to select a target operating system or choose an account to restore, this can vary depending on which particular version/update of Windows 10 you were on. Follow it along and then you'll be given the option to choose a system image backup. You can choose either the latest system image or an older one if you have multiple. Choose your preferred option then click Next.
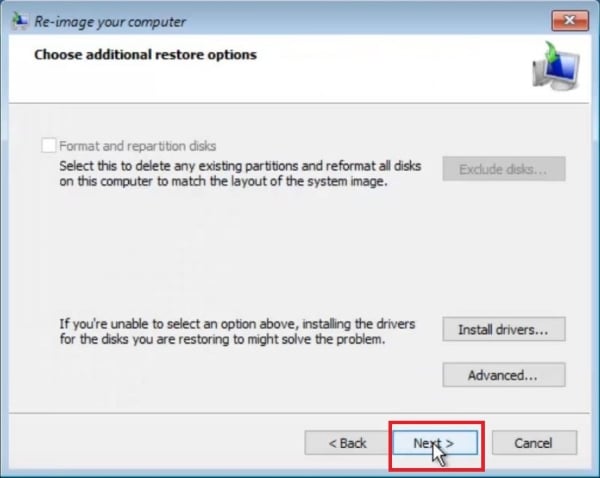
You'll be presented another set of option. "Format and repartition disks" is used if you are either restoring to a brand new drive or want to reformat the drive you're restoring to to match the exact layout/organization of the system image. Click Next when you're ready.
Double check the information for the system image you selected to make sure you have the right one, then when you're ready click Finish. The image recovery process will begin and once it's done your computer should be back to the state it was when you created your image.

Related Articles:
Categories
- All Categories
- 1 The Blog
- 1 What's Trending
- 8K The Community
- 3.2K General Discussion
- 146 New Members
- 873 Consumer Tech
- 234 Prebuilt PCs and Laptops
- 168 Software
- 33 Audio/Visual
- 54 Networking & Security
- 4 Home Automation
- 5 Digital Photography
- 14 Content Creators
- 30 Hobby Boards & Projects
- 84 3D Printing
- 83 Retro Arcade/Gaming
- 62 All Other Tech
- 455 PowerSpec
- 2.6K Store Information and Policy
- 152 Off Topic
- 63 Community Ideas & Feedback
- 619 Your Completed Builds
- 4K Build-Your-Own PC
- 2.9K Help Choosing Parts
- 328 Graphics Cards
- 335 CPUs, Memory, and Motherboards
- 145 Cases and Power Supplies
- 54 Air and Liquid Cooling
- 51 Monitors and Displays
- 93 Peripherals
- 70 All Other Parts
- 65 Featured Categories
We love seeing what our customers build
Submit photos and a description of your PC to our build showcase
Submit NowLooking for a little inspiration?
See other custom PC builds and get some ideas for what can be done
View Build ShowcaseSAME DAY CUSTOM BUILD SERVICE
If You Can Dream it, We Can Build it.

Services starting at $149.99