How to Temporarily Pause Updates in Windows 10
This discussion has a more recent version.


While Windows 10 updates are automatic, they can easily be temporarily paused through Settings in Windows 10. When
you pause updates, new Windows feature updates won’t be installed for up to 35
days. Pausing updates cannot be repeatedly used, once the time lapses for each
pause period, updates will have to be installed before pausing is enabled as an
option again. Here's how to pause your updates in Windows 10:
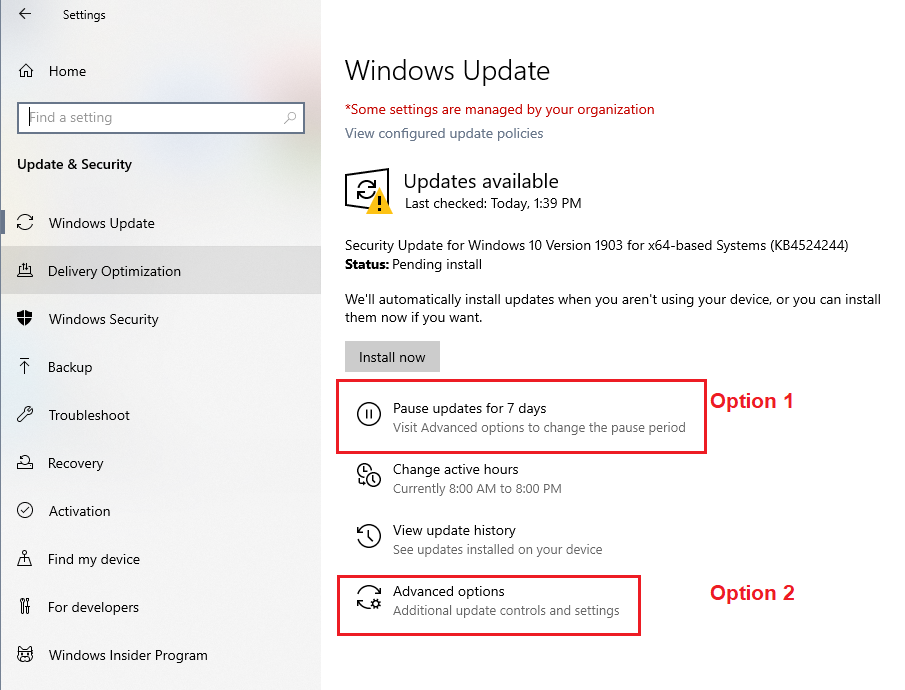
3. From this screen, you can pause for 7 days, or you can select Advanced options to select a different amount of time, up to 35 days.
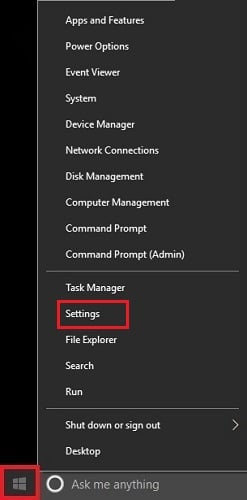
1. Right click on the Start button, typically found at the lower left corner of the screen, then click on Settings.
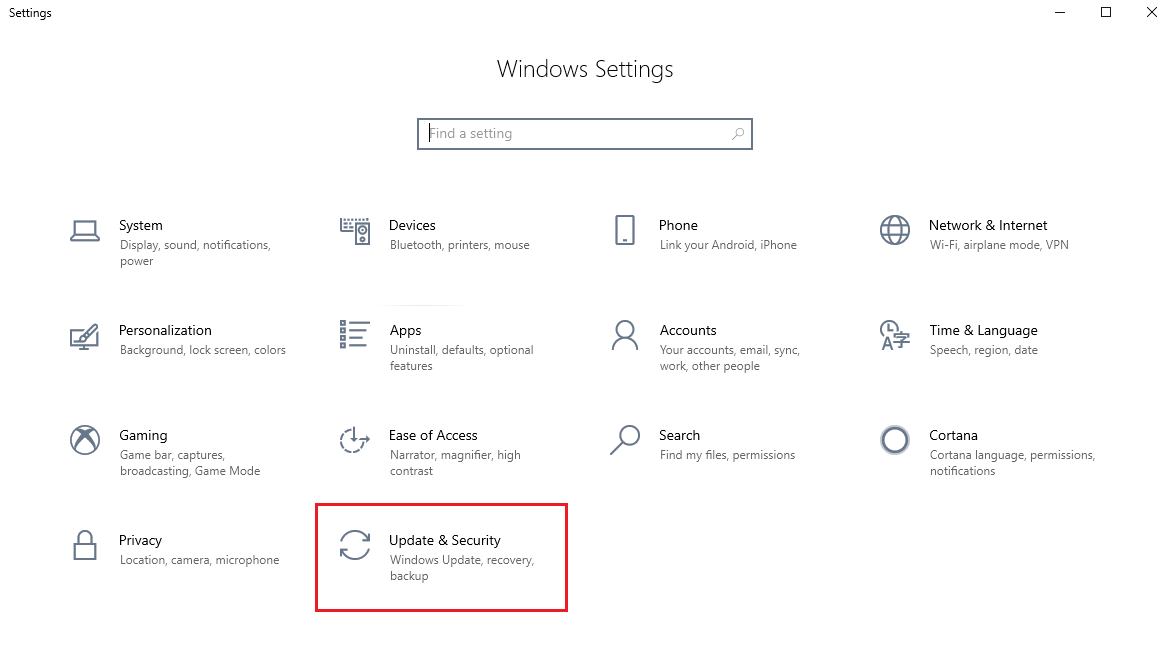
2. From the Windows Settings page, from the list of categories, click on the Update & Security option.
3. From this screen, you can pause for 7 days, or you can select Advanced options to select a different amount of time, up to 35 days.
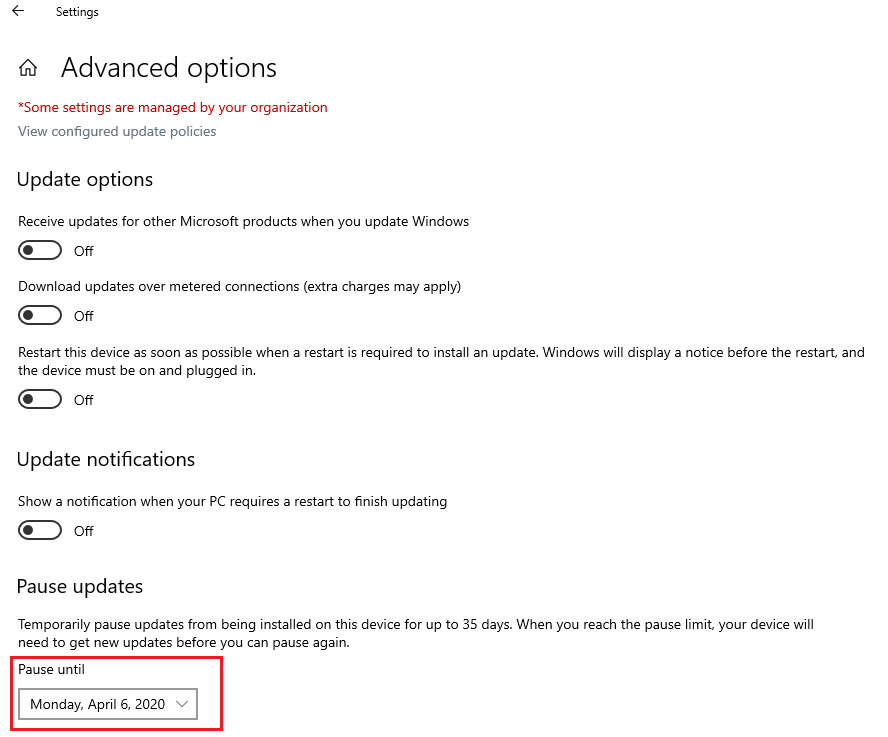
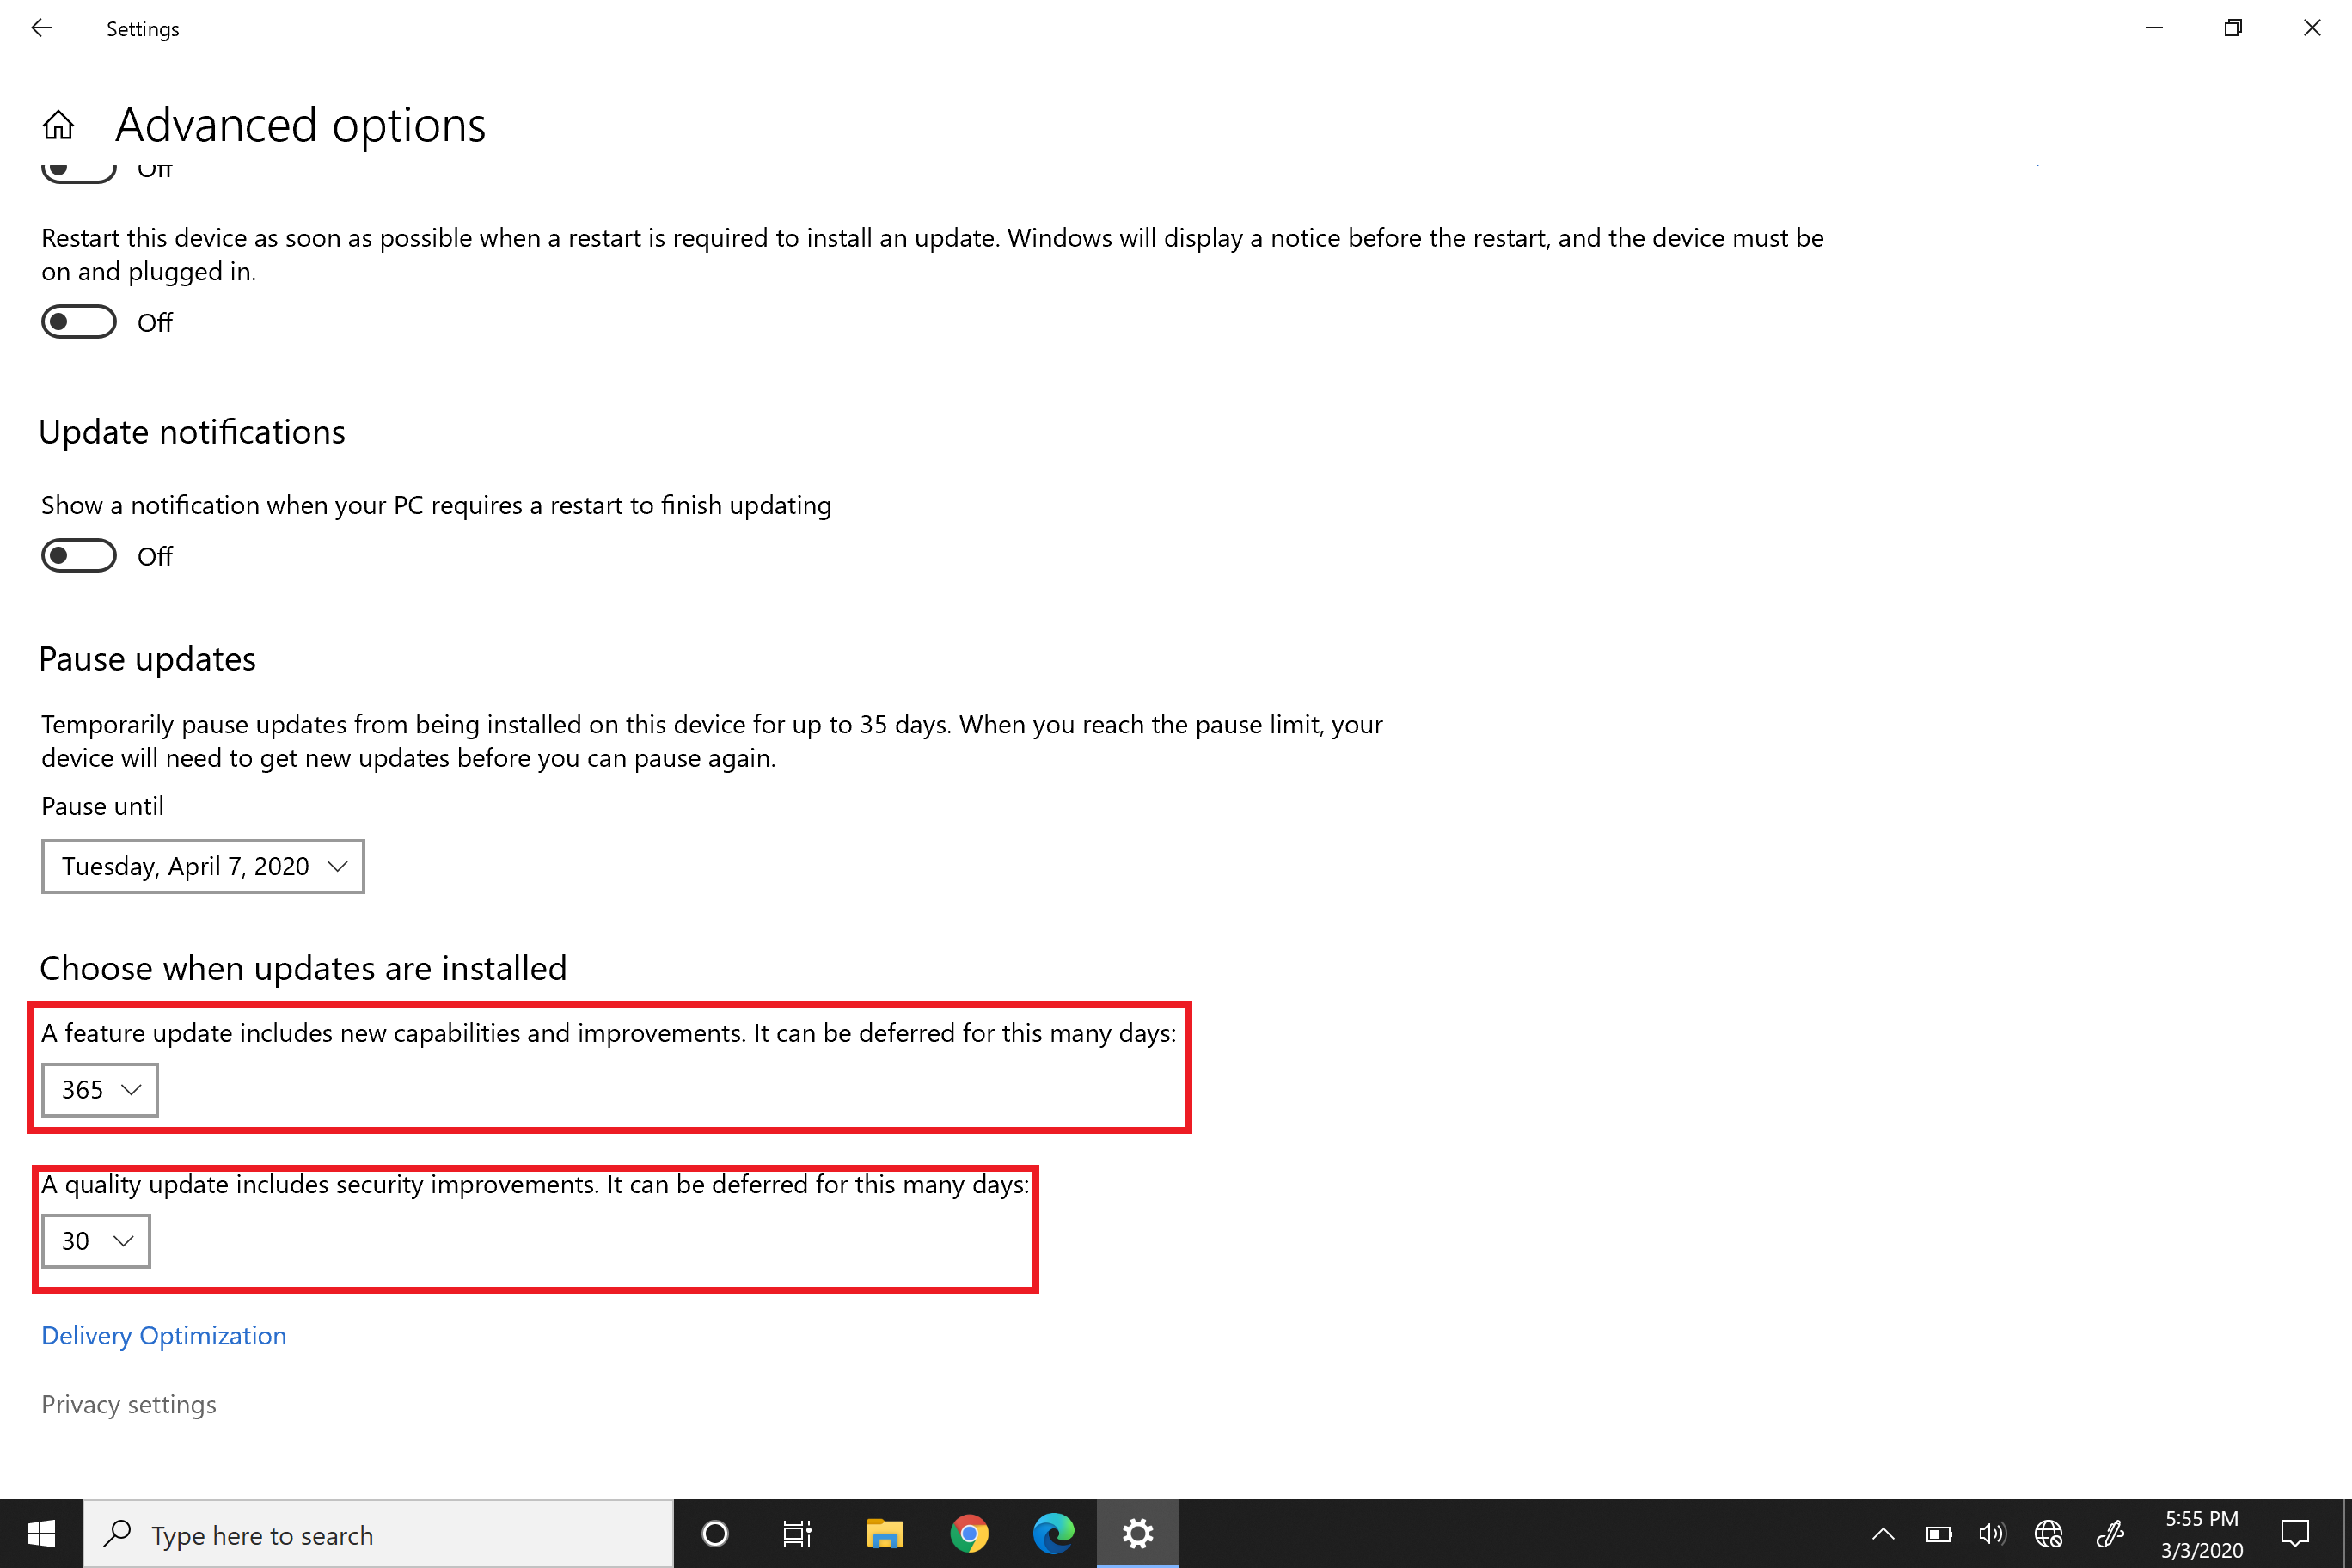
4. If you select Advanced Options, you can defer updates until a specific date of your choosing, up to 35 days out.
5. If you have Windows 10 Pro, you can also set separate deferment periods for feature updates and quality updates. These deferments are set by a number of days to delay. Feature updates can be delayed up to 365 days, and quality updates can be delayed up to 30 days.
6. There is no need to save or apply your changes, they will take effect immediately.
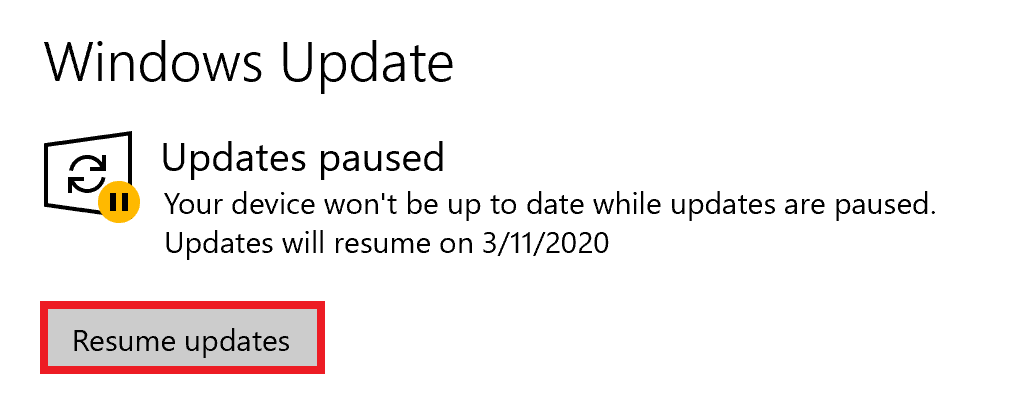
7. If you want to unpause your updates early, simply open settings, select Update & Security (steps 1 & 2 above) and click the button that says Resume updates
Categories
- All Categories
- 1 The Blog
- 1 What's Trending
- 8K The Community
- 3.2K General Discussion
- 146 New Members
- 873 Consumer Tech
- 234 Prebuilt PCs and Laptops
- 168 Software
- 33 Audio/Visual
- 54 Networking & Security
- 4 Home Automation
- 5 Digital Photography
- 14 Content Creators
- 30 Hobby Boards & Projects
- 84 3D Printing
- 83 Retro Arcade/Gaming
- 62 All Other Tech
- 444 PowerSpec
- 2.6K Store Information and Policy
- 150 Off Topic
- 62 Community Ideas & Feedback
- 619 Your Completed Builds
- 4K Build-Your-Own PC
- 2.9K Help Choosing Parts
- 328 Graphics Cards
- 335 CPUs, Memory, and Motherboards
- 145 Cases and Power Supplies
- 54 Air and Liquid Cooling
- 50 Monitors and Displays
- 93 Peripherals
- 69 All Other Parts
- 65 Featured Categories
We love seeing what our customers build
Submit photos and a description of your PC to our build showcase
Submit NowLooking for a little inspiration?
See other custom PC builds and get some ideas for what can be done
View Build ShowcaseSAME DAY CUSTOM BUILD SERVICE
If You Can Dream it, We Can Build it.

Services starting at $149.99