How to make a NAS with a Raspberry Pi using Linux (2020)


The Raspberry Pi File Server
Have you ever wanted to create a server at home? Are you a person that has a lot of videos or files saved on your computer but would like to play them on other devices such as your phone or smart TV? I will show you a way that you can set up your Raspberry Pi as a file server for your home network. This is one of my favorite server roles to set up on a Pi, and it’s quite simple. In this guide, I’ll give you step-by-step instructions that you can follow even if you do not know any programming languages, like me. This will all be set up using some basic Linux commands. If you are a beginner when it comes to Linux, then I encourage you to connect the Pi to your monitor and connect a mouse and keyboard directly to the Pi.
What you will need:
-Raspberry Pi
-Micro SD Card (with Raspbian OS)
-SD Card reader
-Internet Connection
-External HDD or USB flash drive (optional)
-USB Mouse and Keyboard
-Ethernet Cable (optional)
Step 1 - Install Raspbian:
Install Raspbian on the micro SD Card. You can download the OS and imaging program here: https://www.raspberrypi.org/downloads/
Download the Raspberry Pi Imager and Raspbian from the link above. Then install Etcher (Raspberry Pi Imager). Once you have Etcher installed, open the program so we can flash our SD card with the Raspbian OS. (See screenshots below) First, select the Raspbian zip file:


then select the SD card (I recommend unplugging all external drives except for the SD card at this step), then click flash. Do not remove the SD card or close the imaging program until it is finished.

Step 2 – Update Pi:
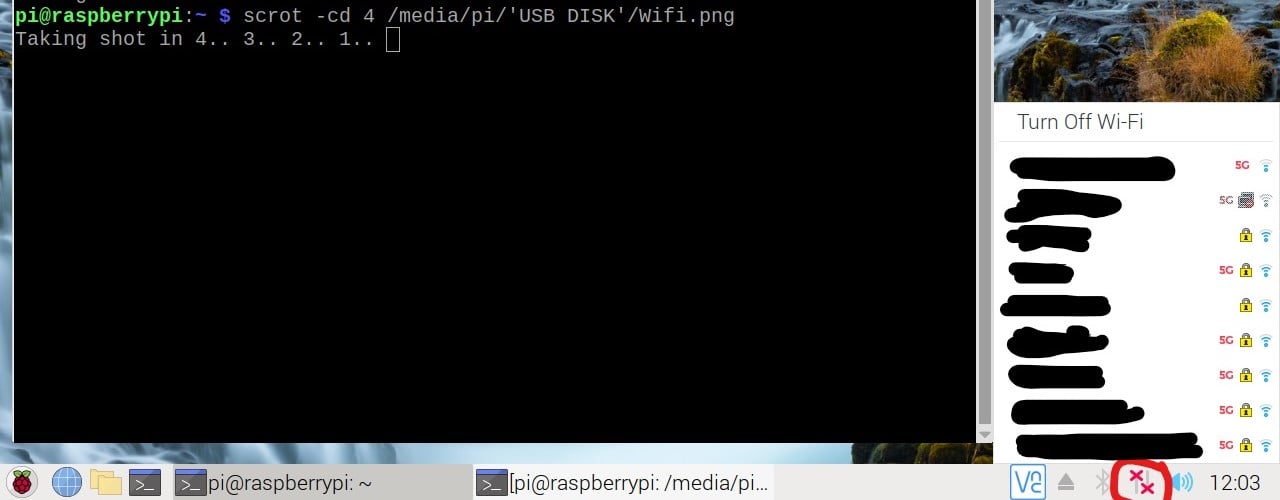
After we install Raspbian on the SD card, we will need to update the repositories and the pi. First, we need to connect to the internet. If you connected your Pi using an ethernet cable, then skip ahead to updating your pi. To connect your Pi to WiFi, click on the arrows with the 'X' over them on the taskbar (your taskbar will be on the top of your screen). Then you will see the list of available WiFi networks. Select your SSID and enter the Wi-Fi password to connect (see screenshot below).
Now, We need to open terminal by clicking on the icon on the taskbar or by pressing Ctrl + Alt + T on the keyboard. You can also open terminal by clicking on the start button in the corner (the raspberry) > Then go to 'Accessories' > Then go to 'Terminal'

Once you have terminal open. enter the following command:
(It may ask for your password. If you have not changed it then the default password is ‘raspberry’)
sudo apt-get update
(sudo in Linux stands for ‘superuser do’. It is similar to ‘Run as Admin’ on Windows)
Once that is finished, we can now update the Pi OS and all the installed programs. Enter this command:
sudo apt-get upgrade
(It will ask you to type Y or N to confirm if you want to install, type Y and hit ‘enter’)
Step 3 – Create Server Folder:
Next, we will need to create a directory (folder) for the server. This will have to be done differently depending on if you are using an external hard drive or the SD card as the storage location for the server.
Creating the folder on the SD card:
**If you want the server files to be stored on an external drive then proceed to the next step**
To create a folder in terminal, we will use the ‘mkdir’ command. We also must include the folder name. Type the following command in terminal:
mkdir /home/pi/shared
Remember this directory path! The folder we are using for our server is ‘shared’. It is in the ‘pi’ folder which is found within the ‘home’ folder.
Creating the folder on an External Drive:
**If you already created the server folder on the SD card above then proceed to step 4**
Now, we just need to make sure the drive is recognized and accessible. We can easily determine this by looking at the desktop on the Pi. If you can’t see it on the desktop, then try unplugging the drive and plugging it back in. If you do this several times and it is still not detected, then I recommend formatting the external drive on a different computer. Make sure it’s formatted in the exFAT or FAT32 filesystem. Once you can see the external drive on the Pi then you are ready to create the folder on it.
From here we will have to see what your drive is labeled as. Type the following command:
cd /media/pi
(cd means change directory)
Now we need to list the contents of this folder with this command:
ls
(this is a lowercase L and not an I)
The name of our external drive will be displayed. So, on my pi when I enter that command it displays:
‘HDD’
(This is likely going to show a different name for you, just remember this for the next step)
Once we see what the external drive is labeled, we can create a folder for the server on the external drive. We will call this folder ‘shared’. We will run this command:
mkdir /media/pi/HDD/shared
(Remember to replace HDD with the name of your external drive!)
Step 4 – Install Samba:
Now we must install samba with the additional files required for the server. To do this, we will enter this command:
sudo apt install samba
When that is finished installing, enter this command:
sudo apt install samba-common-bin
Step 5 – Open the Server File:
Once these are installed, we will need to open the smb.conf file to create the server. We are going to use a text editor in terminal to edit the file. We can do this by entering the following:
sudo nano /etc/samba/smb.conf
(If you are like me and constantly want to change the settings or name of your server, then remember this command and the directory path)
Step 6 - Configure the Server:
This will open the server configuration file. Once it is open, scroll all the way to the bottom using the down arrow on the keyboard. I have set up this samba server a few different ways so I will just explain the method I believe works the best. We will add these lines to the bottom of the smb.conf file:
[global]
netbios name = PiNetworkName
server string = The Pi File Server
workgroup = WORKGROUPNAME
[PiServerName] (The name of your server)
path = /media/pi/HDD/shared (The path to your server folder – See Step 3)
browsable = yes
writeable=yes
create mask=0777
directory mask=0777
public=no
(If you do not want to require a password to access the server then you can change the last line from ‘public=no’ to ‘public=yes’.)
Now I want to mention a few things here. For the NetBIOS name, this is how other computers and your phone will recognize the Pi on the network. You can name it whatever you would like. Also, be sure you entered the correct path to your server folder above. We created this folder in step 3. If you created it in your home directory, it would look like ‘/home/pi/shared’ and if you created it on the external drive it would look like ‘media/pi/USB/shared’. As you can see above, I am setting up my server to use an external drive. This is an important step so if you are not sure then go look at step 3 again and copy that directory path here in the smb.conf file. When you are finished it should look similar to this:

Once these lines have been added to the bottom of the file be sure to save using Ctrl + X. Then Y for yes - Then enter to save.
Step 7 – Create a Password:
Now, we must assign a username and password to the server. In this example, we will set a password for the user ‘pi’. Let’s enter this command:
sudo smbpasswd -a pi
It will prompt you to set a password. Go ahead and type in a password and hit enter. It will ask you to type it in again to confirm it, then hit enter again.
Step 8 – Restart Samba Service
After we create the password for the server, we need to restart the samba service so it will accept all the changes we have made. Do that by entering this command:
sudo systemctl restart smbd
It is worth noting that if you ever have any issues with accessing the server then running this command can solve that problem.
Step 9 – Access the Server
Once you restart the samba service, you will be able to see the NetBIOS name on another PC or device that is on the same network. You can download an smb client app on android or iOS to sign into and access the samba server.
I use CX File Explorer for Android, however, there are dozens of apps to choose from. On a Windows computer, if you open file explorer and click on 'Network' you will see the NetBIOS name of the pi there. You can double-click on it and you will see the server folder. Once you double-click on that it will ask you for the username and password.
If you have issues recognizing the pi over the network, I advise restarting the pi itself then restarting the samba service. You can also reseat the ethernet cable (if you are using one) or reconnect the pi to Wi-Fi.
Comments
-
Questions or Comments
If you are looking for some other ideas on what you can do with a Raspberry Pi, then I recommend checking out our article on "How to turn your Raspberry Pi Zero into a Webcam"I really hope that you all enjoy your server and this project as much as I do. Please let me know if you have any questions. As always, we encourage your feedback! If there is a section in this article you do not understand, please leave a comment and let us know what part. We can explain it more in-depth in the comments and we could edit the guide to help any future viewers. Thank you for reading!
Categories
- All Categories
- 1 The Blog
- 1 What's Trending
- 8K The Community
- 3.2K General Discussion
- 146 New Members
- 873 Consumer Tech
- 234 Prebuilt PCs and Laptops
- 168 Software
- 33 Audio/Visual
- 54 Networking & Security
- 4 Home Automation
- 5 Digital Photography
- 14 Content Creators
- 30 Hobby Boards & Projects
- 84 3D Printing
- 83 Retro Arcade/Gaming
- 62 All Other Tech
- 449 PowerSpec
- 2.6K Store Information and Policy
- 152 Off Topic
- 63 Community Ideas & Feedback
- 619 Your Completed Builds
- 4K Build-Your-Own PC
- 2.9K Help Choosing Parts
- 328 Graphics Cards
- 335 CPUs, Memory, and Motherboards
- 145 Cases and Power Supplies
- 54 Air and Liquid Cooling
- 51 Monitors and Displays
- 93 Peripherals
- 69 All Other Parts
- 65 Featured Categories
We love seeing what our customers build
Submit photos and a description of your PC to our build showcase
Submit NowLooking for a little inspiration?
See other custom PC builds and get some ideas for what can be done
View Build ShowcaseSAME DAY CUSTOM BUILD SERVICE
If You Can Dream it, We Can Build it.

Services starting at $149.99