How to Install Linux in a Virtual Machine - Windows 10


If you want to experiment with extra operating systems, but don't want to risk deleting all your data or putting your PC at risk, a virtual machine, or VM, is the way to go. Virtual machines allow you to use the operating system in whatever way you want without putting your computer in harms way. Basically, its a second computer being run inside your physical computer.
If you are curious about and want to try using Linux but are concerned with the risks of dual-booting, then a virtual machine is the way to go. We'll walk you through the entire process of setting your own virtual machine in a free program called Oracle VM VirtualBox.
Even though this guide is only showing you how to install Linux in VirtualBox, there are many other operating systems you can install as well. Even older Windows operating systems like Windows XP or Vista can be installed on a virtual machine. As long as you have the Disc Image file or ISO file then you can install it.
Please note: The overall performance of the virtual machine will depend on your PC's hardware. You will want to have at least 8 GB of RAM and a Dual-Core CPU for it to run without any issues. If you happen to experience any poor performance when running the VM, I recommend using Lubuntu as it is a very lightweight version of Linux. It was designed for slower PCs so it will run a lot smoother if your PC is not very fast.
Table of Contents
Comments
-
Download the Linux ISO
You can download a Linux ISO from a variety of websites. A few we recommend and trust are:
- Ubuntu - One of the most popular flavors of Linux with great long term support.
- Linux Mint - My personal favorite flavor of Linux. It has the Windows 10 feel but with the power of Linux.
- Oracle - Another very popular flavor of Linux. It is commonly used for Linux servers.
- Lubuntu - If you have a slower PC or maybe you want to try to install Linux on a Windows XP system, this would run a bit smoother.
If you do not already have the ISO file for Linux, you will want to download it using one of the links above. You are welcome to search online for other flavors, just be careful when downloading files from unknown sites.
If you are using a different Linux ISO then just skip to the next step - Download and Install VirtualBox.
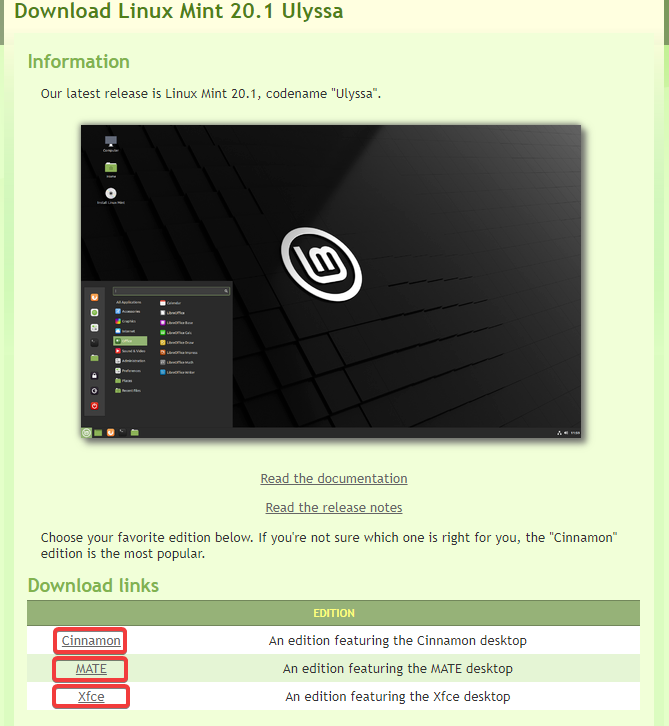
For this guide, I will be using Linux Mint. Once you are at Linux Mint click on either ‘Download’ button
You'll be given the option of Cinnamon, MATE, or Xfce. These are the different versions of this operating system. The difference between them is fairly simple:
Cinnamon = Most modern version, contains most features for a desktop
MATE = Slightly faster and slightly more stable, less features
Xfce = very lightweight desktop, extremely stable. Least amount of features
If you just want to use the standard desktop feel with all the features then I recommend using Cinnamon. That is what I will be using in this guide.
Click on the version you want to use to download it.
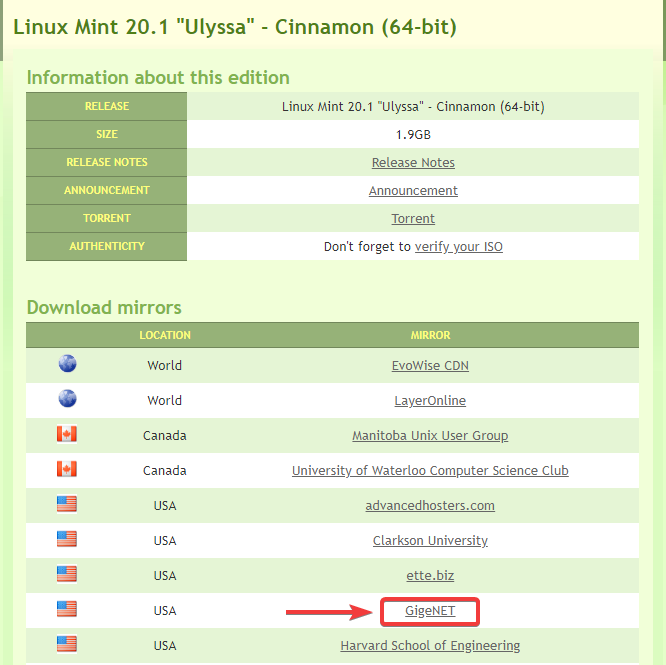
On the next page, click on the GigeNET link
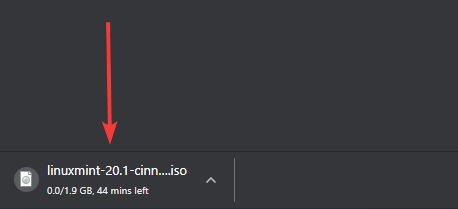
After clicking on that, the ISO file should start downloading.
Unless you changed the download location for this, you should find it in your Downloads folder.
Remember where you save this as we will need it in a moment. If the download did not start on its own, I recommend either clicking the back button and trying again or just closing the browser and starting back from the 1st step.
Next you will need to make sure virtualization is enabled on your PC. It is very easy to check this and enable it if it is not already.
First, Open Task Manager. You can do this by Right-Clicking on the taskbar, then click Task Manager.

You may need to click More details in the bottom left
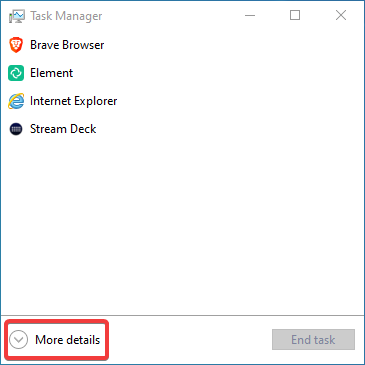
From here, Click on the Performance Tab, Click CPU, and you can see whether virtualization is enabled or disabled.
If it is enabled, skip to Download and Install VirtualBox. If it is disabled, here is how you can enable it. You will need to boot into BIOS to do this. If you aren't sure how, follow the instructions in this guide.
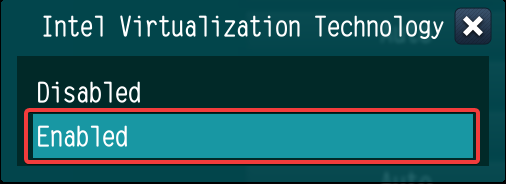
In the BIOS Menu, you will need to find the CPU configuration settings. in this BIOS it is under the Advanced Tab. (Let us know if you have issues finding this as older BIOS menus can look a lot different)

Click on the Virtualization Technology setting and click Enabled.
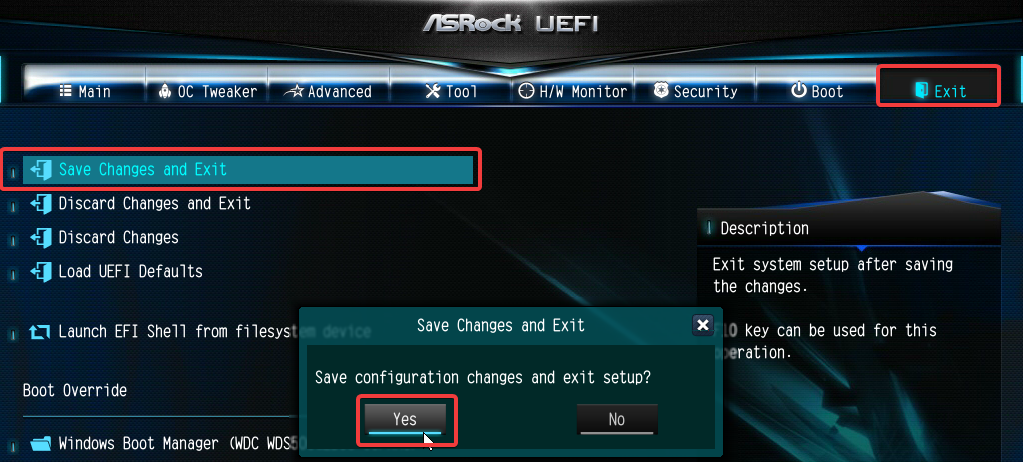
Then make sure you save changes and exit.
Now that we have virtualization enabled, we can start installing VirtualBox.
-
Download and Install VirtualBox
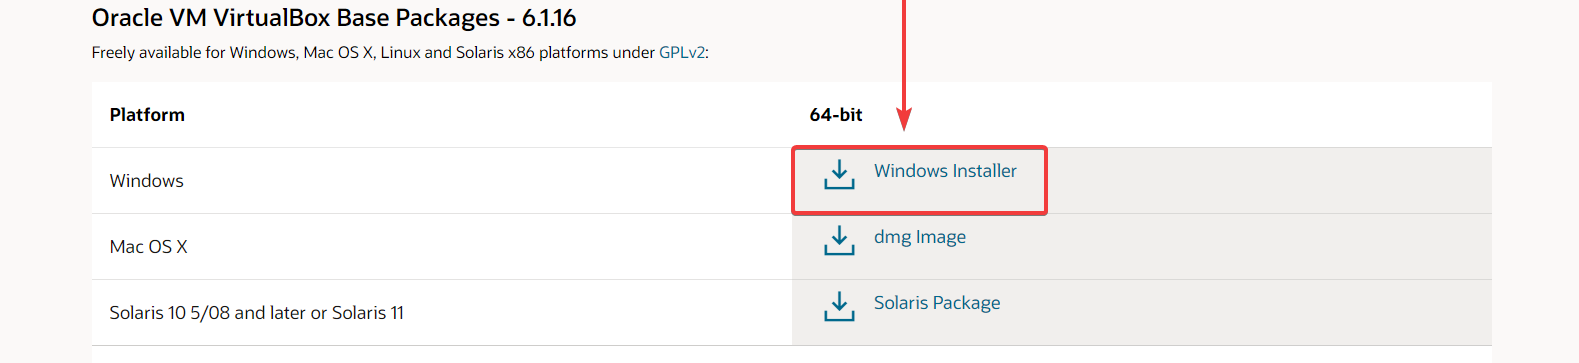
Go to https://www.oracle.com/virtualization/technologies/vm/downloads/virtualbox-downloads.html to download VirtualBox. Once there, click on ‘Windows Installer’
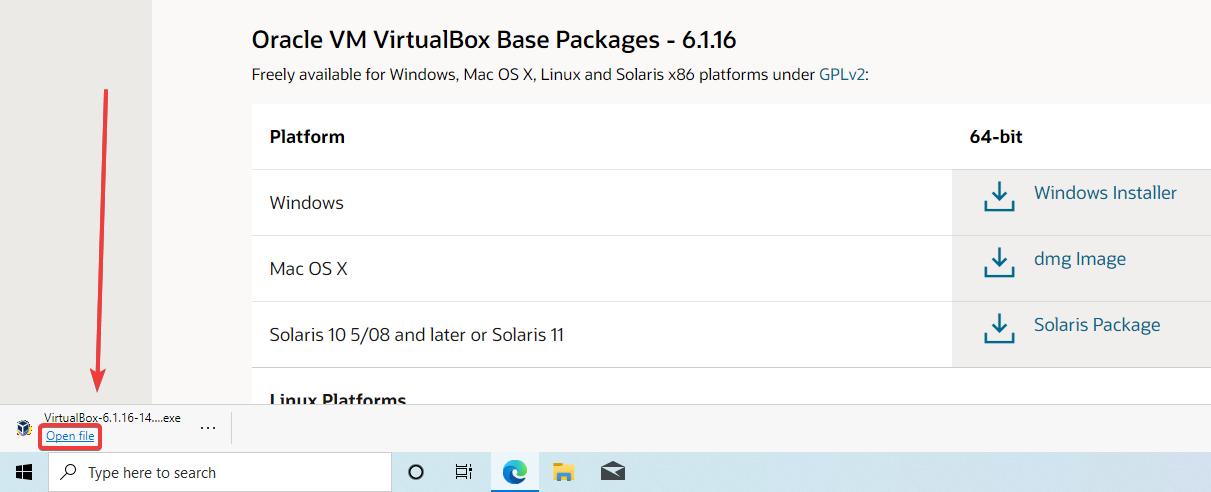
The file should start downloading automatically. Once it is finished, you will need to open or run the download.
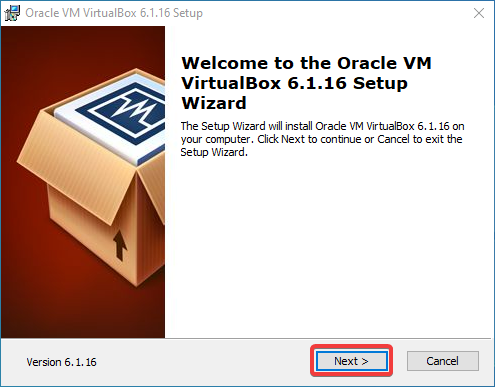
This will open the Installation Wizard. Once open, click Next
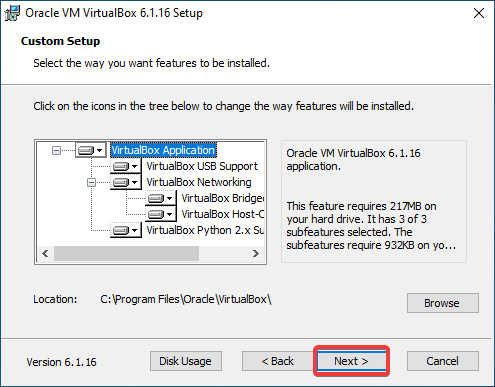
The next screen will ask you what features you want to install and where you want the program installed. For a first installation, you do not have to change anything on this screen. Just click Next.
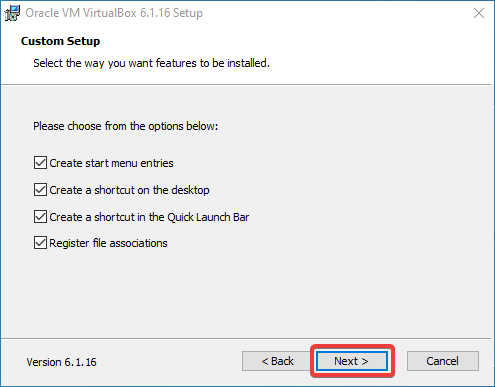
You will be given more install options after that. You can choose where you would like to place your launcher, or just click Next.
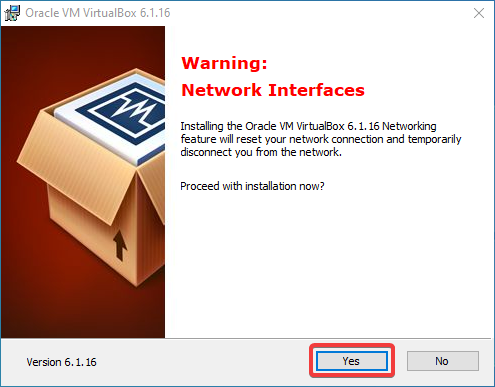
It will have to install the networking feature, which will disconnect you from the internet for a moment. Click Yes.
Now click Install.
Once it is finished installing, open VirtualBox and continue following the steps below.
-
Setting up VirtualBox
Now that you have VirtualBox installed, you can now start setting up your Linux virtual machine.
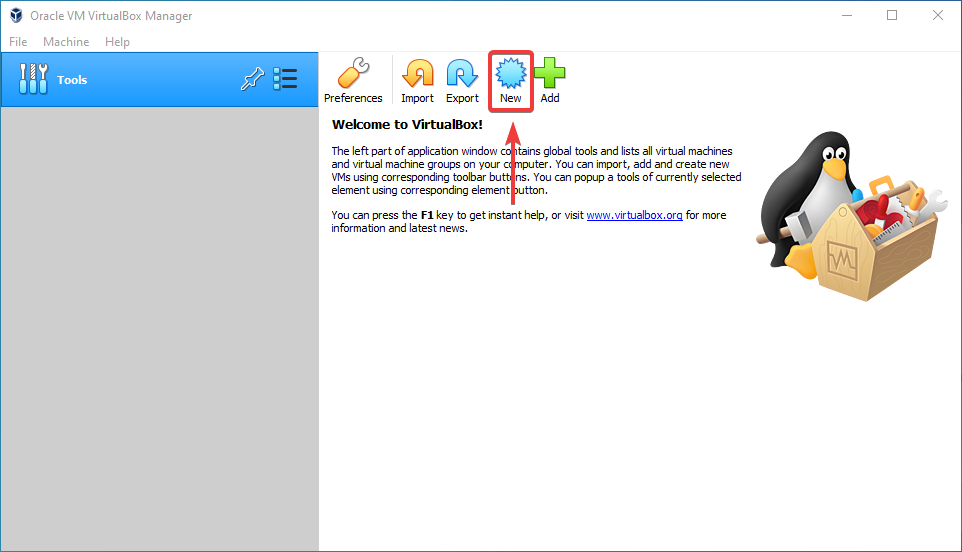
Click New near the top of the window.
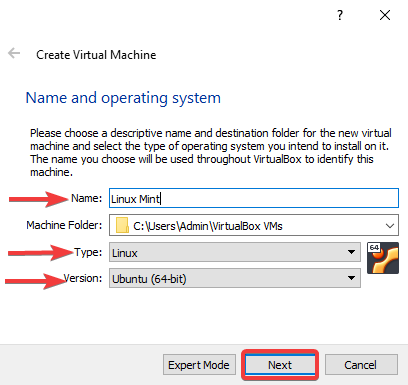
In the ‘Name’ box type: Linux Mint
This should automatically change the ‘Type’ to Linux and the ‘Version’ to Ubuntu (64-bit). If for some reason it does not change, make sure you change them by clicking on the dropdown. Don’t worry about changing the location of the machine folder. Once everything is correct, click Next
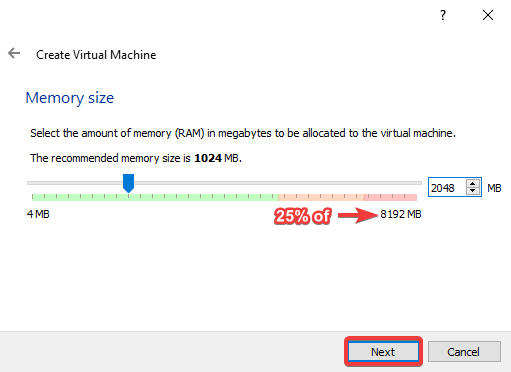
Next it will ask you how much RAM you want to allocate to the virtual machine. Although you can use what VirtualBox recommends, it would be better to use 25% of the total RAM you have installed in the PC.
For our virtual machine, we used a PC with 8192 MB of RAM. We'll use 2048 MB for this VM even though VirtualBox only recommends 1024 MB, just to ensure that everything runs smoothly.
This is something that can be changed at any time if you need to allocate more or less RAM later on.
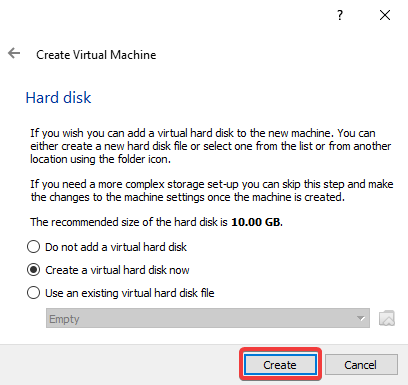
Next you will need to create a virtual hard drive. This is where all of the data will be stored for the virtual machine. Click Create to start this process.
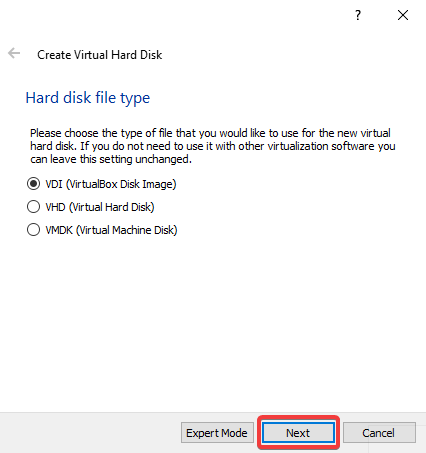
Next it will ask what type of virtual hard disk you want to create. VirtualBox will automatically select the best type of virtual machine for your system, so just click Next.
Now it will ask how you want the data to be stored. Choose ‘Dynamically Allocated’ then click Next.
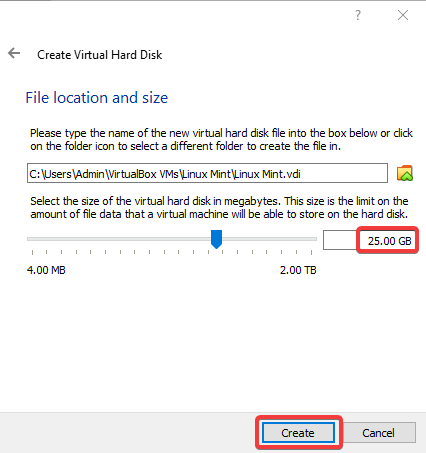
You now have to set the total size of the virtual hard drive and the location where it is saved on your PC. Don’t worry about the file location, just leave that as is.
For the storage size you could use as little as 15 GB, but we recommend using at least 25 GB to give you a little room to work with.
Once you have entered the desired amount, click Create.
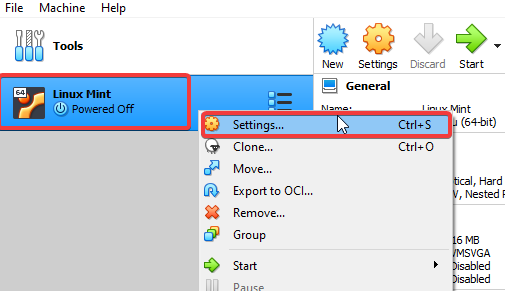
It should take you back to the home screen after that. We still need to do a few more things before we can start the virtual machine.
Right-Click the VM listed and click Settings.
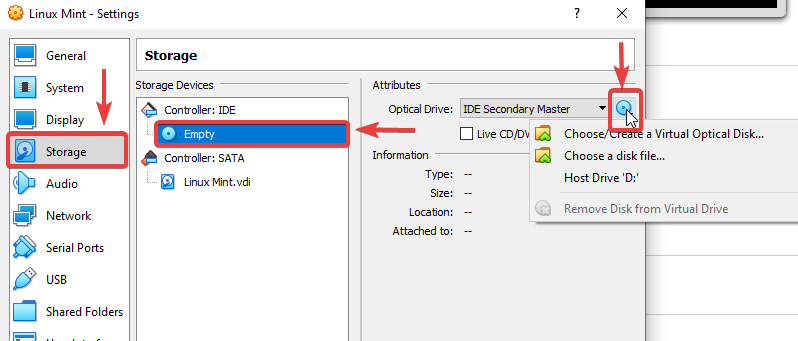
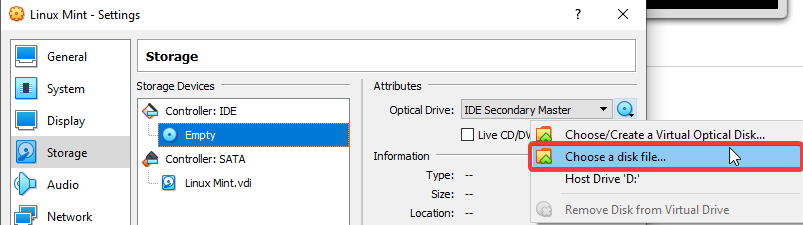
Click Storage on the left side, then click the Disc icon where it says ‘Empty’. After that is highlighted, click the Disc icon toward the right side.
Then click Choose a disk file.
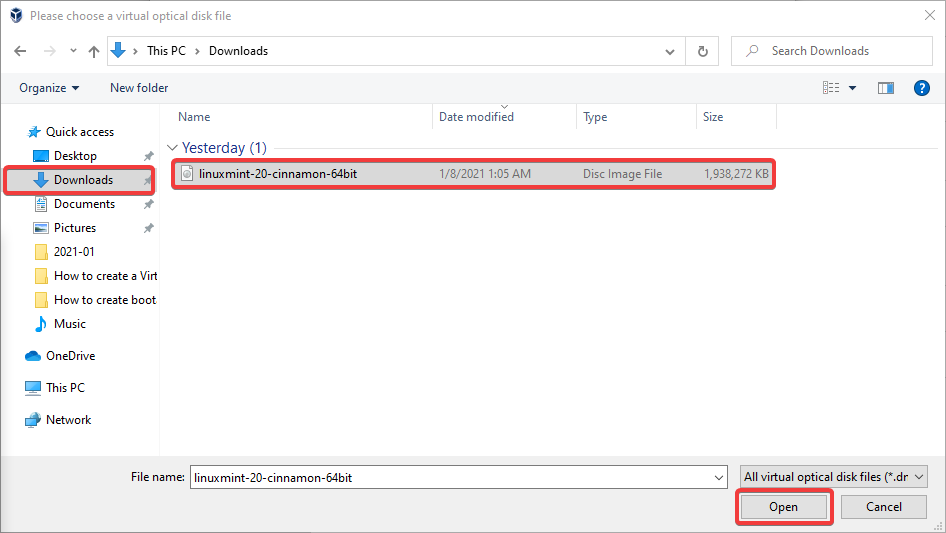
Now select the Linux ISO file we downloaded earlier.
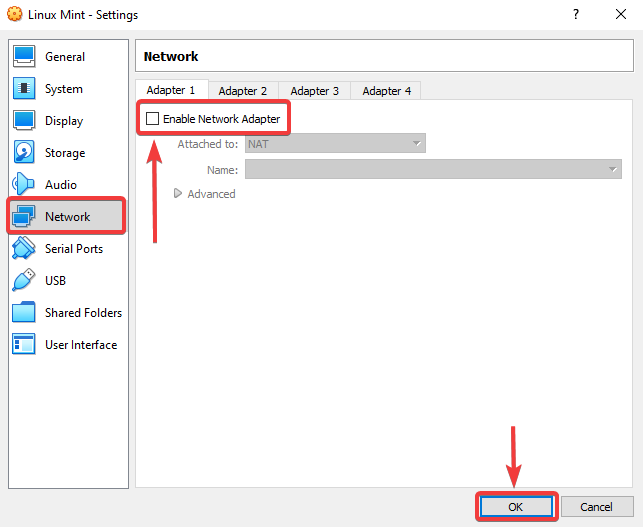
This next step will let you choose the network or internet settings of the virtual machine. To keep your home network and your actual PC fully protected from the virtual machine, uncheck the ‘Enable Network Adapter’ box. Then click OK.
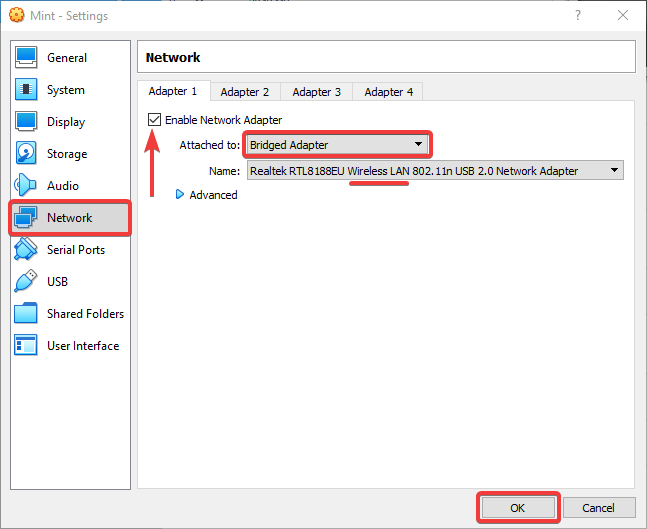
If you want to allow the virtual machine to connect to the internet, you can do this by enabling the adapter and selecting "Bridged Adapter" in the ‘Attached to’ dropdown. You can see I am using WiFi, so I select my Wireless LAN adapter.
Once you have everything set correctly, click OK.
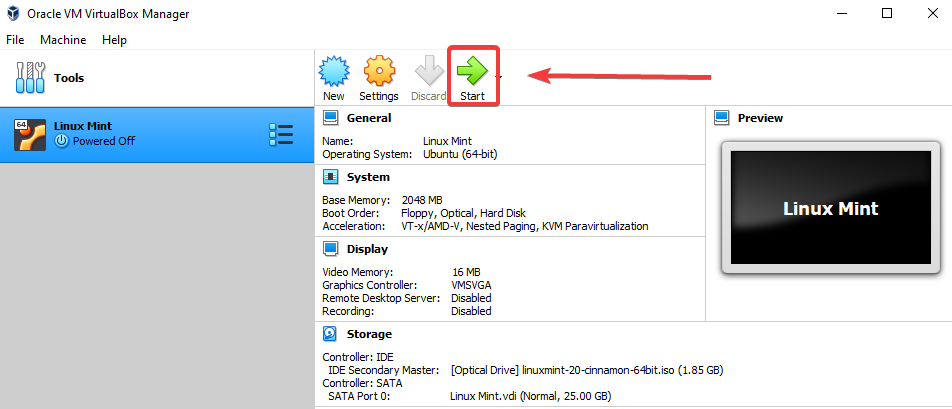
Now you can start the virtual machine by clicking the green arrow.
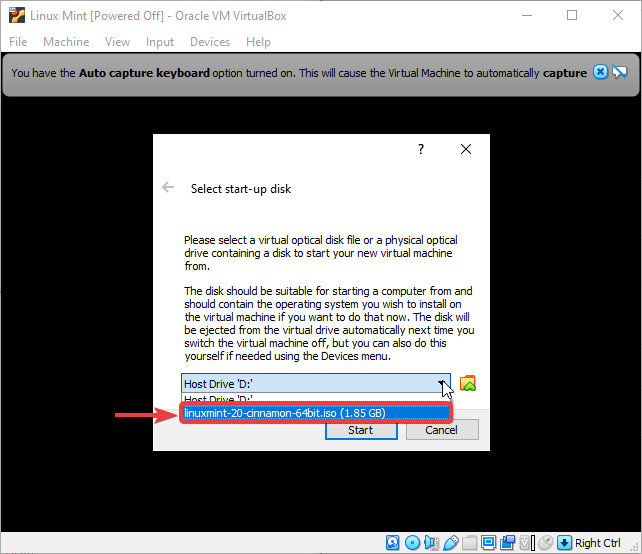
Once you start the VM, it will ask you to choose a disk to boot from. Click the dropdown arrow and click on the Linux Mint ISO.
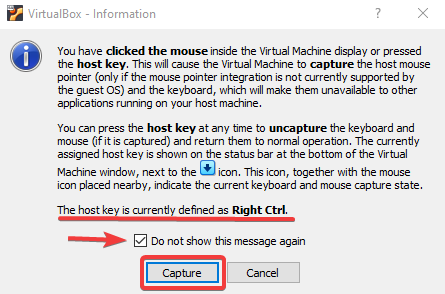
When you click inside of the VM, you will likely get this pop-up asking if you want to capture the mouse. You’ll need to press the host key to use your mouse outside of the VM again, so make sure you remember what it is set to. It will be displayed on this pop-up.
Check the box to not show this message again, then click Capture.
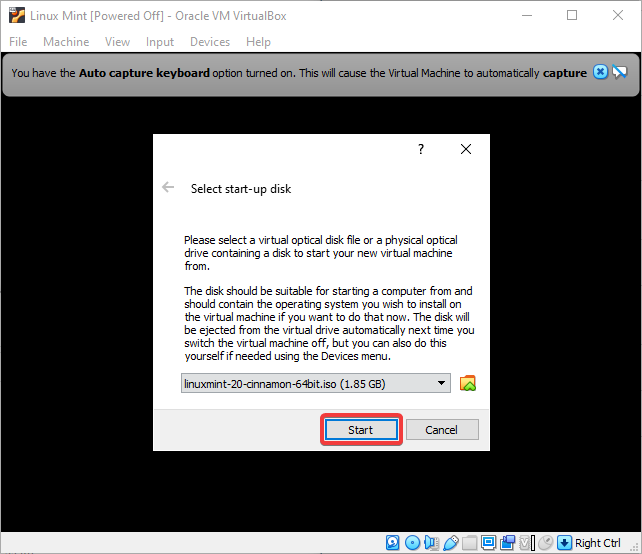
Once you have selected the Linux Mint ISO, click Start.
You have now set up the virtual machine and booted from your Linux ISO. Now we can start installing Linux and setting up your user account.
-
Installing Linux
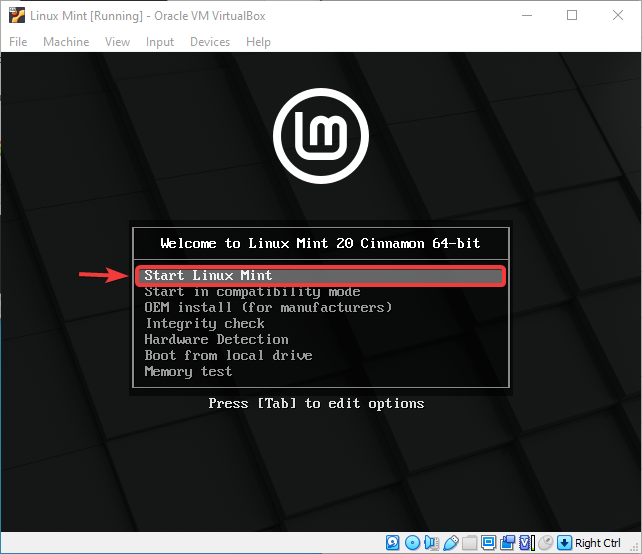
Make sure you click inside of the virtual machine window in order to control it.
Use the arrow keys on your keyboard to select start Linux Mint then click hit Enter.
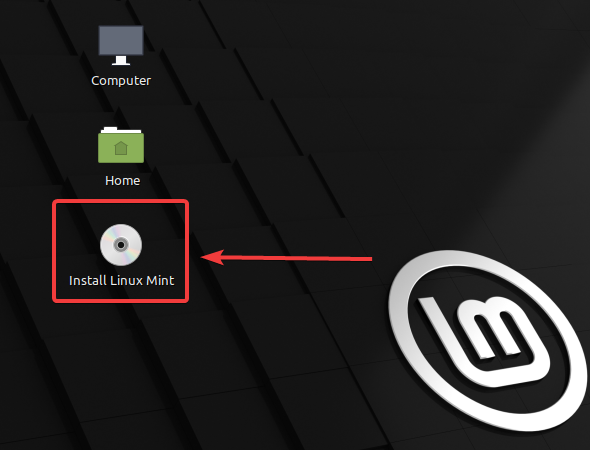
Double-click Install Linux Mint on the desktop.
Select the keyboard layout you will be using. Then click Continue.
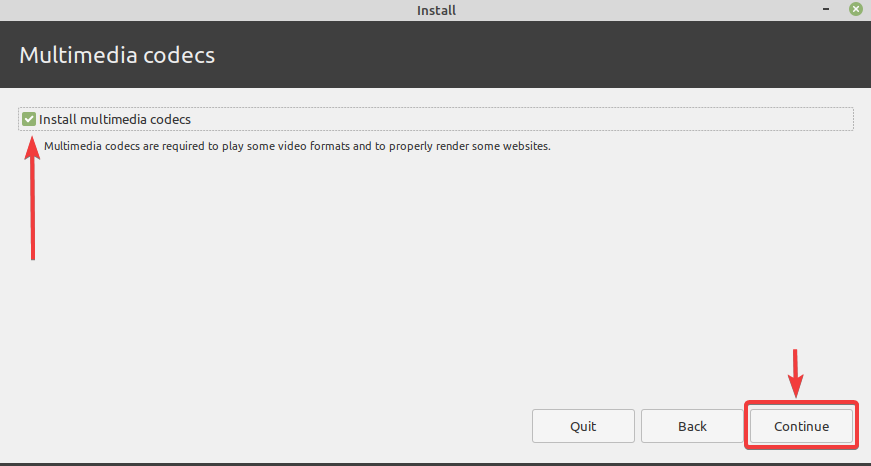
I recommend checking this box to install multimedia codecs so you don’t have to worry about it later. Then click Continue.
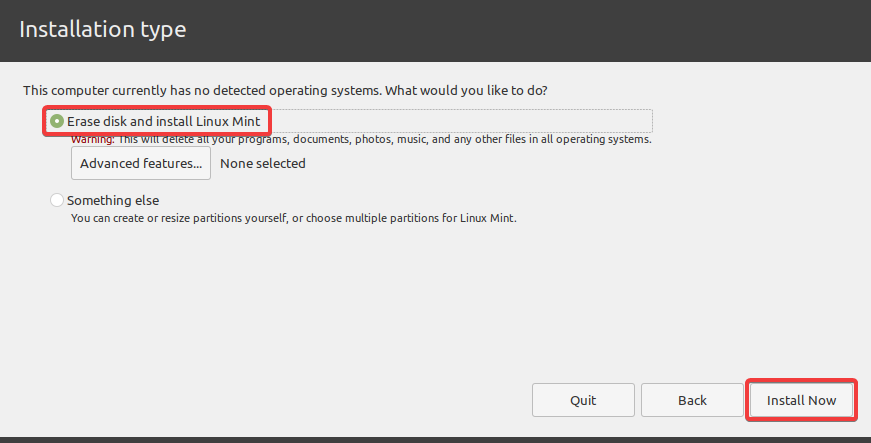
Check the box next to ‘Erase disk and install Linux Mint’, then click Install Now.
Don’t worry, this is not the actual hard drive of your PC that will be erased. It is erasing the virtual drive we created earlier in VirtualBox.
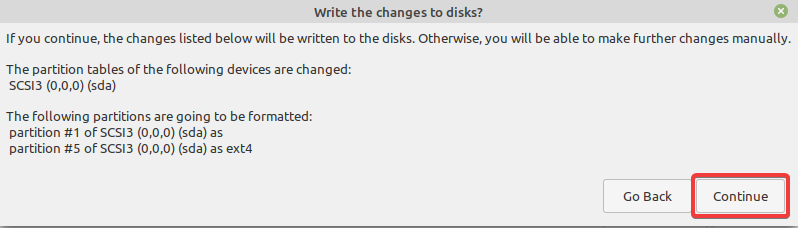
It will ask you to confirm the partition tables. Click Continue.
Select your time zone:
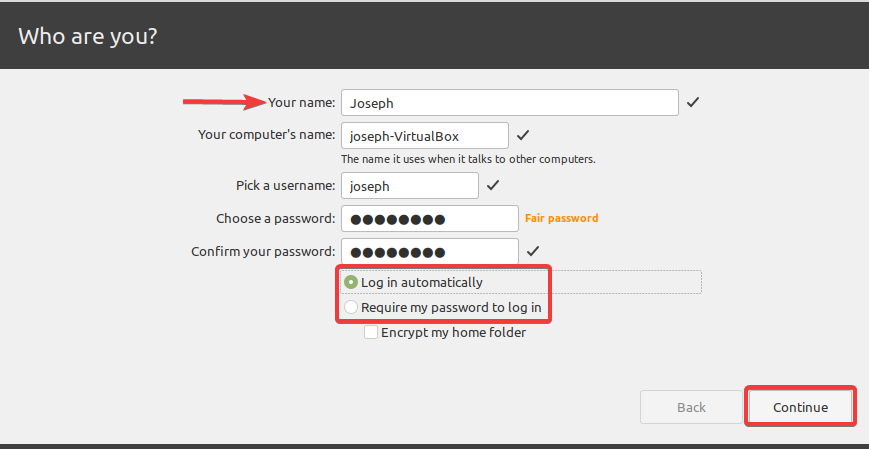
Type in your name and a password here. You can choose either ‘require my password to login’ or ‘login automatically’. Then click Continue and let Linux install
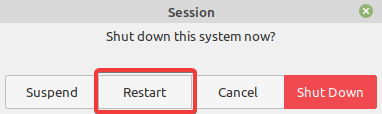
After the install is finished, restart your virtual machine. Click the Start button on the bottom left corner, then click the power icon.
Then click Restart.
-
Installing Guest Additions:
Guest Additions are just additional drivers and software that are needed to improve the overall performance and functionality of the virtual machine. This can include features such as mouse integration, video support, shared folders, and even something as simple as time synchronization.
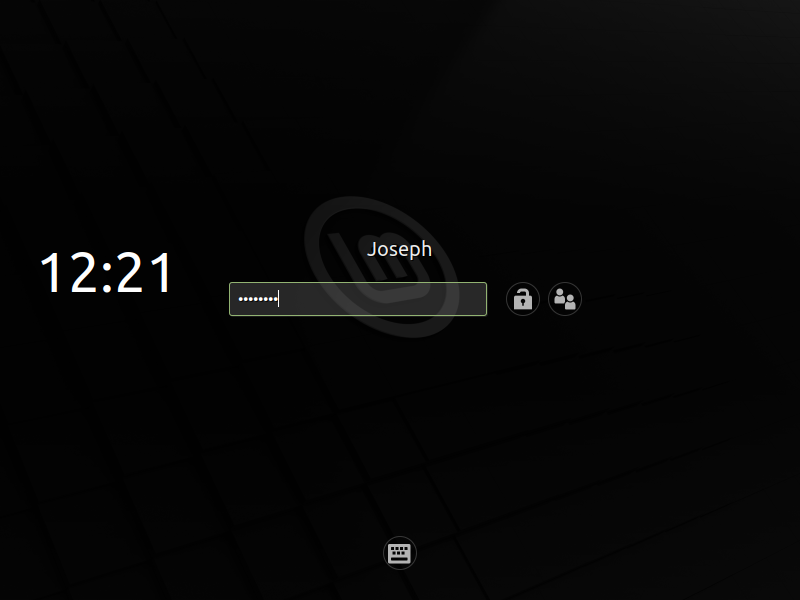
After the reboot, sign in using the password you created.
Next, we will be installing guest additions from VirtualBox.
At the top of the Window, click Devices, then hover the mouse over Optical Drives, then click Remove disk from Virtual Drive.
If this is not clickable, that's okay - skip the next step.
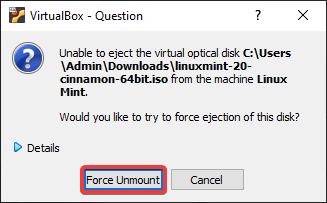
If you get this pop-up click ‘Force Unmount’
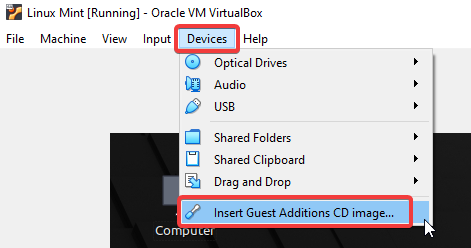
Now, click on devices, the click ‘Insert Guest Additions CD Image…’
When you get this pop-up, Click Run
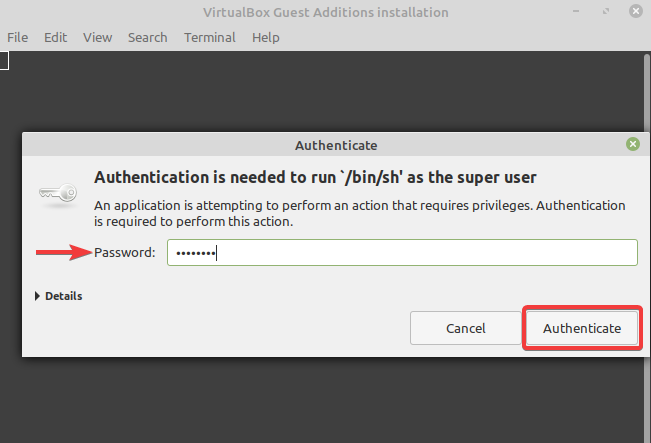
Because you are installing a program, Linux requires you to enter your password. Once you have entered it, click Authenticate.
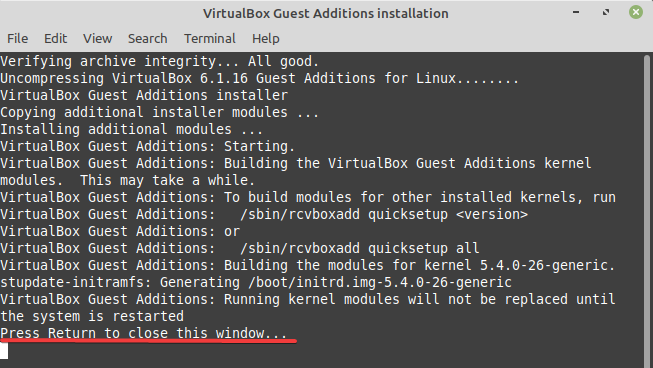
Let the Guest Additions Install. Wait until you see ‘Press Return to close this window’ to close the terminal.
Then restart the VM one more time.
After the VM reboots, the last step is to save the machine in its current state. This is similar to a restore point in Windows but better. It will allow you to easily go back to the time you saved the machine state in the event you encounter any problems.
At the top of the Window, click Machine then click "Take Snapshot..."
Enter a name for the Snapshot. Then click OK.
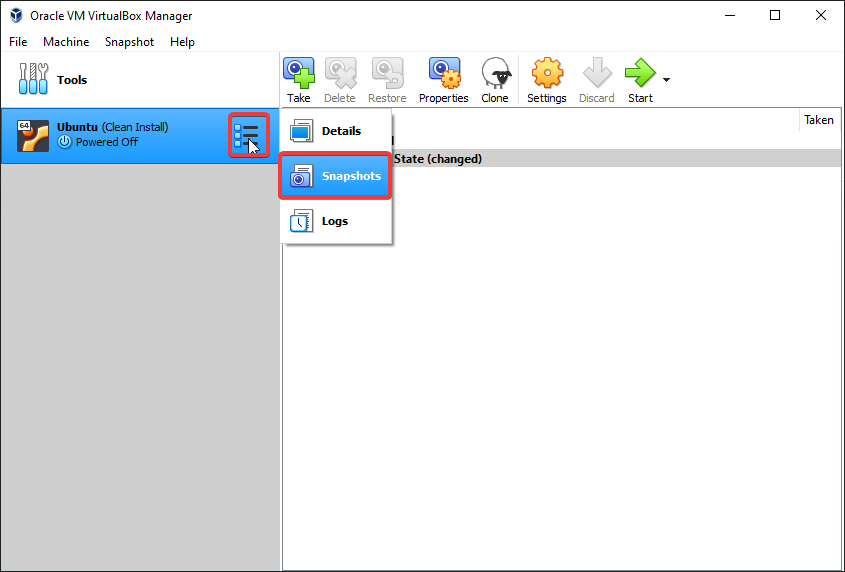
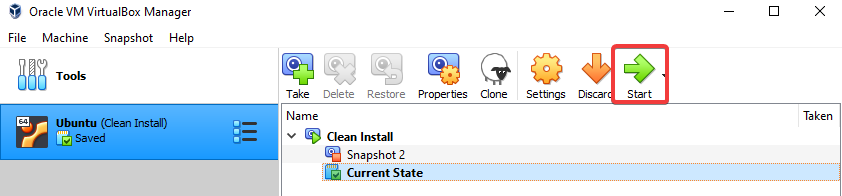
If you ever need to restore your Snapshot, click on the Options icon on the Virtual Machine, then click Snapshots.
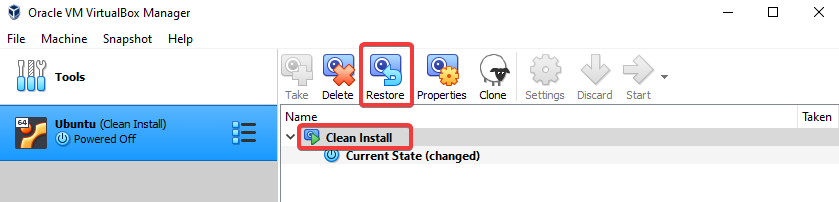
Then click on the Snapshot, then click Restore at the top.
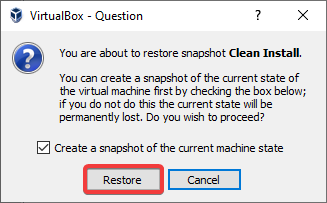
Click Restore again.
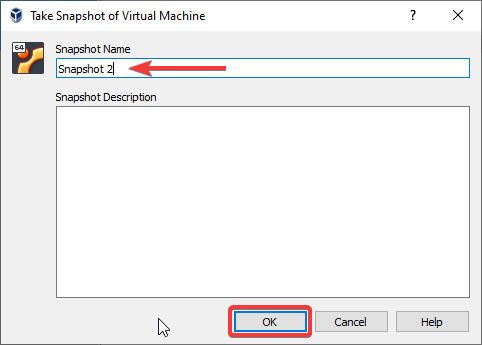
Then save the new snapshot. You can name it whatever you like:
Now you can just click Start and the snapshot will be restored.
You are now finished with installing and setting up your VM. Feel free to play around with it and see what it can do. Even if you are using it without any internet there is still a lot you can do. I recommend looking at all of the pre-installed utilities and admin tools just to compare them to Windows. You may also want to look up some basic Linux commands, as you can do a lot from terminal.
Remember you don’t have to worry about harming your PC by entering the wrong command since you are in a Virtual Machine with no internet. If by chance you happen to crash your Virtual Machine - which I may have done more than a few times - you can load the snapshot you saved or just create a new one. You could also install a different flavor of Linux in another VM to see the differences and find one that you like best.
-
I hope this guide encourages many of you to use Linux and virtual machines more often. I learned how to actually use Linux in a virtual machine for the first time in late 2018. I have always had it installed on at least 1 of my PCs ever since. One of my favorite features of Linux is the number of different file systems they allow you to not only read, but format partitions with. It’s nice to have that many options since Windows is a bit limited as to what file systems it can use.
Comment down below what your thoughts are on Linux and/or Virtual Machines. Was this your first time using them? If not, let us know what you mostly use either Linux or VMs for?
If you are interested in Linux and are ready to take this to the next level then you can check out our other Linux related articles:
-
Other Linux related Articles


Categories
- All Categories
- 1 The Blog
- 1 What's Trending
- 8K The Community
- 3.2K General Discussion
- 145 New Members
- 872 Consumer Tech
- 233 Prebuilt PCs and Laptops
- 168 Software
- 33 Audio/Visual
- 54 Networking & Security
- 4 Home Automation
- 5 Digital Photography
- 14 Content Creators
- 30 Hobby Boards & Projects
- 84 3D Printing
- 83 Retro Arcade/Gaming
- 62 All Other Tech
- 434 PowerSpec
- 2.6K Store Information and Policy
- 150 Off Topic
- 61 Community Ideas & Feedback
- 616 Your Completed Builds
- 4K Build-Your-Own PC
- 2.9K Help Choosing Parts
- 328 Graphics Cards
- 334 CPUs, Memory, and Motherboards
- 145 Cases and Power Supplies
- 54 Air and Liquid Cooling
- 49 Monitors and Displays
- 93 Peripherals
- 69 All Other Parts
- 65 Featured Categories
We love seeing what our customers build
Submit photos and a description of your PC to our build showcase
Submit NowLooking for a little inspiration?
See other custom PC builds and get some ideas for what can be done
View Build ShowcaseSAME DAY CUSTOM BUILD SERVICE
If You Can Dream it, We Can Build it.

Services starting at $149.99