Configuring a trackball and spinner with Retropie


Recently I've been taking a look at one of our new products, the Atari USB Spinner. The Atari USB Spinner can replace one of the arcade buttons, or it can be mounted in a 1 1/8” hole drilled in the control panel. It's connected to your Rapberry Pi or other computer via USB and acts as a mouse. This article focuses on configuring your games so you can use both the trackball and spinner. Although I’m using the Ultimate Fight Stick with Trackball, these instructions will work for any setup with both a trackball and spinner such as a full size cabinet with a trackball installed.
If you’re using a controller without a trackball the spinner is plug and play, but getting both the trackball and spinner working together takes a little more work. Before we get started I want to explain the technical issue using both at once causes- skip the next paragraph if you just want to get to the fix.
The trackball and spinner are both seen by the Raspberry Pi as a mouse. The trackball is essentially an old school ball mouse flipped upside down, and the spinner uses an optical encoder and microcontroller to emulate a mouse that only provides one dimension of motion. These devices are known to the Linux side of the Raspberry Pi as “mouse1” and “mouse0”. Each game listens to one mouse at a time. The default global setting is mouse0. Since we want some games to listen to mouse0 and some to listen to mouse1, we need to create per game configuration files for each game that should be using mouse1. While there is a way to get the names of each mouse used by the Linux operating system from the command line, Retroarch (the program running the emulators) aliases the mice differently so it’s best to determine which device is which by plugging both in and loading up a game.
The instructions below were written for Micro Center’s Retropie image that is distributed with our retro gaming kits (like the Atari Pi Kit and Stand Up Arcade kits) and the Atari Games SD card. These instructions might not work perfectly for other images, but should give you a good starting point.
In addition to a Retropie setup you’ll also need a USB
keyboard connected to the Raspberry Pi. You can also SSH into the Pi using terminal on Linux or macOS or PuTTy, WSL, or another terminal or SSH program on Windows, but setting up an SSH connection won't be covered in this guide.
First, we need to identify which device is the default. Hook
up both the spinner and track ball with the system powered off, then boot it
up. You can determine which device is the default by opening a game like
Avalanche or Crystal Castles and trying both controllers. One should allow you
to move, and one should be unresponsive. Make note of which one works, as this
is the default “mouse” with index 0. In my case this was the track ball, so
I’ll be creating config files for games I want to play with the spinner. If neither are working, it's possible you've selected a game that
doesn't support mouse inputs. Many home consoles (Like the Atari 2600) will not work with
either controller. Exit
the game and return to the main menu.
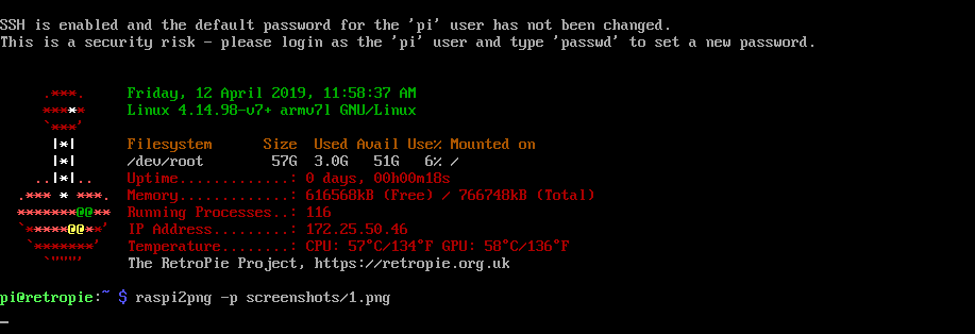
Most of the screenshots in this guide end with the command raspi2png –p screenshots/#.png. You can ignore these lines, it’s just the command I used to take screenshots of the terminal.
Type the following command, which will move us into the directory our roms are stored in:
cd RetroPie/roms
Next, type ls to get a list of files and sub directories in this directory. You should see a sub directory for each game system: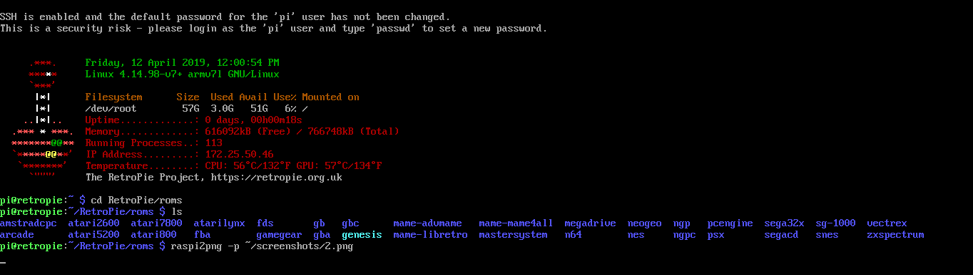

We’ll use nano to create a new file, so use the command below to open an empty file for our game:
nano <game name>.cfg
Nano is a command line text editor that’s great for quick changes like these. Make sure the file extension for the rom (.zip in the case of arcade games) and .cfg are included in the filename. In my case, I used nano avalnche.zip.cfg. Note the misspelling of “avalanche”- this is how the rom is named, and it’s important to use the exact name of the rom.
After running this command you should be greeted by a mostly empty window. There will be a list of commands at the bottom and a banner at the top that says “GNU Nano” and the file name, like this:
 This is our empty file. Add the
following lines:
This is our empty file. Add the
following lines:
input_player1_mouse_index = “2”
config_save_on_exit = false
This tells our game to listen to the mouse with index 2, and not to overwrite the config file when the game is exited. Press ctrl+x to exit nano, press y to save changes, and press enter to save the file. You can verify the file was created using `ls`. Reboot the system from the command line with this command:
sudo reboot
Load up the game you just configured and try out the controllers. Your default controller should be unresponsive, but the second controller should work now. In my case I could move the tower in Avalanche with the joystick or spinner, but not the trackball.
Creating files for more games is even easier. The cp command lets us make a copy of a file. All we need to do is use cd to get back into the directory our games are stored in and copy the config file we just made. For example, I wanted to use the spinner for Tempest as well, so I used the following commands:
cd RetroPie/roms/arcade
cp avalanche.zip.cfg tempest.zip.cfg
Here I’ve used the ls command before and after using cp to duplicate a config file. This let me verify the copy was successfully created:

Those of you with a bit of Linux experience might be tempted to find the mouse indexes in /dev/input/, but I found the information listed here doesn’t match the index used by Retroarch. Retroarch assigns its own indexes to the mice which don’t match the indexes assigned by Linux.
The new spinner feels much more natural for games that only involve 1 dimension of movement like Tempest and Avalanche, but isn’t great for games like Crystal Castles that involve 2 dimensional movement. Having both mounted in your cabinet is the best of both worlds, and a few minutes of configuration is all it takes to get both controllers up and running.
Comments
-
I will be buying this shortly to try it, and will report back.
Very cool to see these quality controls for reasonable prices. -
I've wanted to add the AtGames Ultimate Legends Arcade cabinet, because it "just works". All the controls you need, ability to add lots of game ROMS, with none of the headaches of wrestling with Raspberry Pi and associated software emulations. However, I don't have the space for this cabinet, so I'm picking up the Legends Gamer Pro control panel instead. All the features, but portable. However, the one thing the Ultimate Legends cabinet has that the Gamer Pro is missing is a spinner. I'm trying to determine whether there is a way to drop this Atari USB spinner into this control panel somehow (either removing one of the 7th or 8th buttons from the panel and replacing with the spinner, or drilling one additional hole near the trackball area for it). and just plugging the spinner into the available USB on the back of the panel. Does anyone with experience with the AtGames Legends products and this Atari USB spinner know whether the Legends will detect this added controller and allow me to use it for the select games that need it to play properly? https://www.samsclub.com/p/legends-gamer-pro-se-tabletop-arcade/prod24923281?xid=plp_product_1
-
got the spinner today:
 package:=============contains the spinner top, spinner bottom part with connector, 1 connector pcb-> usbInstallation:----------------------------------choose a button to replace or drill hole in panel1) unlock and open up panel2) locate button, and disconnect wiring to button3) unscrew washer around button, and unscrew the button4) attach connecter with USB to bottom of spinner5) thread spinner through the button hole6) tighten washer to secure spinner7) put spinner top on shaft===============================thoughts and quick testsits a very sturdy and heavy duty spinner, good weightand spins very freely.looks good with the atari symbol on it. and the ridgeson the side make for a good gripits very silent.test===================ran a quick test on MAME for windows.the spinner is recognized as a mouse input.fired up tempest, adjust the settings and sensitivityto the lowest, and was able to play just fine.further tweaks for other games will be needed.will be testing it out on the xbox one with tempest also.recommendation:==================price / value is definitely worth it, and the fact you don'thave to drill into a panel makes it superior just for that.no tools are needed to install, and no maintenace afterwards.good value, and sturdy build make it worth $49.99
recommended 5/5 starslater-1 -
The total length of spinner and controller is about 2 1/2 inches.Here is a comparison with the normal button:

 here it is inside:-------------------
 later-1
 -
@negative1 Thanks for taking the time to write up your experience and upload the detailed pictures! I'm glad to hear you're enjoying the product.
-
Hi, @negative1. Great post. Based on the photos, the spinner appears to have only a small weight and no flywheel. When you spin it and let it go, does it continue to spin?
-
Nick, I have the dual trackball 3B+ version and added a USB spinner. I'm running a custom image. Like your above example, my trackball is mouse index 0 and the spinner is 2. I've followed your directions above and wrote custom config files in the roms folder for tempest.zip and centiped.zip and included config save on exit=false. But these settings don't save, and revert every time I reboot. When I go into the in-game gui and change the mouse index, I'm able to switch from the trackball to spinner, but the problem is that the settings don't save. Each time I exit, it reverts back to mouse index 0. If I change the mouse index settings in retroarch to mouse index 2, and save config on exit=true, then those settings persist when rebooted. So I can have either the spinner or the trackball load when emulation station loads, but I have to enter the in game gui to adjust mouse index each time.Any ideas where to look? Specifically, which config files need to be set to save or load? I believe there's a config for each game, multiple configs for each emulator, each system, and retroarch.
-
@kwil
Try config_save_on_exit = true instead of config_save_on_exit = false. There's so may variations in configs it's difficult to give direction on any image other than our own, but based on the behavior you're describing that may do it.
There's multiple levels of configurations, with smaller scope configuration taking precedence over larger scope configurations. This article goes over the config files pretty well:
https://retropie.org.uk/forum/topic/22816/guide-retroarch-system-emulator-core-and-rom-config-files
-
Thanks for the reply Nick. As it turn out, I was finally able to get it to save correctly. What did it for me was to enter the following into the game's config file:
input_player1_mouse_index = “2”
config_save_on_exit = false
But.. for my image, the above config additions had to be placed in opt/retropie/configs/all/retroarch/config/mame2003/(gamename).cfg, rather than in the ROMS directory, (without the ".zip" in the file name)
Hopefully, this helps someone else out.
-
I am still struggling with this. I am using the Micro Center Atari distribution of RetroPie on a PI3B+. I have the fight stick with trackball and added the spinner. I followed the procedure in the original post with no luck. Since then I have searched the problem and have tired various remedies but sill no luck. When I do the PI command line mouse test the track back works at mouse 0 and spinner at mouse 1. If I only leave one plugged in they work as expected but I can't create any configuration that allows them to both be plugged in. The only additional information I have that might allow someone to help me is no matter what I place in the CFG file for mouse index the trackball always works and spinner never does. I am assuming there is some hierarchy that is overwriting it but I can' really follow that document all that well and wouldn't know how I changed anything that would prevent the original procedure from working.
Thankfully I enjoy a puzzle probably more than playing the games but I have been devoting a few hours every weekend to this and several other controls problems and never play any games.
-
@ Kodos
I have the same setup and I am having the same issue. Where you able to resolve the issue?
Thanks
Ant
-
I'm having this same problem. Can't get it to work unless I unplug the spinner or trackball. I'll take it one step further in that I have 2 spinners installed and the trackball. It's currently defaulting to my spinner I have installed for player 2, which is the worst condition for playing Centipede.
I'm starting to believe the instructions above are incorrect where it states to place the .cfg file in the same directory as the rom as well as including the ".zip" within the file name of the config. The reason I think that is because there is a YouTube vid here with similar but more detailed instructions: https://www.youtube.com/watch?v=ABzxehgfLsg
In that vid they are putting the .cfg file in the following directory without the ".zip" included, only problem there....that's not working for me either.
Pie_IP_Address\configs\all\retroarch\config\<rom_name>.cfg
Going to give kwils method a try:
"the above config additions had to be placed in opt/retropie/configs/all/retroarch/config/mame2003/(gamename).cfg, rather than in the ROMS directory, (without the ".zip" in the file name)
-
Here's my follow up:
It worked for me placing the .cfg file in the folder kwils outlined.
"<Pi_IP_Address>/configs/all/retroarch/config/mame2003/(gamename).cfg, (without the ".zip" in the file name.)
I have the MC Atari dual fightstick with trackball which came with the Raspberry Pi v3B+ and Atari MicroSD card. I have 2 Retropie images I have tried this on. One being the official Atari image updated to the v4.5.1MC official update release, the other is a fresh install image of RetroPie v4.7.1 downloaded directly from retropie.org.uk. Neither of these images worked for me following Nick's instructions to place the .CFG files in the same folder as the game roms, but both worked following kwils method. Thank You kwils!
Nick's solution sounded great, thank you Nick! However, now that I got the configs to work, I was able to realize there is an inherent problem with using this method. It seems like the Linux OS re-assigns the Mouse Indexs each time it boots up in a first in/first assigned method. Therefore for example, when you write the config file to use Mouse index 0 as the trackball and Mouse index 1 as the spinner the config will work, but the next time you boot the system there is no way to ensure that the Track Ball is still assigned to Index 0. It may be re-assigned to Index 1 instead and your config is now doing the exact opposite as what you wanted. In my instance it gets even worse because I have 2 Atari spinners plugged in and a Track Ball. Now my odds of Linux assigning them to the exact same Mouse Index as my configs is even less likely.
Upon doing further research, I discovered that the ADVMAME1-4 emulator allows multiple mouse devices to be active simultaneously when playing a game, where with the lr-MAME2003 emulator which is being used for the Atari game ROMs by default, that emulator while it supports multiple mouse devices, only ONE of the mice are active in the game at a time, where the .CFG file helps that problem of which mouse device is active when playing that particular game, but then you have to deal with the Linux OS re-assigning the Mouse index on each reboot.
I therefore attempted to install the ADVMAME1-4 emulator on the MC Atari Image, it wouldn't install. It keeps giving me an install error and won't complete the install. However, I was able to install the ADVMAME1-4 emulator with the RetroPie v4.7.1 image I also have. There must be something special going on in the MC Atari Image release which doesn't allow you to install the ADVMAME1-4 emulator.
At this time, I believe re-assigning the Atari game ROMs to use the ADVMAME1-4 emulator instead of their default lr-MAME2003 is likely the best solution to solve this problem. So what do we need to do so we can install the ADVMAME1-4 emulator on the MC Atari released RetroPie image?
I would prefer to run the MC Atari released image to keep everything "official", but it seems to be a crippled release by not allowing certain emulators to be installed through RetroPie. The solution I found was that I was able to copy all the Atari game roms from the MC Atari Image, to my RetroPie v4.7.1 image. The Atari game roms run fine on that image for the ones I've tested so far and that image allowed me to install the ADVMAME1-4 emulator.
Atari and MC really need to get their act together if they're going to continue to sell Atari RetroPie systems with Trackballs and Spinners. I've spent almost an entire week troubleshooting this instead of actually playing the games which I purchased this console for. Centipede and Tempest were big popular Arcade games back in their day and the way they were intended to be played was Centipede using a track ball and Tempest with a spinner. It's pretty sad, I need to jump through hoops to get an official Atari system and purchasing official Atari accessories for it to work that way.
-
I got frustrated with this and gave up for a year. As common as having a spinner and trackball on the same cabinet is you would think there would be a straight forward documented way to get it to work. I renewed my searching for information and saw the updates here and gave them a try but no luck.
Here is what I have tried so far. I gave up using a Pi3 and the Atari image. My time spent adding various arcade roms and messing with config files had polluted the install and I decided it was time to start clean. As a random side question is there a way to reset the Atari image to it's original as shipped state?
I started a new install with version 4.8 on a Pi4. I am using the MicroCenter console with trackball and I have installed the Atari spinner. I installed a small collection of arcade roms that use various input devices. I have Centipede, Missile Command, Tempest, 1941, Joust, Robotron, and Tron.
The path @kwil suggested did don't exist. retropie/configs/all/retroarch/config/did not have a mame2003 folder so I created one an tried the config file there
I have basically tried to move the file to various locations and editing the index from 0 to 2 each time and even including "zip" in the filename and not including it. Nothing seems to work.
I don't seem to be able to use the advmame method @Rednroll suggested because it didn't install with base release of version 4.8 for Pi4. I'm not sure if it can be added or not. I guess I need to research that. It seems like having all the mouses work at the same time would be easiest. The joystick works simultaneously with whatever mouse is active so why not another mouse.
I'm back to frustrated again so if anyone has any new advice or other links to go to I'd appreciate it.
-
For the life of me I can't figure out why this doesn't work. I reverted back to a PI3 and reset the Atari MC back to default and started over trying the config file again in different locations, names, and mouse indexes. No luck. I did the same using a 4.8 install on a PI3. No luck.
I than tried the advmame method. It mostly didn't work. Making those changes causes the ROM not to load for missile command and just return back to the menu. If I remove the changes the ROM will load. I played around trying to figure out which line breaks it with not much success. I did get tempest to work if I only configured the dial x for multiple mice but the buttons on the micro center controller are way too screwed up to leave it like that and the remapping didn't make much sense to me.
About the only thing I haven't tried at this point is using 4.7.1 instead of 4.8.
-
Update in the event someone comes to this post looking for help. Through a lot of observation of what files get updated with different changes I finally got this to work. For my particular installation using retro pie 4.8 the folder for MAME 2003 is actually retropie/configs/all/retroarch/config/MAME 2003 (0.78)
The config file is named with the ROM name without .zip and the final thing the I noticed looking at default config files is spaces make a difference. I didn't have a space before and after the "=" like this input_player1_mouse_index="1" changing it to this everything started to work input_player1_mouse_index = "1"
-
I may try to use this so I can use my track ball and eventually, a spinner. I had the SD card that came with this unit, I took it out to back it up, and im doing so, crushed the corner of the card and it no longer works. Any way I can find a copy of that image/card to download?


Categories
- All Categories
- 1 The Blog
- 1 What's Trending
- 8K The Community
- 3.2K General Discussion
- 146 New Members
- 876 Consumer Tech
- 235 Prebuilt PCs and Laptops
- 169 Software
- 33 Audio/Visual
- 54 Networking & Security
- 4 Home Automation
- 5 Digital Photography
- 14 Content Creators
- 30 Hobby Boards & Projects
- 84 3D Printing
- 83 Retro Arcade/Gaming
- 63 All Other Tech
- 460 PowerSpec
- 2.7K Store Information and Policy
- 152 Off Topic
- 64 Community Ideas & Feedback
- 620 Your Completed Builds
- 4K Build-Your-Own PC
- 3K Help Choosing Parts
- 328 Graphics Cards
- 335 CPUs, Memory, and Motherboards
- 146 Cases and Power Supplies
- 54 Air and Liquid Cooling
- 51 Monitors and Displays
- 93 Peripherals
- 70 All Other Parts
- 65 Featured Categories
We love seeing what our customers build
Submit photos and a description of your PC to our build showcase
Submit NowLooking for a little inspiration?
See other custom PC builds and get some ideas for what can be done
View Build ShowcaseSAME DAY CUSTOM BUILD SERVICE
If You Can Dream it, We Can Build it.

Services starting at $149.99