How to Backup and Restore Data Using File History in Windows 10
This discussion has a more recent version.


Windows offers a few different ways to back up your files. The most common choice, especially for those who have an external hard drive, is to use File History. File History is the primary offline data backup tool for Windows 10. It allows you to automatically save data to a drive and restore from it. It has some similarity with the Time Machine feature in Mac computers where you will be able to restore multiple previous versions of a document or file if it has accumulated changes over time. For example, on a Word document you've had several variations of, with File History you could restore to the first save, or even the third or fourth depending on how far back you need to go. Setting it up is easy:
1. Open Settings from your start menu
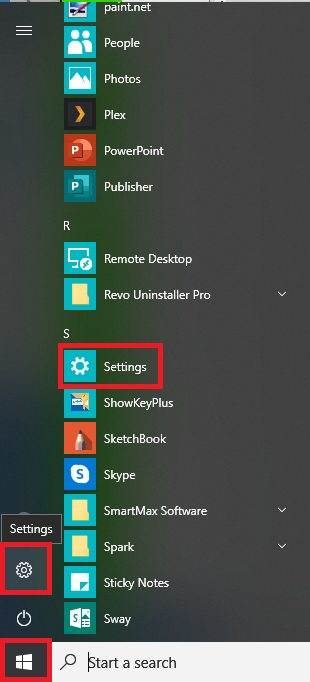
2. Go to Update and Security
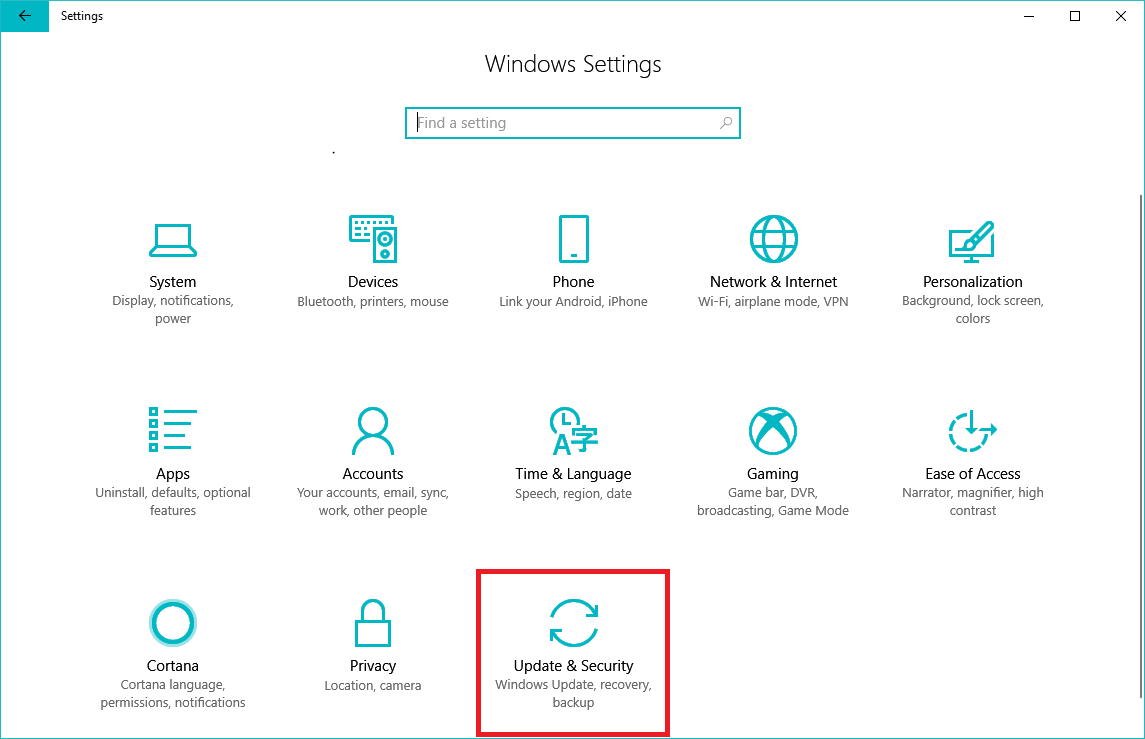
3. Go to Backup on the left, then select Add a Drive under "Back up using File History." Select the drive you want to use for your backup.
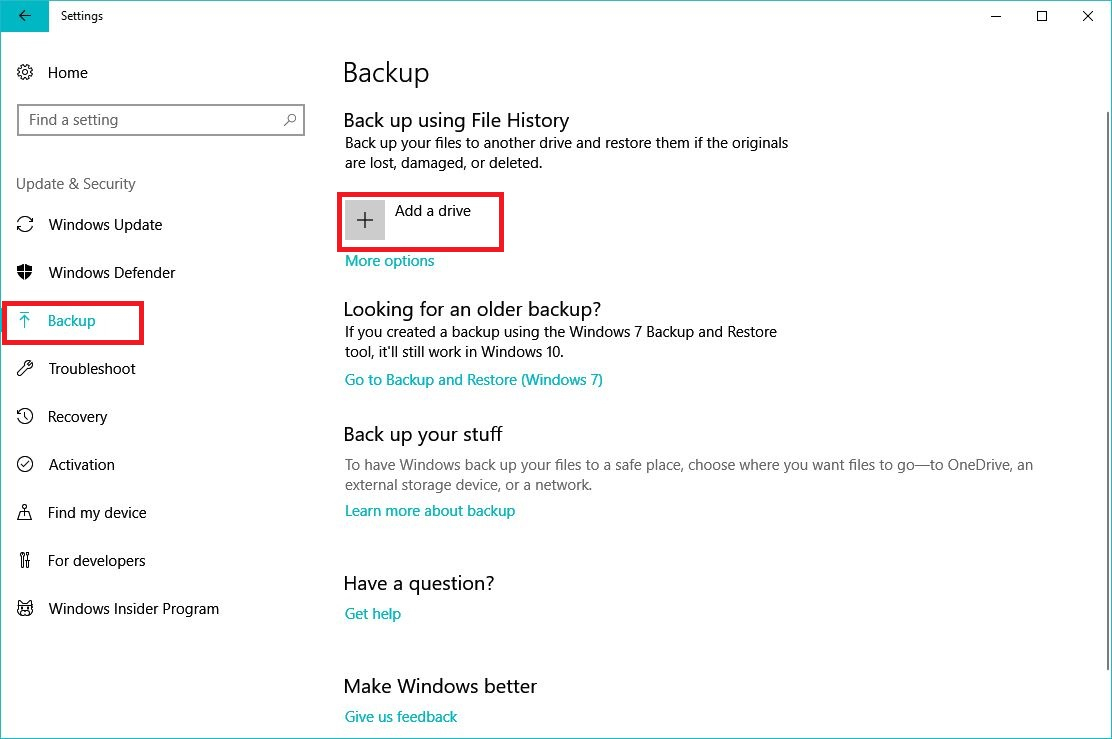
Once you select what drive you want, File History will automatically use it for future backups. "Add a drive" should change to a toggle switch you can use to enable or disable automatic backups. If you want to customize your backup settings, click More options under the switch.
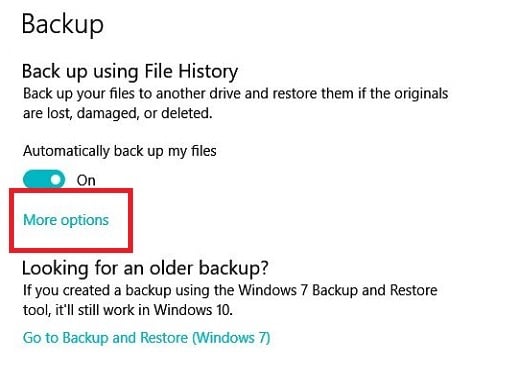
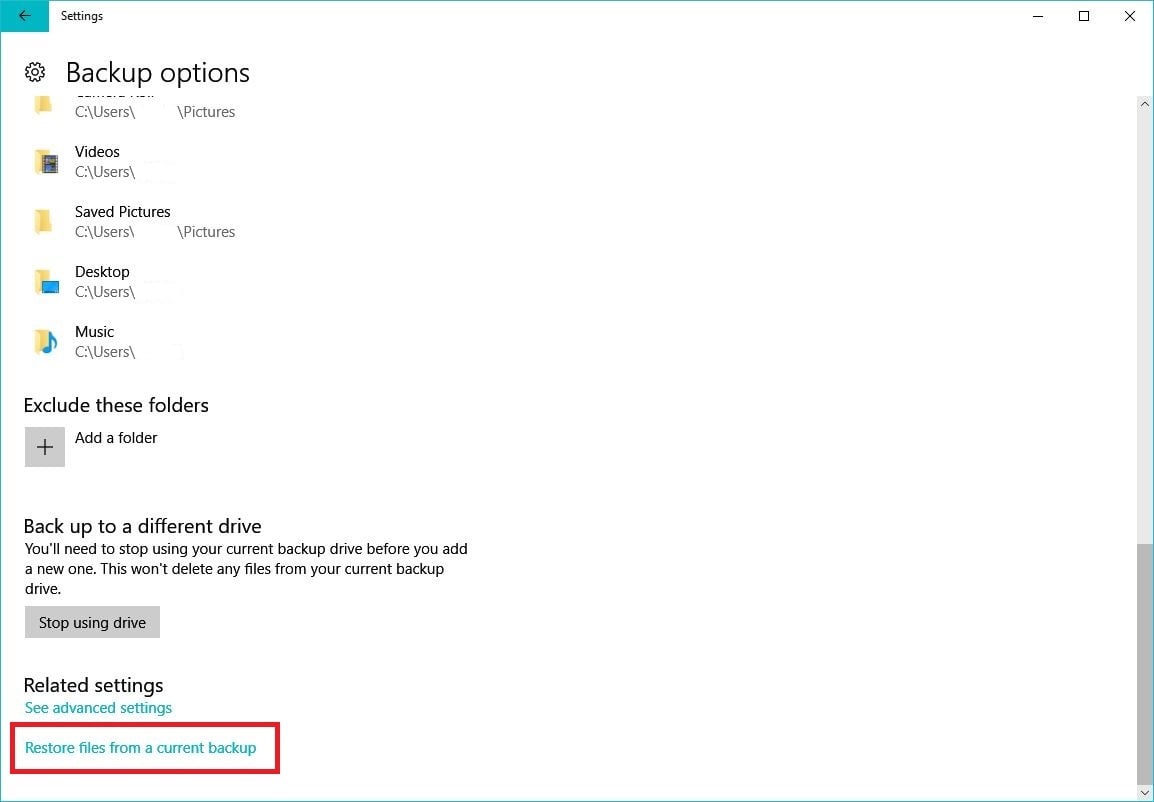
In Backup Options you can run a manual backup, change how often automatic backups occur, and change how long backups are kept. You can also add, remove or exclude folders from automatic backups as you need, all user data folders should be included by default (documents, pictures, music, videos, downloads, etc...)
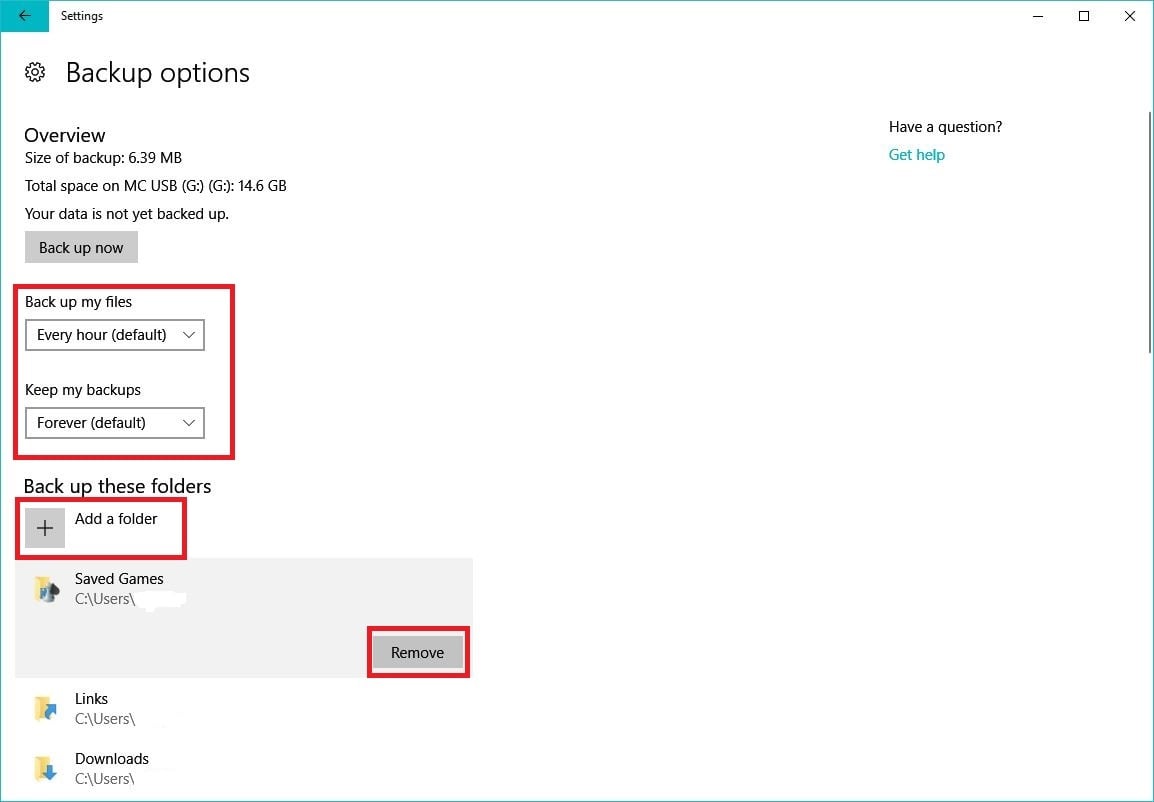
If you scroll down to the bottom of the Backup Options menu, you'll also find Restore files from a current backup. This will allow you to restore lost documents or old versions of documents from your backup drive.
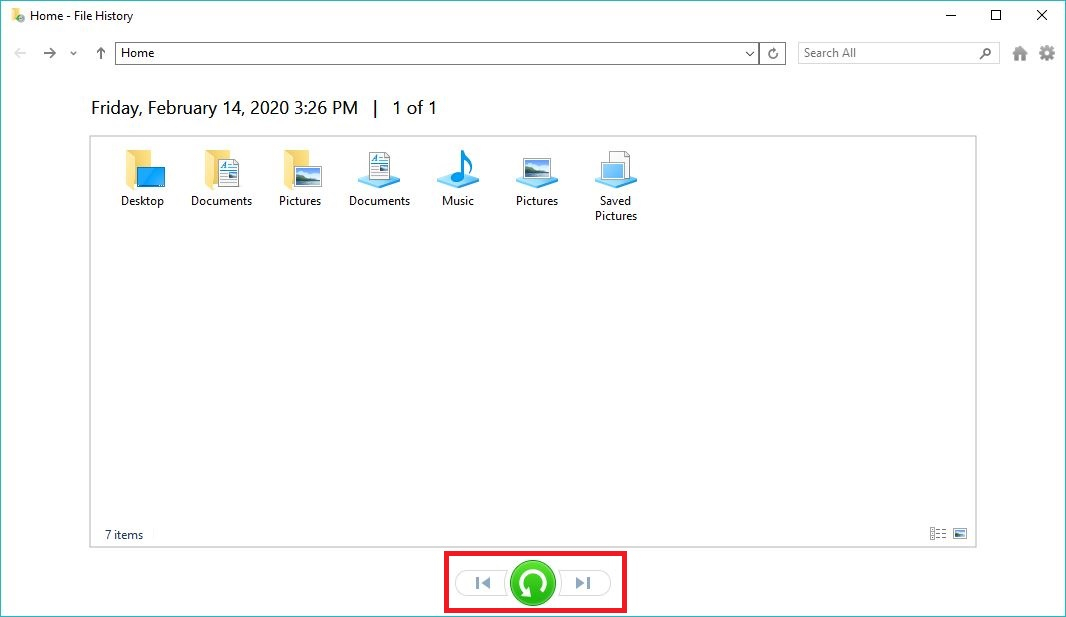
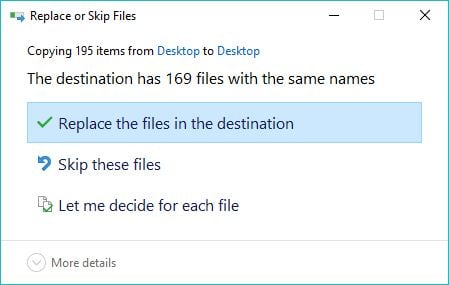
When you click this option you'll be presented with a Control Panel window for File History with a list of the folders that have been backed up. At the bottom of the menu you'll notice the green circular arrow; that is the Restore to original location button. After you've selected whatever you need to restore, you can click that button and it will restore that file/folder back to where it was originally saved on your system. You can also preview individual files and use the left/right arrows to navigate between different saved versions if you're trying to roll back. If you're restoring a folder/file that is still on your computer, it will prompt you to replace the current file or skip over any duplicates.
You can use File History within File Explorer to restore previous versions of files/folders as well. Just navigate the to the file/folder you want to restore, right-click it and then select Restore previous versions

A smaller window will open with a list of any previous versions of the file/folder available and what date they are from.
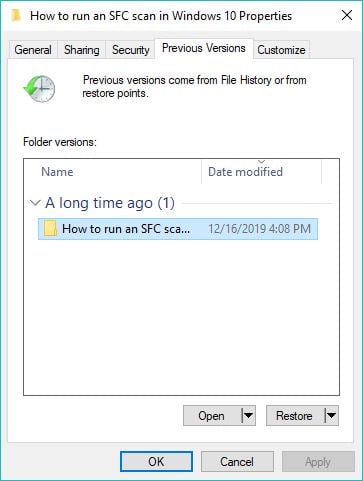
From here you can can click Open if you want to get a preview of the version from that date, and Restore will restore it back to the original save location how it was saved on that date. If anything you're restoring is still currently on your computer, you'll be prompted to replace the current version or skip over any duplicates.
Related Articles:
1. Open Settings from your start menu
2. Go to Update and Security
3. Go to Backup on the left, then select Add a Drive under "Back up using File History." Select the drive you want to use for your backup.
Once you select what drive you want, File History will automatically use it for future backups. "Add a drive" should change to a toggle switch you can use to enable or disable automatic backups. If you want to customize your backup settings, click More options under the switch.
In Backup Options you can run a manual backup, change how often automatic backups occur, and change how long backups are kept. You can also add, remove or exclude folders from automatic backups as you need, all user data folders should be included by default (documents, pictures, music, videos, downloads, etc...)
If you scroll down to the bottom of the Backup Options menu, you'll also find Restore files from a current backup. This will allow you to restore lost documents or old versions of documents from your backup drive.
When you click this option you'll be presented with a Control Panel window for File History with a list of the folders that have been backed up. At the bottom of the menu you'll notice the green circular arrow; that is the Restore to original location button. After you've selected whatever you need to restore, you can click that button and it will restore that file/folder back to where it was originally saved on your system. You can also preview individual files and use the left/right arrows to navigate between different saved versions if you're trying to roll back. If you're restoring a folder/file that is still on your computer, it will prompt you to replace the current file or skip over any duplicates.
You can use File History within File Explorer to restore previous versions of files/folders as well. Just navigate the to the file/folder you want to restore, right-click it and then select Restore previous versions
A smaller window will open with a list of any previous versions of the file/folder available and what date they are from.
From here you can can click Open if you want to get a preview of the version from that date, and Restore will restore it back to the original save location how it was saved on that date. If anything you're restoring is still currently on your computer, you'll be prompted to replace the current version or skip over any duplicates.
Related Articles:
How to create and restore from a system image in Windows 10
How to recover files with the Windows File Recovery Tool
How to recover files with the Windows File Recovery Tool
Categories
- All Categories
- 1 The Blog
- 1 What's Trending
- 8K The Community
- 3.2K General Discussion
- 146 New Members
- 873 Consumer Tech
- 234 Prebuilt PCs and Laptops
- 168 Software
- 33 Audio/Visual
- 54 Networking & Security
- 4 Home Automation
- 5 Digital Photography
- 14 Content Creators
- 30 Hobby Boards & Projects
- 84 3D Printing
- 83 Retro Arcade/Gaming
- 62 All Other Tech
- 449 PowerSpec
- 2.6K Store Information and Policy
- 152 Off Topic
- 63 Community Ideas & Feedback
- 619 Your Completed Builds
- 4K Build-Your-Own PC
- 2.9K Help Choosing Parts
- 328 Graphics Cards
- 335 CPUs, Memory, and Motherboards
- 145 Cases and Power Supplies
- 54 Air and Liquid Cooling
- 51 Monitors and Displays
- 93 Peripherals
- 69 All Other Parts
- 65 Featured Categories
We love seeing what our customers build
Submit photos and a description of your PC to our build showcase
Submit NowLooking for a little inspiration?
See other custom PC builds and get some ideas for what can be done
View Build ShowcaseSAME DAY CUSTOM BUILD SERVICE
If You Can Dream it, We Can Build it.

Services starting at $149.99