The Definitive Micro Computer Buying Guide


Written by Nick Beiderman
Choosing a microcomputer board for a project can be a difficult task. Raspberry Pi alone offers a plethora of boards, each one having unique strengths and weaknesses based upon what you want to do with them. Then you get into Adafruit and Arduino’s microcontrollers and even more questions arise.
But, before you reach choice paralysis, we’ve broken down 7 of the most common Raspberry Pi models (and take a quick detour to discuss Adafruit and Arduino), exploring what projects they excel at and what each board offers.
We'll be taking a look at the

Raspberry Pi 4 Model B
The Raspberry Pi 4 Model B is the current flagship product from Raspberry Pi. This model features two USB 3.0 ports, two USB 2.0 ports, two Micro HDMI outputs, a 3.5mm audio jack, a gigabit Ethernet port, a USB-C port for power, a 40-pin header, and a camera input and display output. On the wireless side, the 4 Model B features WiFi and Bluetooth. The 4 Model B uses a Broadcom BCM2711 quad-core CPU, VideoCore VI GPU, and is available with 1, 2, 4, or 8GB RAM.
For most uses, the 2 or 4GB model is a good balance of cost and performance. I’ve set up several 2 and 4GB models as servers for PLEX, PiHole, file sharing, and gaming. I keep an 8GB around for prototyping new projects. After I finish my prototype, I can check the RAM usage and buy a board that gives me the best performance at the best price.
Raspberry Pi Zero
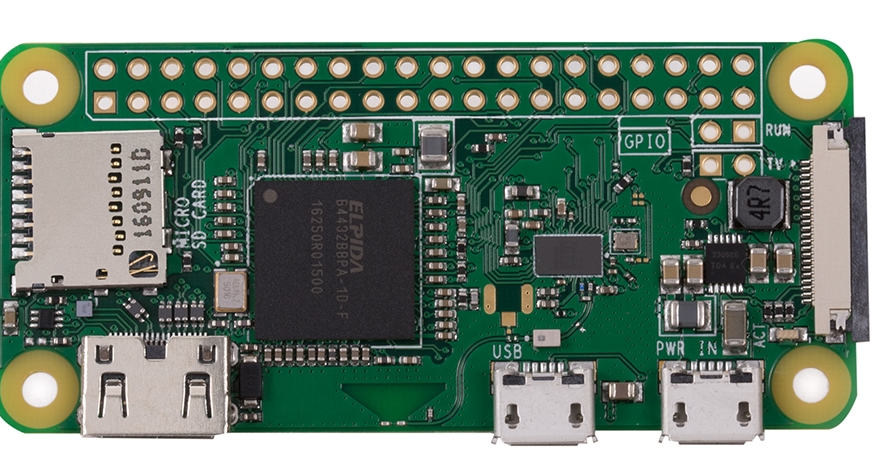
The Raspberry Pi Zero is physically smaller than Raspberry Pi’s other single board computers, consumes less power, and comes in three different styles. While all three have less processing power than standard Pi boards, the base Zero model does not have wireless connections, nor header pins. The Zero W adds Bluetooth and WiFi, and the Zero WH adds wireless connectivity and has pre-soldered headers. All three versions use a Broadcom BCM2835 Microprocessor, have 512 MB RAM, and have two Micro USB ports (one for power, one for connecting devices via USB OTG), a camera connector, a Mini HDMI port, and a 40-pin header.
The Zero is great for low-power projects, like portable displays or remote monitoring. With a bit of web development knowledge, you can create a web interface for your projects. Add in a little ad-hoc networking and you can access your systems wirelessly in areas that don’t have WiFi. The price is low enough I like to use the Zero W for all my projects, though you can save a few dollars by using the non-wireless version. Some of my favorite projects that utilize a Raspberry Pi Zero include a timelapse camera and a PiPod music player.

The PiPod is a small, portable music player based on the Raspberry Pi Zero (image from raspberrypi.org/blog/pipod-pi-zero-music-player)

Raspberry Pi 3 Model B+
The previous flagship model, 3 Model B+, is still widely available. It’s less powerful than the 4 Model B with a Broadcom BCM2837B0 and 1GB RAM. It features four USB 2.0 ports, a full-size HDMI port, a 3.5mm audio jack, gigabit Ethernet, a 40-pin header, WiFi, and Bluetooth. Power is provided via a Micro USB port.
This model is generally a few dollars cheaper than the 4 Model B. The 3 Model B+ can be used for a lot of the same projects as the 4 Model B. While I’ve migrated most of my 3 Model B+ projects to 4 Model Bs, I still control my 3D printer with OctoPi running on a 3 Model B+.

Raspberry Pi 3 Model A+
The 3 Model A+ falls in between the 3 Model B+ and the Zero. It uses the same Broadcom BCM2837BO as the 3 Model B+, but only has 512MB RAM. Connectivity is a bit more limited than other models, with only a single USB 2.0 port. Like the 3 Model B+, it features a full-size HDMI port, Micro USB for power, 3.5mm audio jack, camera, and display connectors, a 40-pin header, WiFi, and Bluetooth. However, it doesn’t have Ethernet networking, which makes it a better choice for some portable projects, like the PiGrrl, that benefit from the smaller size but don’t use much RAM.
All of the models listed above feature a 40-pin header. 40-pin headers can be used to attach Hardware Attached on Top, or HATs, to expand functionality. Some of my favorite HATs include the POE HAT that allows me to power a Raspberry Pi via Ethernet, and Pimoroni’s Inky pHATs that add an eink display to the Pi. These pins can also be used as GPIO pins to control lights or relays, read inputs from buttons, switches, and other actuators, or provide connections via SPI and I2C.

Raspberry Pi 400
The Raspberry Pi 4 Model B is also available in two unique form factors. First is the Pi 400. This all-in-one computer has the same form factor as the official Raspberry Pi keyboard but has a full computer built-in. On the back, there are three USB ports, a USB C port for power, two Micro HDMI ports, a 40-pin header, and gigabit Ethernet. This model is the perfect option for a micro desktop computer replacement, as it combines the computer and keyboard into one unit.
All of the models listed above also feature a Micro SD card slot. The Micro SD card acts as the Raspberry Pi’s hard drive. It stores the operating system and any user files on the computer. Depending on the board, operating system, and system configuration, the Raspberry Pi can support cards up to 2TB. For most projects, I use 32GB cards as they tend to be the best bang for your buck, but I have used cards as big as 512GB for projects like my PiPod and PiGrrl. I frequently use Micro Center’s house brand cards for their excellent price and performance.
The Raspberry Pi 400 is the perfect starting point for a clean, clutter free desk (Image from raspberrypi.org/products/raspberry-pi-400/)

Raspberry Pi Compute Module 4
In addition to the 400, Raspberry Pi offers a compute module based on the 4 Model B. This version is sometimes referred to as the CM4 and is designed for use in embedded systems. The only connectivity is two high-density connectors on the bottom of the board. These connectors allow the CM4 to be connected to carrier boards to expand its functionality. The CM4 is great for projects that need specialized hardware controlled by a Raspberry Pi, such as the Gumstix flight controller for multirotor drones.
Raspberry Pi offers an IO board for the CM4, which is necessary for flashing the operating system to the internal memory. There are a total of 32 variations available, with a range of RAM and internal storage options, and with or without wireless connectivity.
All of the models listed above are fully-fledged single board computers. They run a Linux-based operating system and are great replacements for low-power computers. They can be used for servers, desktops, and complex control systems. They’re able to run multiple programs concurrently, and can easily be connected to monitors, keyboards, or mice.
But now we’re going to shift into microcontrollers. Microcontrollers run a single program that starts when they are powered on and stops when they are powered off. Microcontrollers don’t have an operating system and are great for simple control systems, like automated light control, watering plants, or logging environmental conditions. While microcontrollers often feature SPI, I2C, and other communication methods to connect peripheral hardware, GPOI pins are the bread and butter of microcontrollers. These pins can serve as outputs, providing a voltage (usually 3.3v or 5v), or inputs, detecting whether or not a voltage is present.
Raspberry Pi Pico
The Raspberry Pi Pico is Raspberry Pi’s first microcontroller. It features 26 GPIO pins (of which three may be used as analog inputs), 2xSPI, 2xI3C, 2xUART, a serial debug port, and 16 PWM channels. There’re 20 header pins on each side, for a total of 40 pins. The spacing of these pins allows the Pico to be mounted to a breadboard for rapid prototyping or soldered to perf board or strip board for more permanent projects. The pin holes are castellated, meaning they can be soldered directly to a PCB. This makes the Pico a great option for small scale production products. The Pico can run code written in MicroPython or C++, and can include low-level assembly code. This flexibility makes it great for everything from quick projects in Python to high-performance projects written with C++ and assembly.

The Pico offers an excellent variety of inputs and outputs in a small package
While Raspberry Pi is one of the best-known names in the hobby board market, other companies like Arduino and Adafruit also produce well-known microcontrollers. Like the Raspberry Pi Pico, they run a single piece of code in a loop until they are powered off. This makes them great for simple projects like control or monitoring systems. They’re not well suited for servers, desktops, or other roles that require a more traditional computer with an operating system.
While the Pico can generally be used in the same applications as boards from Adafruit and others, it’s not always the best choice. Depending on the project, you may need a board with more input and output pins. For very small or low-power projects, a smaller board might be a better fit. Since the Pico is fairly new, some ecosystems like Adafruit’s Feather line have a larger variety of peripheral accessories available than the Pico.
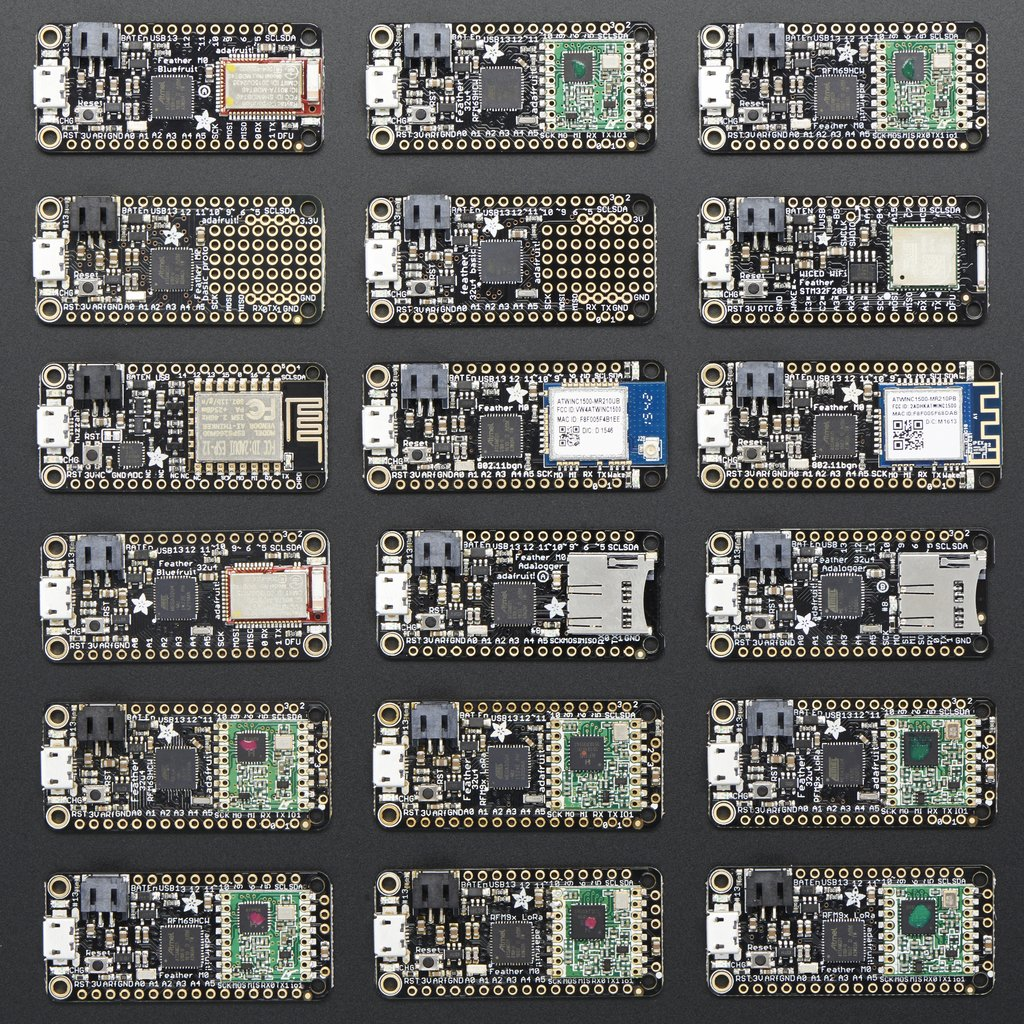
Adafruit’s Feather ecosystem offers numerous mainboards and expansion “wings” (image from learn.adafruit.com/adafruit-feather)
Now that you’ve got a handle on what each board is and what it does, you’re ready to start digging into the world of Pi! If you’re still not sure what board is right for you, start by asking yourself if a microcomputer or a microcontroller is right for your project. Single-board computers are larger and generally have higher power consumption, processing power, and cost. If you choose a microcontroller you’ll also want to consider the language you’ll be programming in, the number of pins, and available peripheral accessories. There’s no “one size fits all” board, but now you should be able to go out and choose the board that’s right for you.
More from the Micro Center Community:
Looking for more information about Raspberry Pi? We’ve got a Hobby Board section of the community, as well as Hobby Board guides like How to use a Wyze Cam V2 as a Webcam, Raspberry Pi Basics, and Using the Raspberry Pi Pico. And if you can’t find what you’re looking for, don’t hesitate to post a new discussion and the Community will be happy to help!
Leave a Comment
Categories
- All Categories
- 1 The Blog
- 1 What's Trending
- 8K The Community
- 3.2K General Discussion
- 146 New Members
- 875 Consumer Tech
- 234 Prebuilt PCs and Laptops
- 169 Software
- 33 Audio/Visual
- 54 Networking & Security
- 4 Home Automation
- 5 Digital Photography
- 14 Content Creators
- 30 Hobby Boards & Projects
- 84 3D Printing
- 83 Retro Arcade/Gaming
- 63 All Other Tech
- 458 PowerSpec
- 2.7K Store Information and Policy
- 152 Off Topic
- 63 Community Ideas & Feedback
- 619 Your Completed Builds
- 4K Build-Your-Own PC
- 2.9K Help Choosing Parts
- 328 Graphics Cards
- 335 CPUs, Memory, and Motherboards
- 145 Cases and Power Supplies
- 54 Air and Liquid Cooling
- 51 Monitors and Displays
- 93 Peripherals
- 70 All Other Parts
- 65 Featured Categories
We love seeing what our customers build
Submit photos and a description of your PC to our build showcase
Submit NowLooking for a little inspiration?
See other custom PC builds and get some ideas for what can be done
View Build ShowcaseSAME DAY CUSTOM BUILD SERVICE
If You Can Dream it, We Can Build it.

Services starting at $149.99