Creating Windows 10 Installation Media on OSX


This is a guide on various methods of creating installation media on OSX. The methods vary based on a couple of factors. Mainly the age of the system, and whether the motherboard can boot to certain file systems. Mainly ExFAT. FAT32 will work, but it’s limited to a maximum file size of 4GB, and at this point the install.wim file on the current version of Windows 10 is too large for this file system and this is the main hurdle.
Microsoft has tools to work around this. Their media creation tool will format your flash drive FAT32 and split the wim file for you. DISM.exe also has ability to split and combine wim files. Unfortunately, neither of these tools are available to us on OSX without setting up a virtual machine.
You can download the latest version of Windows 10 here: https://www.microsoft.com/en-us/software-download/windows10
Option 1:
If you’ve got a new ASUS board with an Intel chipset, you’re more than likely not going to have a problem with exFAT. I’ve also tested some Asrock boards with Intel chipsets that worked just fine as well. This makes the process quick and easy. You’ll need to format your flash drive as exFAT. You can do this in Disk Utility or via Terminal. I will detail the command via terminal below. You can open Terminal from the Utilities.
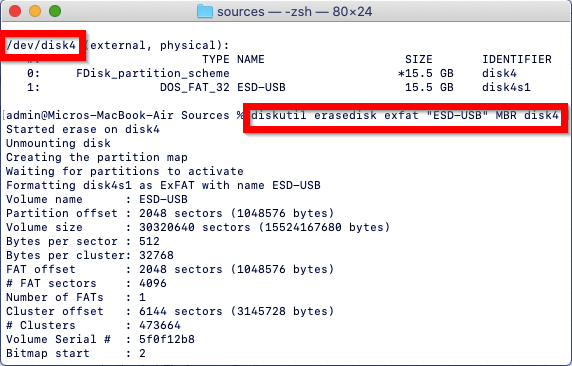
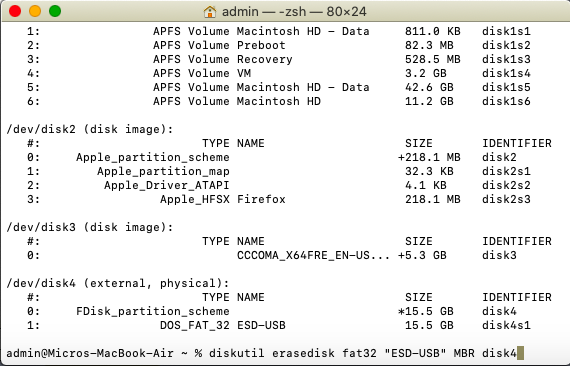
Type “diskutil list” to list your drives. In the image below we see our drive is disk2. Verify this by the volume name and capacity. Be careful, you do not want to wipe the wrong drive. Once you’re sure, type “diskutil erasedisk exfat “ESD-USB” MBR disk4” with disk4 being your flash drive. If this is not the case, correct the number on the end.
Now we need to copy our installation files. Double click the ISO we downloaded earlier to mount it. It will mount as CCCOMA_X64FRE_EN-US_DV9. Our flash drive is labeled ESD-USB. Type “cp -rp /Volumes/CCCOMA_X64FRE_EN-US_DV9/* /Volumes/ESD-USB/”. We’re using the copy command (cp) with the switches recursive (to copy all sub directory files) and p (Preserves file attributes). Let the files copy, this will take up to 20 minutes.
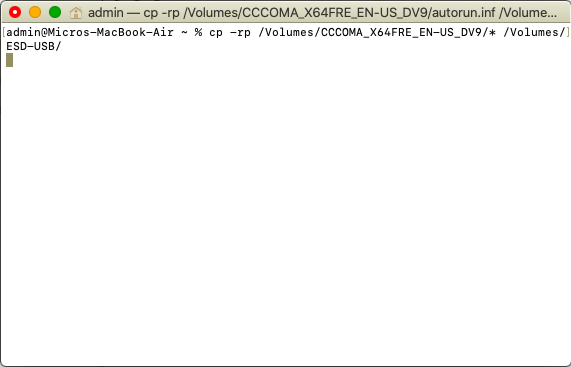
It’s important to note there is not status indicator here, you’ll get a flashing cursor. At this point, wait until it finishes. Your prompt will return once it does. Finally eject the flash drive, connect it to your computer and power it on. If this is a new build with an empty drive, it should boot automatically. From here, you’re just doing a normal clean install of Windows 10. If not, you’ll need to use the boot menu key and select the flash drive from there. We’re booting UEFI in this guide.
From here, you’re just doing a normal clean install of Windows 10. Please see our guide on this:
Option 2:
Part 1: OSX
If you followed the guide above and your flash drive wasn’t detected, apparently your motherboard cannot boot from an ExFAT partition. We’ll need to use FAT32. In this guide we’re going to focus on doing this in a way that does not use third party tools to split the wim file.
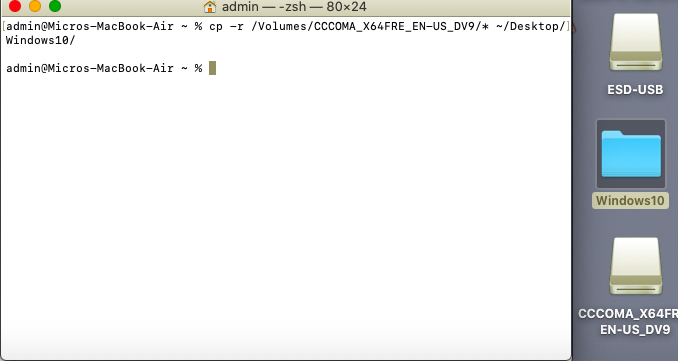
First we’ll need to create a folder to store our installation files. I created a folder on the desktop called “Windows10”. From here, we’ll copy the files from the mounted ISO file. You can do this in finder, or via terminal. Type: “cp -r /Volumes/CCOMA_X64FRE_EN-US_DV9/* ~/Desktop/Windows10/”.
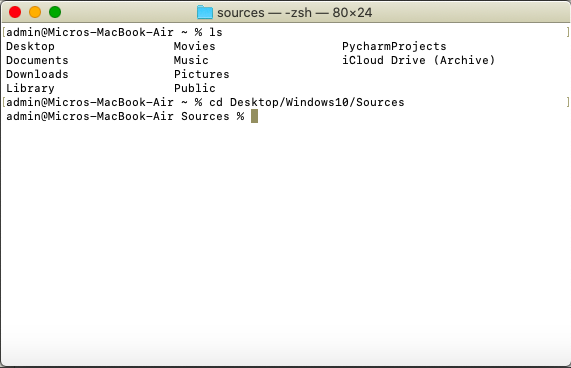
Now, we need to navigate to this new folder where the files were copied via terminal. Open terminal and type: “cd Desktop\Windows10\Sources”. The prompt should confirm you’re in the sources folder.
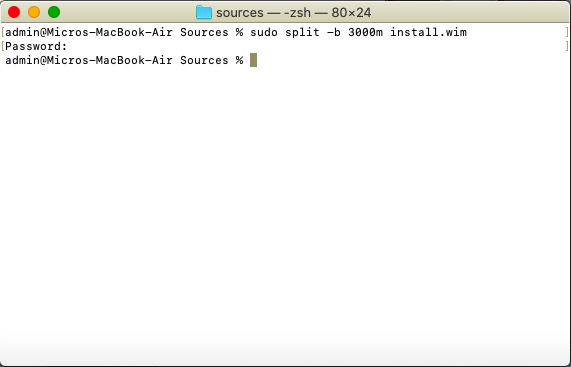
Next we’ll need to split the wim file. Remember, we need to get the file size under 4GB for FAT32. We’ll type, “sudo split -b 3000m install.wim”. It’s important to follow the syntax exactly, the m for “Megabyte” must be lower case. This will split our wim file into two files labeled “xaa” and “xab”. This is much like copying files, it will take some time to process. Wait for the prompt to return. Then delete install.wim from the Windows10\Sources folder.
Now we need to format our flash drive to FAT32. You can do this from Disk Utility or via Terminal by typing ”diskutil erasedisk fat32 “ESD-USB” MBR disk4”.
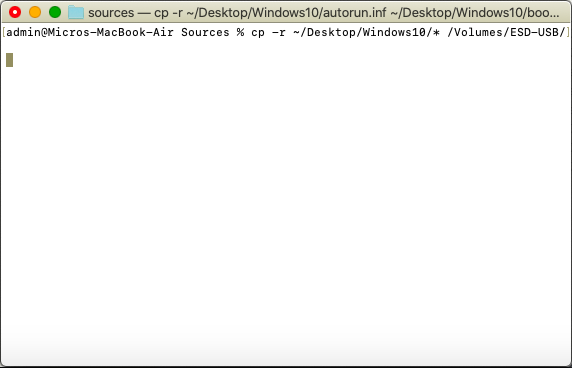
Next, we’ll copy our files to our newly formatted flash drive. We’ll type “cp -r ~/Desktop/Windows10/* /Volumes/ESD-USB/”. We’ll wait for it to copy, this will take some time. Once done, we’re finished with the OSX side. Eject the flash drive and connect it to your PC.
Part 2: WinPE
We’ll boot to the flash drive, either through our boot menu, or automatically if there are no other devices to boot to. Now we need to format our internal hard drive to be imaged from this media, before we copy over the files and image it. Make sure your data is backed up and any drives with important data are disconnected. We will need to wipe your main hard drive that you’ll be installing Windows to in advance. To open command prompt press”Shift + F10” from the “Install Now” page.
Well type the following commands:
list disk (find your hard drive, it should be obvious by the capacity)
select disk # (# being the number of the drive, most likely 0)
convert GPT
create partition efi size=100
format quick fs=fat32 label="System"
assign letter="S"
create partition msr size=16
create partition primary
shrink minimum=450
format quick fs=ntfs label="Windows 10"
assign letter="W"
create partition primary
format quick fs=ntfs label="WinRE"
set id="de94bba4-06d1-4d40-a16a-bfd50179d6ac"
gpt attributes=0x8000000000000001
Once you’re done. Type: “list part” and verify the partition scheme matches the image below. Also type “list vol” so we can verify our assigned drive letters. Once confirmed, type "exit" to exit diskpart.

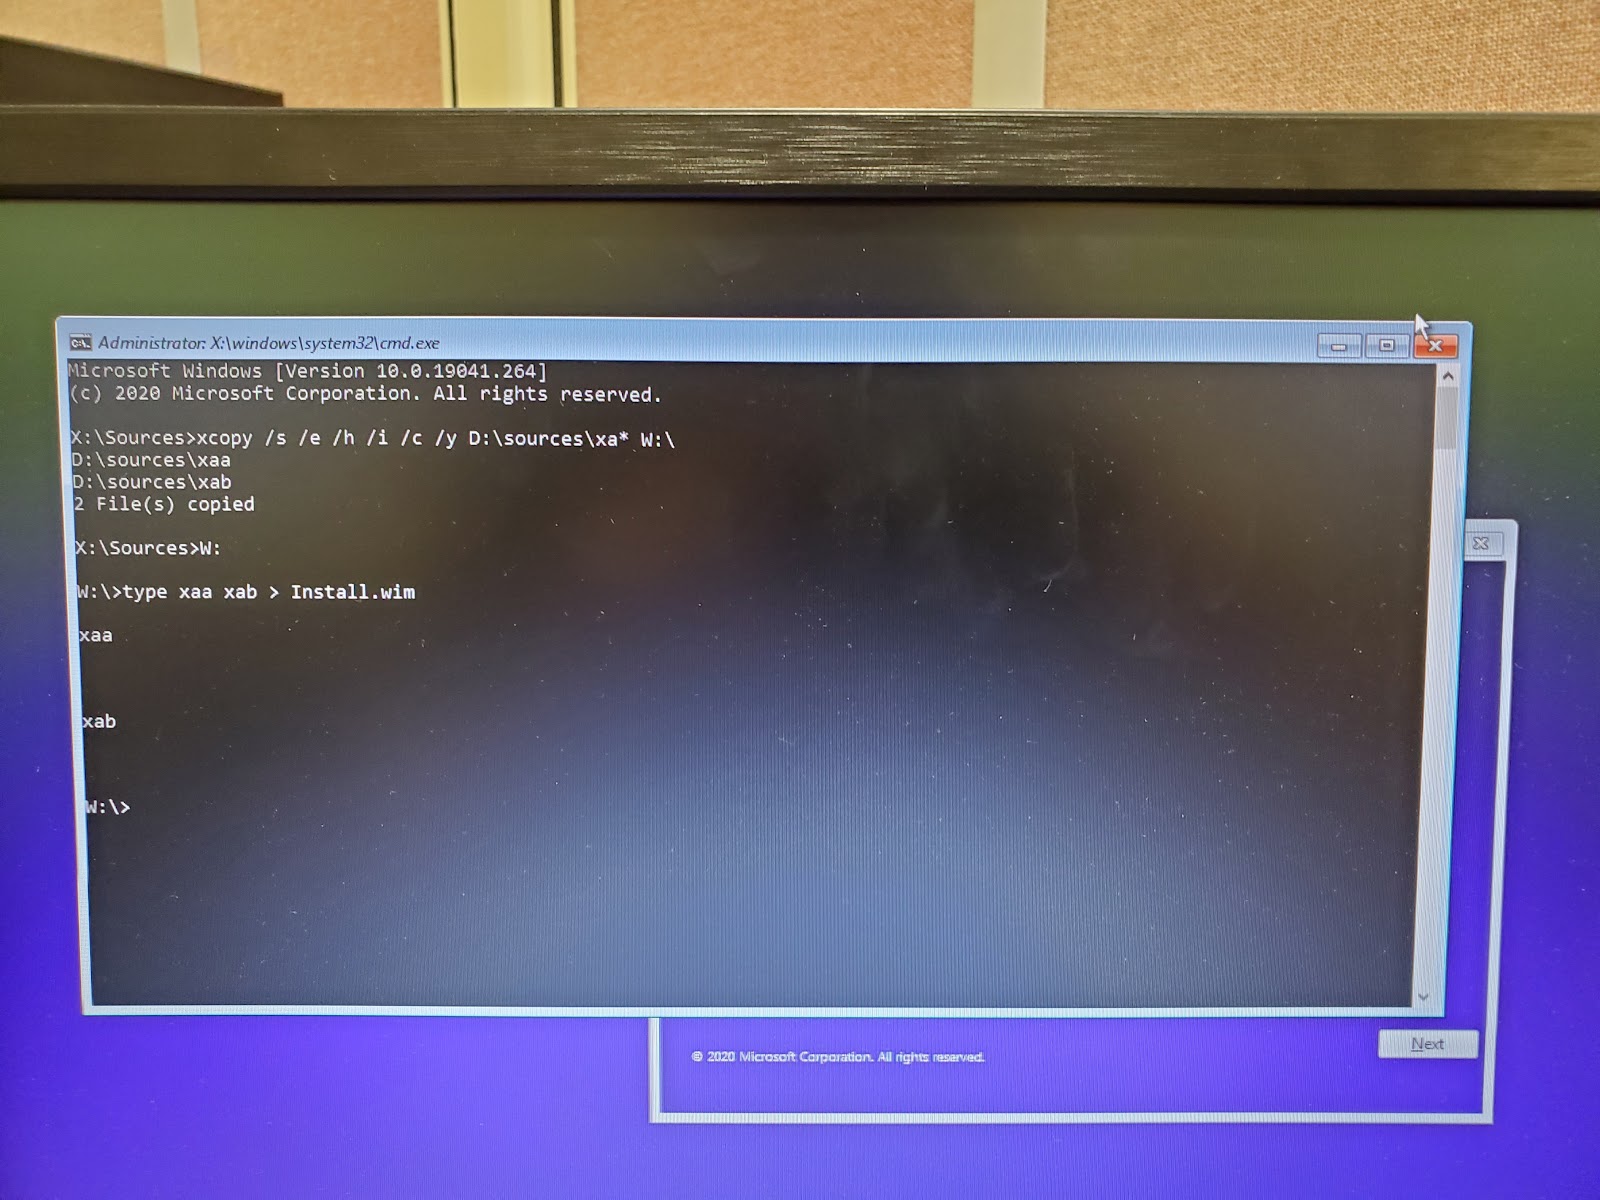
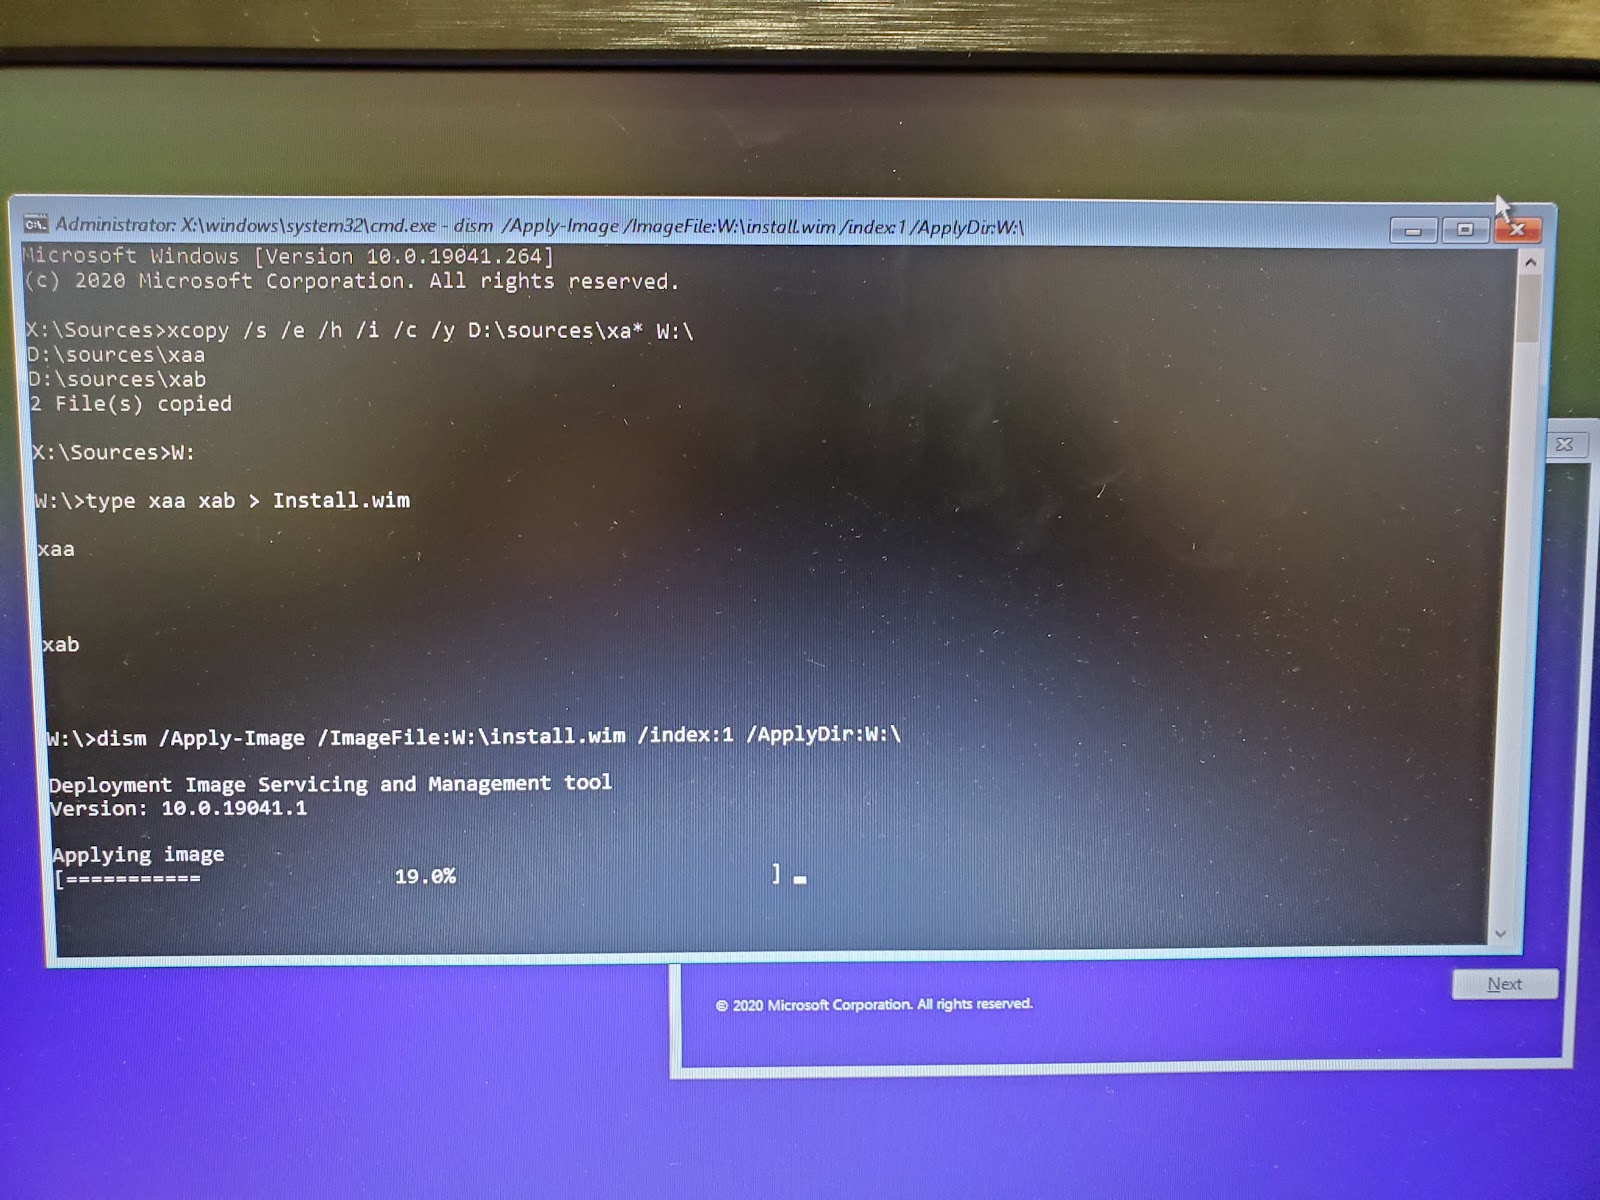
Next we’re going to copy out files on to our newly formatted and labeled W volume. We’ll type “xcopy /h /c /y C:\Sources\xa* W:\”. In this case our flash drive was labeled as C. This will be corrected automatically when we reboot. Your main drive will be C as normal, not W. This command will copy both the xaa and xab files we created when we split the install.wim file. Asterisk is a wildcard, that searches for and copies any file in the directory that starts with xa. Once again, wait a few minutes for the files to copy.
Now we’re going to merge the two halves of the wim file we split earlier. We’ll need to navigate to the W root folder. Type “W:”, verify the prompt indicates your in this directory.
Now type “type xaa xab > Install.wim”. Wait a few moments while the two large files halves are merged together.
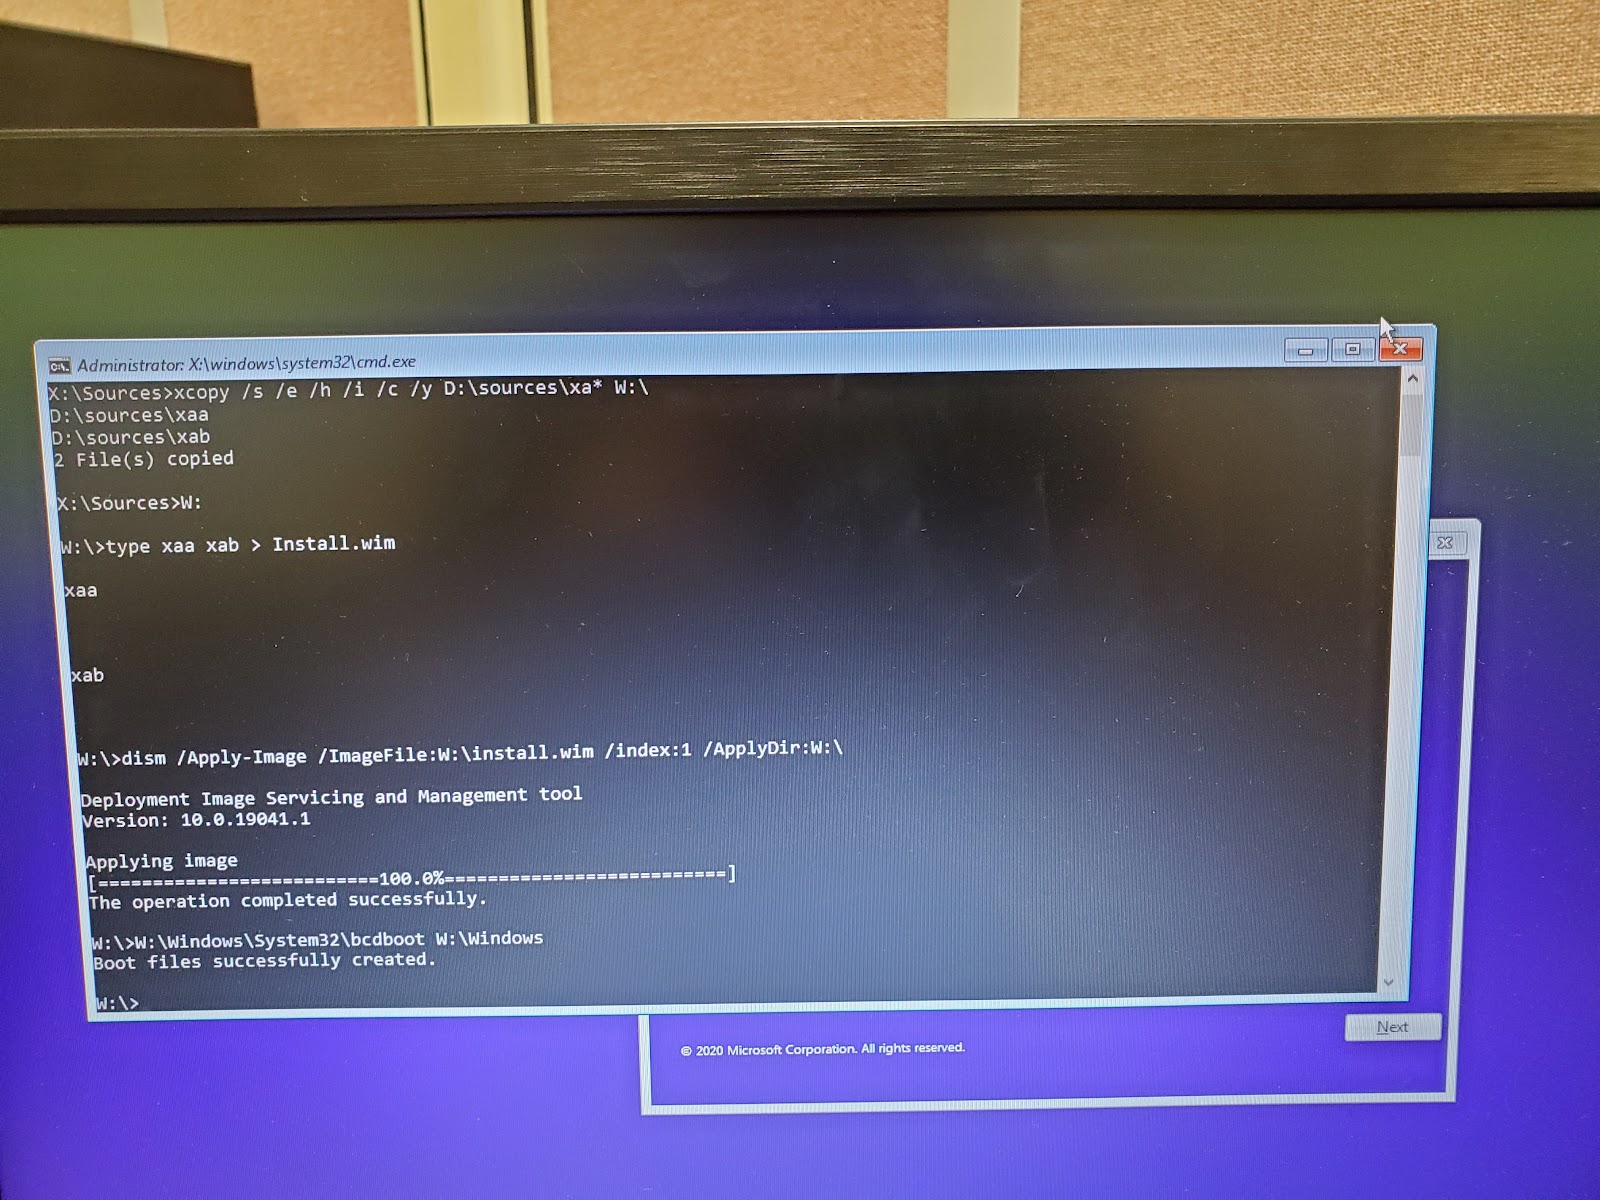
Now we’ll need to image our drive from the wim file. Type”dism /Apply-Image /ImageFile:W:\install.wim /index:1 /ApplyDir:W:\”. This will take a few moments to complete.
Last step is to make our new windows installation bootable. We used a GPT partition and we’re booting via UEFI so we’ll type “W:\Windows\System32\bcdboot W:\Windows”.
Finally, remove the flash drive and reboot. If you want to do this via command prompt type “W:\Windows\System32\shutdown -r -t 0”, or just restart the system with the power button. Once it reboots, it should load of windows and right into the out of box experience for you to create your user account.
FAQ
Is there an easier way to create the partition scheme, rather than typing in all those commands?You can run it via a script. Copy the following and safe it as a .txt file to your installation flash drive:
convert GPT
create partition efi size=100
format quick fs=fat32 label="System"
assign letter="S"
create partition msr size=16
create partition primary
shrink minimum=450
format quick fs=ntfs label="Windows 10"
assign letter="W"
create partition primary
format quick fs=ntfs label="WinRE"
set id="de94bba4-06d1-4d40-a16a-bfd50179d6ac"
gpt attributes=0x8000000000000001
From there you'll execute it by typing "diskpart /s <path to file>". Make sure to verify the number of your drive with "list disk" and modify it accordingly. So if we called the file formatdisk.txt and we established our flash drive was labeled as D, we would type:
diskpart /s D:\formatdisk.txtI'm not sure if a file transferred or copy. How can I can check from command line or terminal?
For command line the command is "dir". For terminal the command is "ls". You'll need to navigate to the folder you want to view. The command is the same on both, "cd <folder>" for change directory.
After typing "W:\Windows\System32\bcdboot W:\Windows" I receive the error "Failure when initializing library system volume".
It's not able to locate your system volume. We'll need to mount it and specify the path. In my example my system volume was 3. Check 'list vol' and correct as necessary. Type the following:
select disk 0
select vol 3
assign letter=S
exit
W:\Windows\System32\bcdboot W:\Windows /s S: /f ALL
Related Articles:
Keywords: usb stick, bootable usb drive, diskutil erasedisk ms dos, boot camp assistance, create bootable usb, install disk, windows 10 iso file, downloads folder, windows 10 bootable usb
Comments
-
So i finished everything on the terminal on my mac like you said in part one, but when i went to boot up the windows install on my pc it gave me an error saying "Windows could not collect information for [OSImage] since the specific image file [install.wim] does not exist. What would i nee to do now?
-
Greetings @TanNguyen93
Doesn't sound like you copied and merged the two halves of the wim file. Refer to the portion referring to "xcopy /h /c /y C:\Sources\xa* W:\" and the "type xaa xab > Install.wim". This copies the two halves the wim file to the W: drive, where because it's NTFS, we can exceed the four gigabyte file size, and merge it back into the install.wim, we need to use to deploy our OS. -
This post was very helpful! I was having trouble with all of the wimlib-xsplit methods I found posts about elsewhere on the internet, but the split method you gave in this post worked perfectly! Thanks!
-
Excellent! Glad to hear it helped!


Categories
- All Categories
- 1 The Blog
- 1 What's Trending
- 8K The Community
- 3.2K General Discussion
- 146 New Members
- 873 Consumer Tech
- 234 Prebuilt PCs and Laptops
- 168 Software
- 33 Audio/Visual
- 54 Networking & Security
- 4 Home Automation
- 5 Digital Photography
- 14 Content Creators
- 30 Hobby Boards & Projects
- 84 3D Printing
- 83 Retro Arcade/Gaming
- 62 All Other Tech
- 452 PowerSpec
- 2.6K Store Information and Policy
- 152 Off Topic
- 63 Community Ideas & Feedback
- 619 Your Completed Builds
- 4K Build-Your-Own PC
- 2.9K Help Choosing Parts
- 328 Graphics Cards
- 335 CPUs, Memory, and Motherboards
- 145 Cases and Power Supplies
- 54 Air and Liquid Cooling
- 51 Monitors and Displays
- 93 Peripherals
- 69 All Other Parts
- 65 Featured Categories
We love seeing what our customers build
Submit photos and a description of your PC to our build showcase
Submit NowLooking for a little inspiration?
See other custom PC builds and get some ideas for what can be done
View Build ShowcaseSAME DAY CUSTOM BUILD SERVICE
If You Can Dream it, We Can Build it.

Services starting at $149.99