How to remove a Printer from Windows 10
This discussion has a more recent version.


If you have gotten a new printer for your PC, and still see the option for your old, unused printer, this process explains how to remove a printer in windows 10, which will remove the option of it being available to print to. This process can also be done to assist with the reinstall of a printer driver as well.
Here is how to do this:
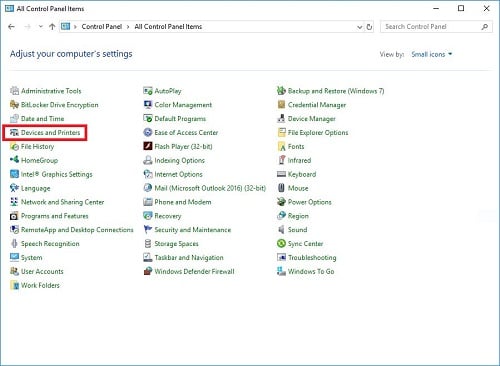
- Type Control Panel in the search box, then click it.

2. Click Devices and Printers.
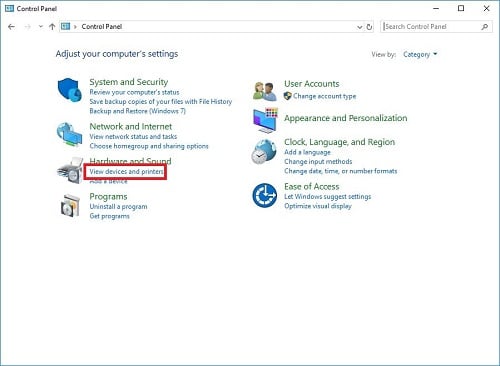
This may show categories, in that case click View devices and printers
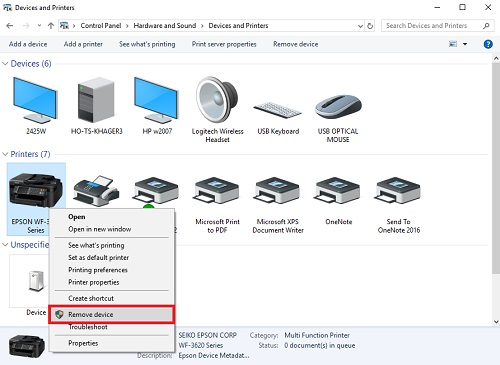
3. Right Click the printer to be removed, then click Remove device
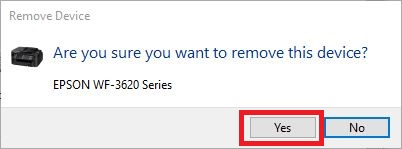
4. A confirmation window will appear. Make sure this is the correct printer to remove, then click on Yes to remove it.
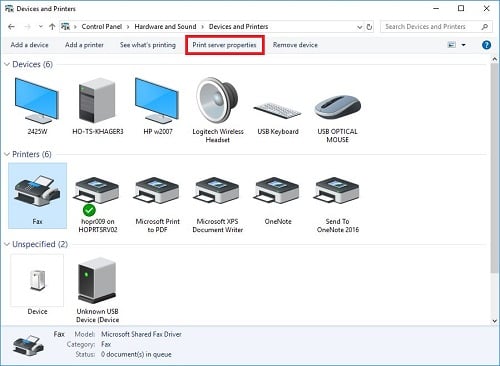
5. Click Print server properties at the top of the Devices and Printers window.
6. Click Drivers at the top of the pop-up window, then click on Change Driver Settings.

7. Select the driver of the printer to remove, then Click Remove

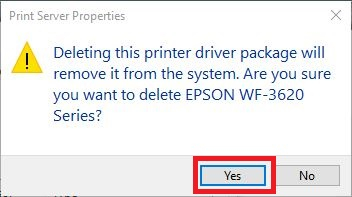
9. Another confirmation window will appear, click Yes to confirm removal.
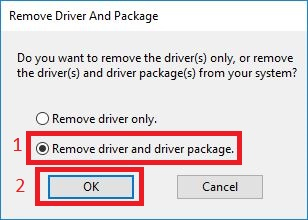
10. Another pop-up will appear for remove driver package, once it loads up the information, click Delete.

11. Click OK once removal is successful, and then it is completely removed from the PC. If prompted, restart your PC to complete.

Related Articles:
Categories
- All Categories
- 1 The Blog
- 1 What's Trending
- 8K The Community
- 3.2K General Discussion
- 146 New Members
- 873 Consumer Tech
- 234 Prebuilt PCs and Laptops
- 168 Software
- 33 Audio/Visual
- 54 Networking & Security
- 4 Home Automation
- 5 Digital Photography
- 14 Content Creators
- 30 Hobby Boards & Projects
- 84 3D Printing
- 83 Retro Arcade/Gaming
- 62 All Other Tech
- 444 PowerSpec
- 2.6K Store Information and Policy
- 150 Off Topic
- 62 Community Ideas & Feedback
- 619 Your Completed Builds
- 4K Build-Your-Own PC
- 2.9K Help Choosing Parts
- 328 Graphics Cards
- 335 CPUs, Memory, and Motherboards
- 145 Cases and Power Supplies
- 54 Air and Liquid Cooling
- 50 Monitors and Displays
- 93 Peripherals
- 69 All Other Parts
- 65 Featured Categories
We love seeing what our customers build
Submit photos and a description of your PC to our build showcase
Submit NowLooking for a little inspiration?
See other custom PC builds and get some ideas for what can be done
View Build ShowcaseSAME DAY CUSTOM BUILD SERVICE
If You Can Dream it, We Can Build it.

Services starting at $149.99